
Project Curb Appeal
Gretchen Rose
Let’s talk about Curb Appeal. What does it mean to you? Does your home have it? Is it “almost there” but missing a little something? To me, curb appeal simply means that the home catches your eye when you walk/drive by, standing out from the others around it (in a good way). The exterior of your home is the first thing your guests see, therefore it should reflect the personal style of your interior too. There are many ways you can enhance your home’s curb appeal and show your own personality!
Quick Ways to Increase Curb Appeal:
Landscaping
Front door (new door altogether or just fresh paint)
New front porch lighting
Exterior paint
Shutters
We recently moved (in case you missed it) from a small, 1950s charming cape cod to a newer, larger brick traditional home (late 1980’s build with a little less of that old world charm). I fell in love with the bay windows, the 2 story brick exterior, the larger lot and the serious potential this home has to be a wonderful family home.
But.
It was missing something!
Here is a before photo:

As you can see, it is a classic brick 2 story. That said, it was a lot of brown. Brown brick. Brown roof. The lanterns were brown. Even the trim work was a shade of cream (brown). I love a tone-on-tone look, but I wanted a little more contrast to give our new home a bit of personality!
We started with a new storm door because I love and need natural light. We also swapped out the front porch lanterns from 1989 dingy brown to more updated, yet still traditional, black lanterns (blog post about them linked here). Then I got a new doormat and larger/taller black urns and a few new porch plants! Landscaping is on our list for the spring, but at 9 months pregnant it just isn’t happening right now.
Although the new lighting, storm door, and doormat definitely updated the front porch, the house was still missing something. Fast forward a couple of weeks after move-in and I FINALLY realized what was missing… SHUTTERS! It really didn’t take too long to convince Jordan of this either. I did a “mock up” of sorts to show him and he quickly agreed that adding shutters would improve the look of the exterior.
Here’s the mock up I showed him:

We plan to work on the landscaping in the spring :)
All About the Shutters:
Shutters, to me, are like jewelry for your house. They add personality (and curb appeal). Let’s talk about the process!
Step One: Shutter Shopping
This part didn’t take long. Here are some things to consider when shopping for shutters:
Shutter style
Shutter color
Shutter material
Shutter size

Lincoln makes for a good desk!
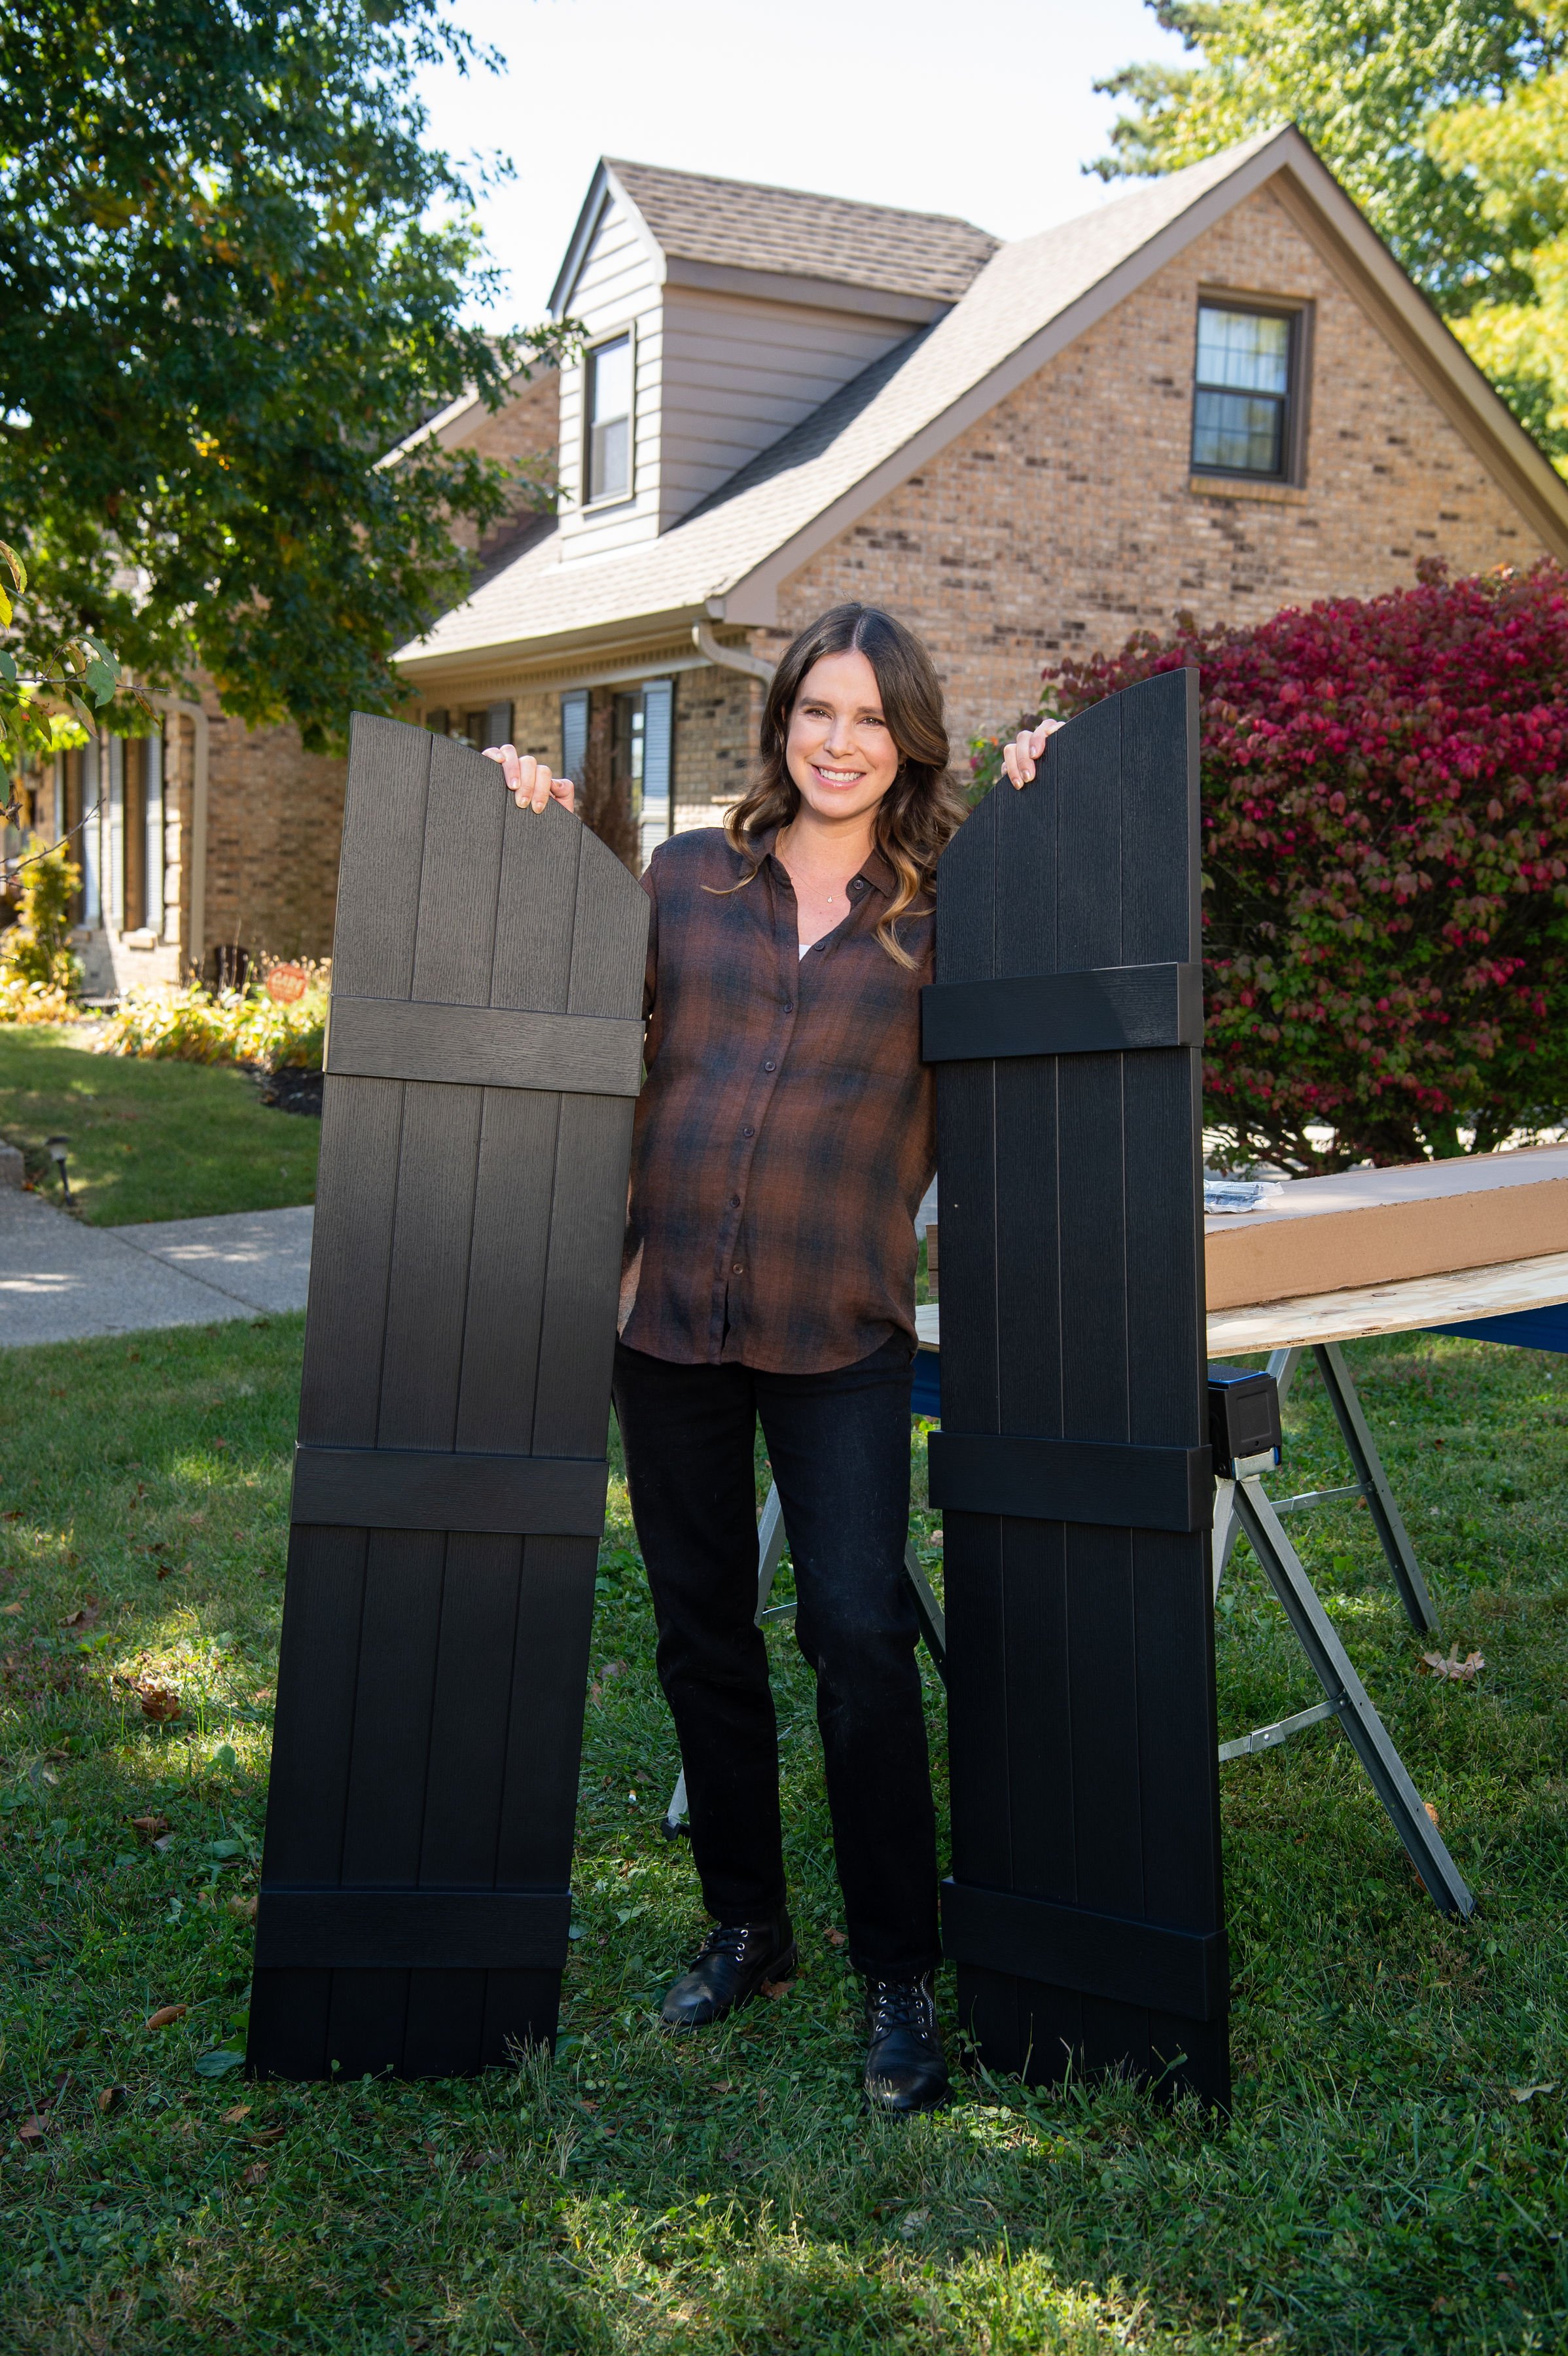
I knew I wanted black vinyl shutters (less maintenance for vinyl, and black to tie into the black front door & lanterns). Additionally, I wanted an arch top style shutter to compliment the brick arches over the windows. I love Board and Batten shutters because they remind me of the English countryside- and if we ever lime wash the exterior, this style will look equally beautiful with that too!
I went straight to lowes.com website and started my search. You can quickly filter shutters by color, style, and material, so it didn’t take long to find the Vantage Shutters Black Board and Batten Vinyl (with Arch Top) shutters (linked here). The best part was how affordable they were- some styles were well under $100 per pair! They came in SO MANY sizes too- our windows are relatively tall so I was a little worried it would cause an issue with finding shutters but it worked out perfectly (they do offer custom sizes if you need that service). Lincoln even helped me shop!

Okay, so you found the shutters you want. What’s the next step? Measuring!
Step Two: Measuring
I didn’t really know where to start for this step. I am a classic “over thinker” - while I knew approximately how I wanted the shutters to look on the house, I didn’t want to order them in the wrong size! Thankfully, Vantage offers a guide for this exact reason. This is the guide that I used:


Since I opted for the arch top style shutter, I needed to measure all the way to the top of the arch.

Don’t forget to measure width too!
Step Three: Ordering
Once you have your shutter style chosen, and your measurements, it’s as easy as “add to cart”. Unless you have a custom window size - then I recommend going into Lowe’s and talking with a Lowe’s customer service professional in the window/doors department.

Add to cart
We have 7 windows to order shutters for! 2 on garage, and 5 across the second story.
Step Four: Delivery & Installation
Shipping for our shutters (we had 7 total windows, so 14 shutters) took about a week, which seemed really quick to me! If you had a custom order, keep in mind it would likely take more time. The shutters arrived safe and undamaged, on a large pallet that we stored in garage until the install date.


Since these are vinyl, they don’t weigh much at all - YAY!
Pure excitement to see these beautiful shutters!
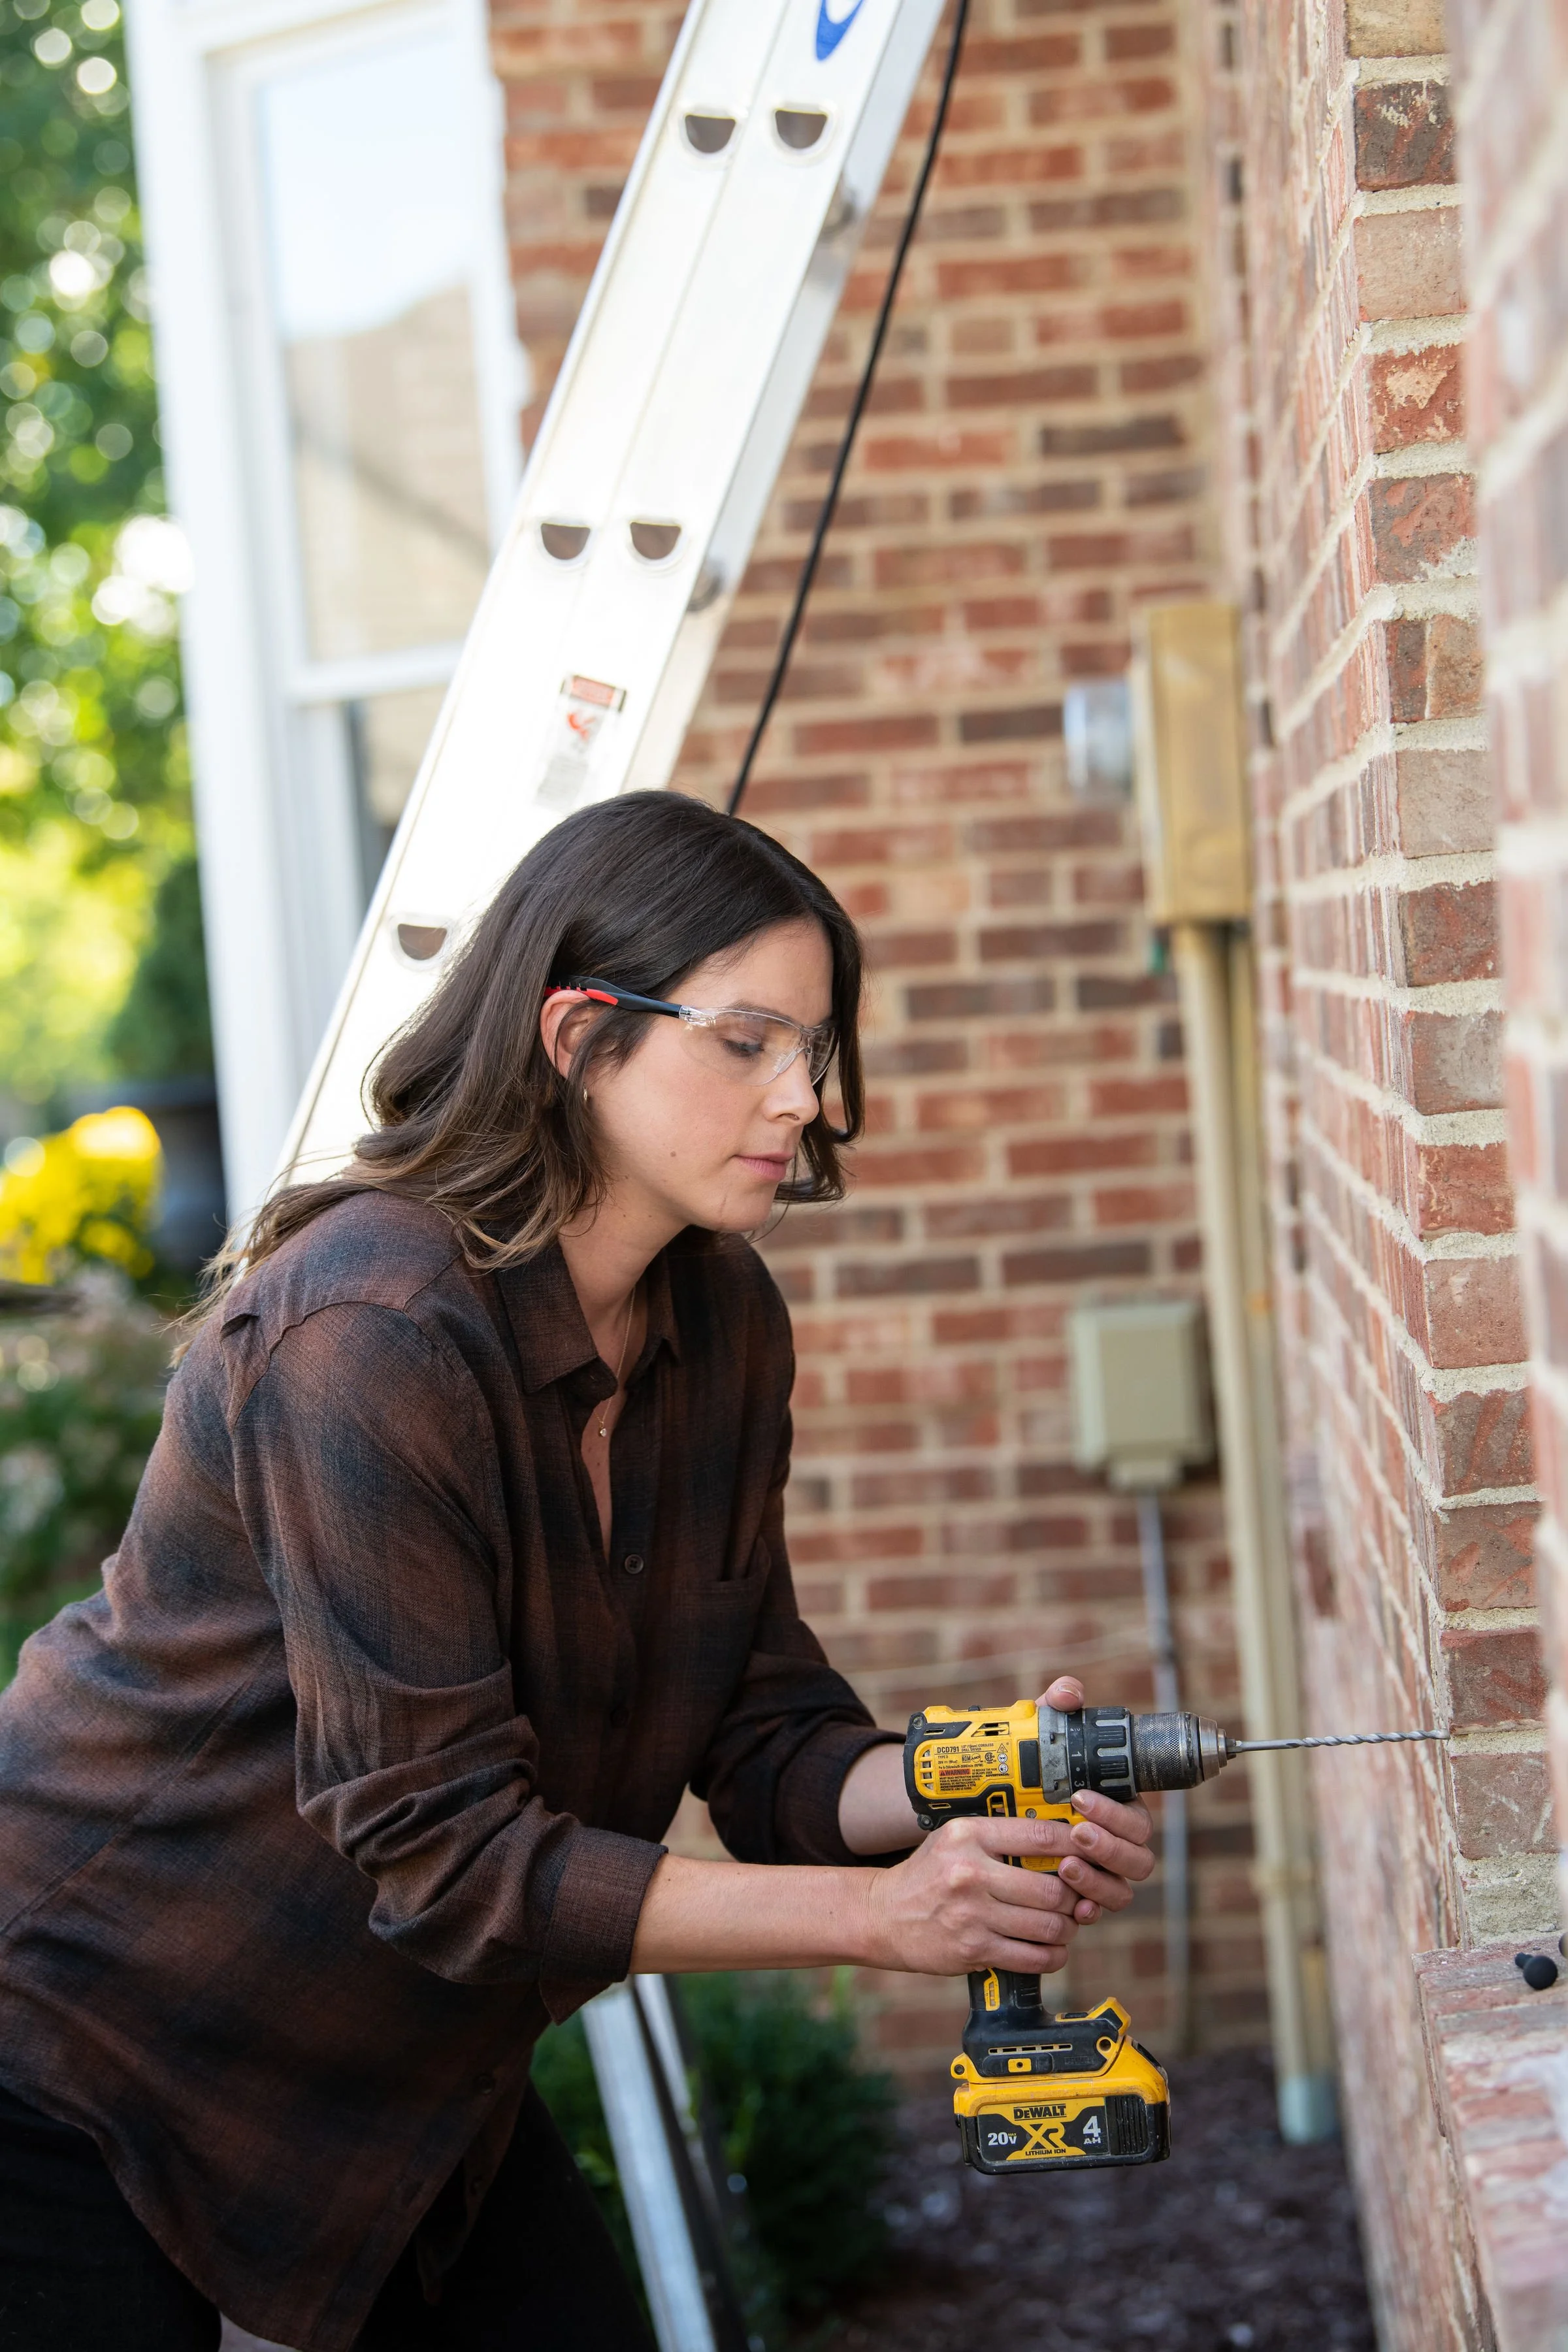
Installation of the shutters was relatively quick and easy too! Our main concern was logistics- accessing the shutters over the bay windows. We knew regular scaffolding or ladder wouldn’t work (bay window would be in the way), so we decided to use two ladders, two ladder jacks, and a platform setup. Once we figured out our method of approach, it was time to get started!

Very few tools are required for this!
Tools you will need:
Drill (and appropriate bits for your siding material- i.e. brick, wood siding, vinyl, stone etc.)
Level
Tape measure
Pencil
Mallet
Work surface (we used two collapsible sawhorses from our local Lowe’s (sawhorses linked here) and a piece of plywood).

I double checked (okay triple) to make sure everything was level before we started drilling into the brick!
Time to drill
Install:
Hold shutter up against house to mark where you want it (based on measurements and correct shutter placement diagram above). Mark on the shutters with a pencil where you will pre-drill holes. For shutter heights over 47”, installation guide recommends using 6 fasteners per shutter as opposed to 4. All of our shutters ended up being 55” or taller so we used 6 fasteners for each shutter.
Pre-drill holes in shutters
Hold shutter up against house again and take a pencil to mark where the holes need to go in the masonry.
Drill hole(s) in masonry.
Install shutter using provided fasteners and a mallet- start off slow until you make sure the fastener is in the hole!
TIPS:
It really helps to have a partner for install - especially when you are using ladders!
Make sure to wear eye protection when drilling (the masonry created a bit of dust).
Wipe off the shutter after pre-drilling holes (before installing it) as this also creates a bit of dust.

Having a partner is necessary to help hold shutter still!

Tap the provided plastic fasteners in!
That is literally all there is to it- it was SO EASY. My friend John helped me install the shutters that required a ladder for access since I can’t be climbing on 20’ ladders right now haha! I even took the dogs for a short walk at one point and by the time I came back he had another whole set done (so like 10-15 minutes?!?). The most time consuming part of everything was moving the ladders around!

Who’s faster: Pregnant Gretchen taking her dogs on a walk or John installing shutters?

Answer: John was faster!
But seriously… check out those beauties! They are exactly what this house needed!

The face of a girl who cannot contain her obsession with how the shutters look!

So, what do you think? We absolutely love how the shutters turned out, and I get excited again every time I pull in the driveway. Our neighbors love them too- they have stopped us to tell us that anytime we are out walking the dogs or in front of the house. Now I am even more excited and proud to invite guests over, and decorate for the holidays. Can’t you just picture wreaths in the windows now?!?

We are looking forward
to family holiday photos on this porch now!
Oh, and we are VERY MUCH looking forward to holiday family photos on the front porch with our newborn (who will be joining us at any time- squeal).
Thank you again to Vantage Shutters and Lowe’s Home Improvement for partnering with us on our Project Curb Appeal!
PHOTO CREDIT: Nathan of Fusion Photography in Louisville Kentucky
Sincerely,
Gretchen, Jordan, Maker, Lincoln and Baby Rose (coming soon)