Contact Us

Fill out the form to contact us. If you are interested in joining our mailiing list, just say so!


If you are looking for something specific, submit your email address and the type/size/color of rug you are looking for. Have a great day!

BLOG

My Home Office

Gretchen Rose

It’s been a few months (maybe 11?) since I wrote a blog post so bear with me! I will try to keep this short and sweet.

When you first move into a home, it is hard to know exactly how you will use the space(s). Generally it just takes a little bit of living in your home for it to really speak to you, which is exactly how this project started.

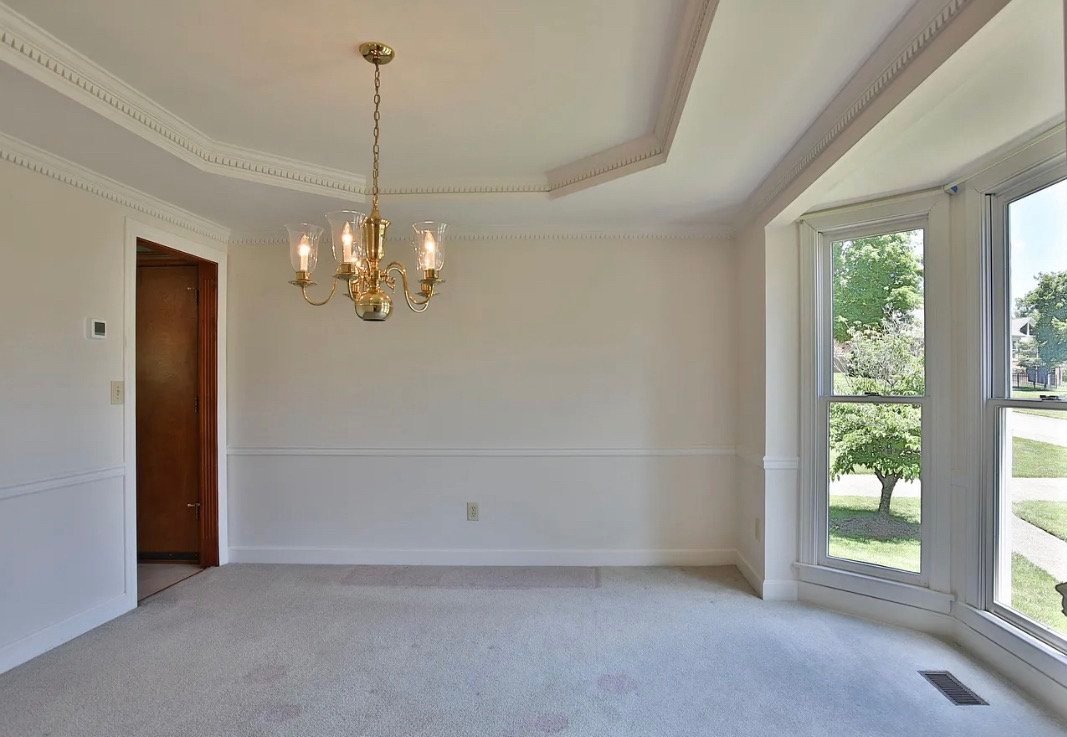
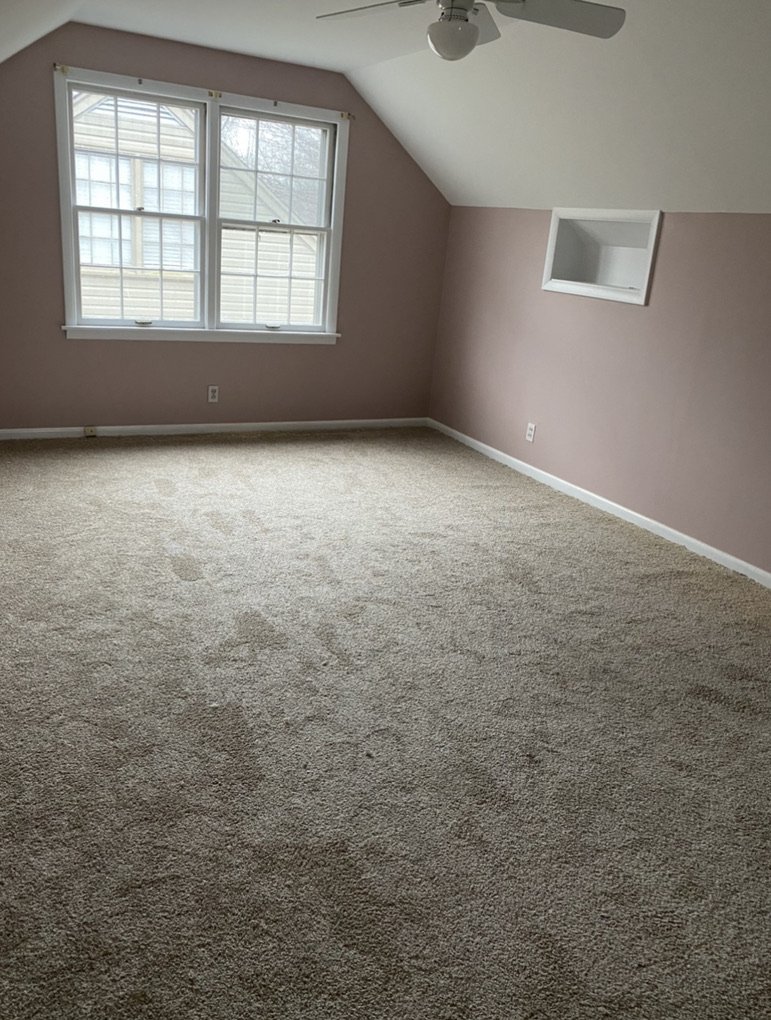
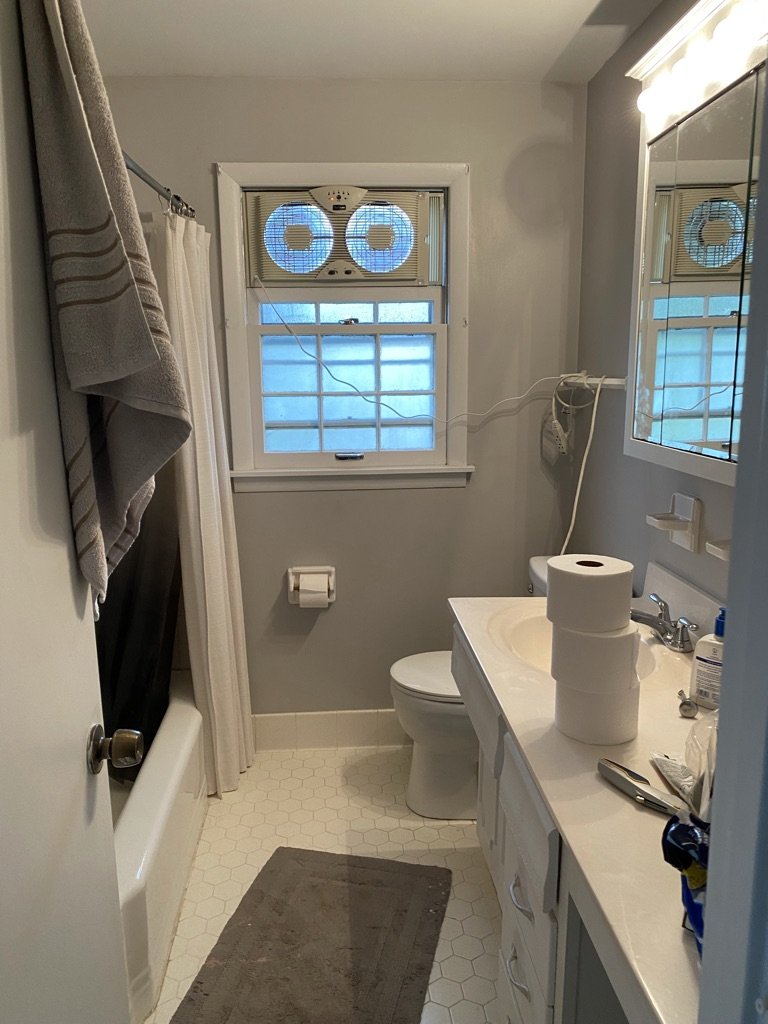
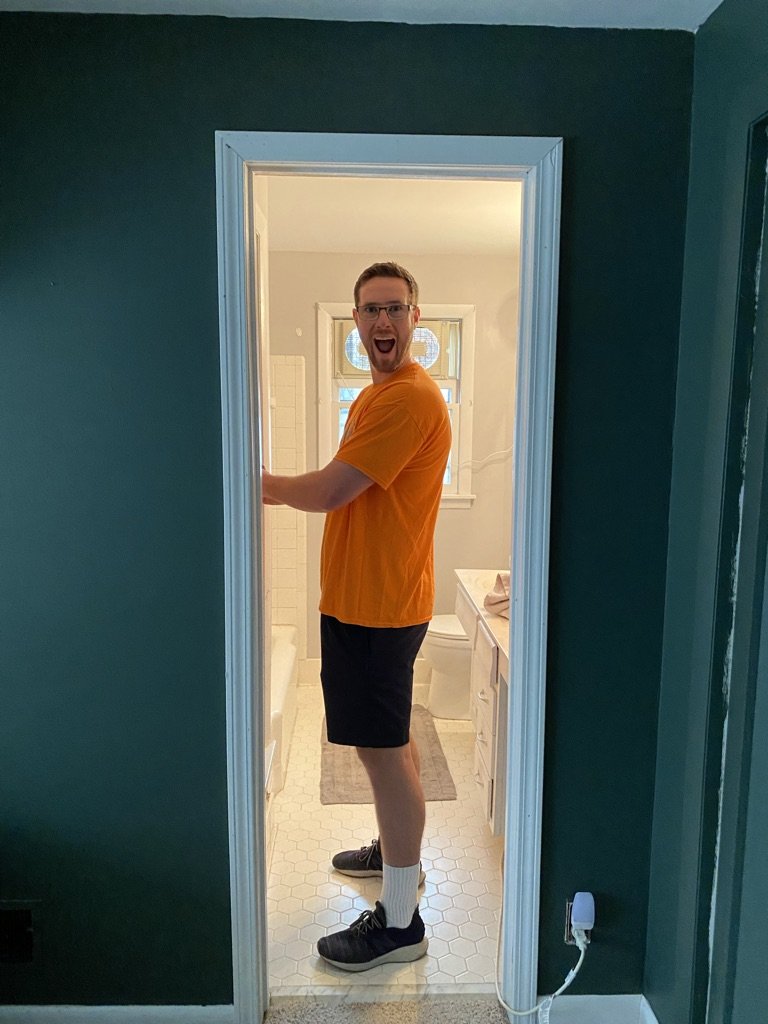
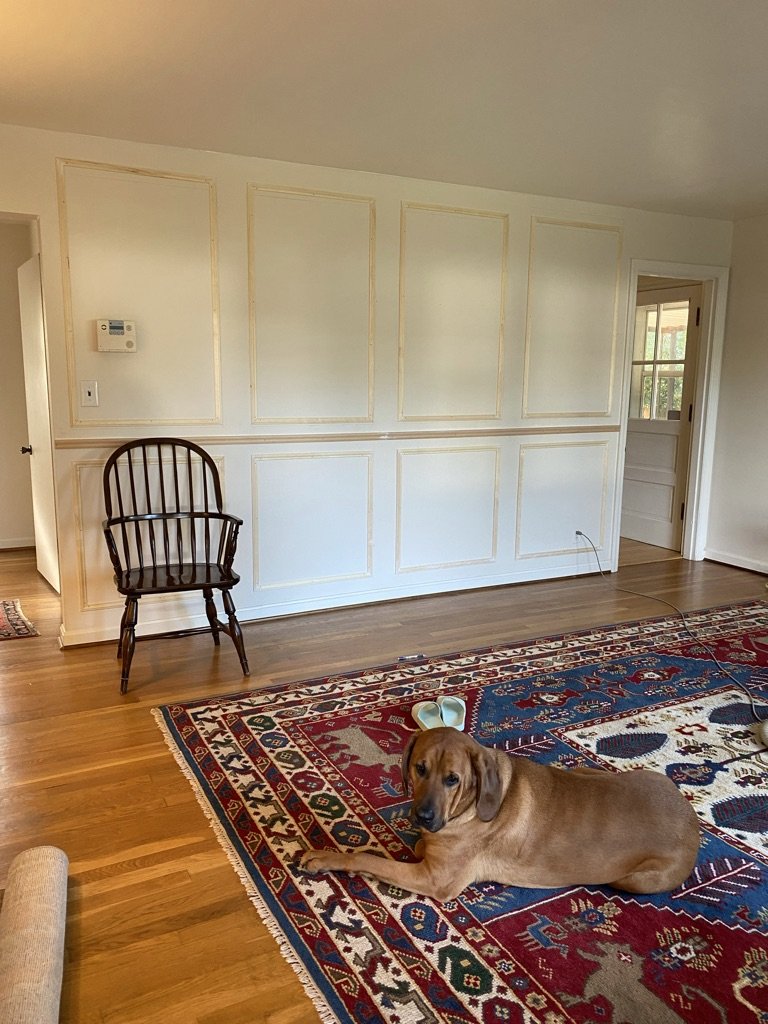
Move in day. 90’s beige, complete with mysterious pink stains on the carpet.

We moved in July of last year, I was 25ish weeks pregnant and we had quite the to-do list. While we knocked a few of them out prior to Gwen’s arrival, the majority of “aesthetic” changes had to wait until we had more time (and I had more energy)!

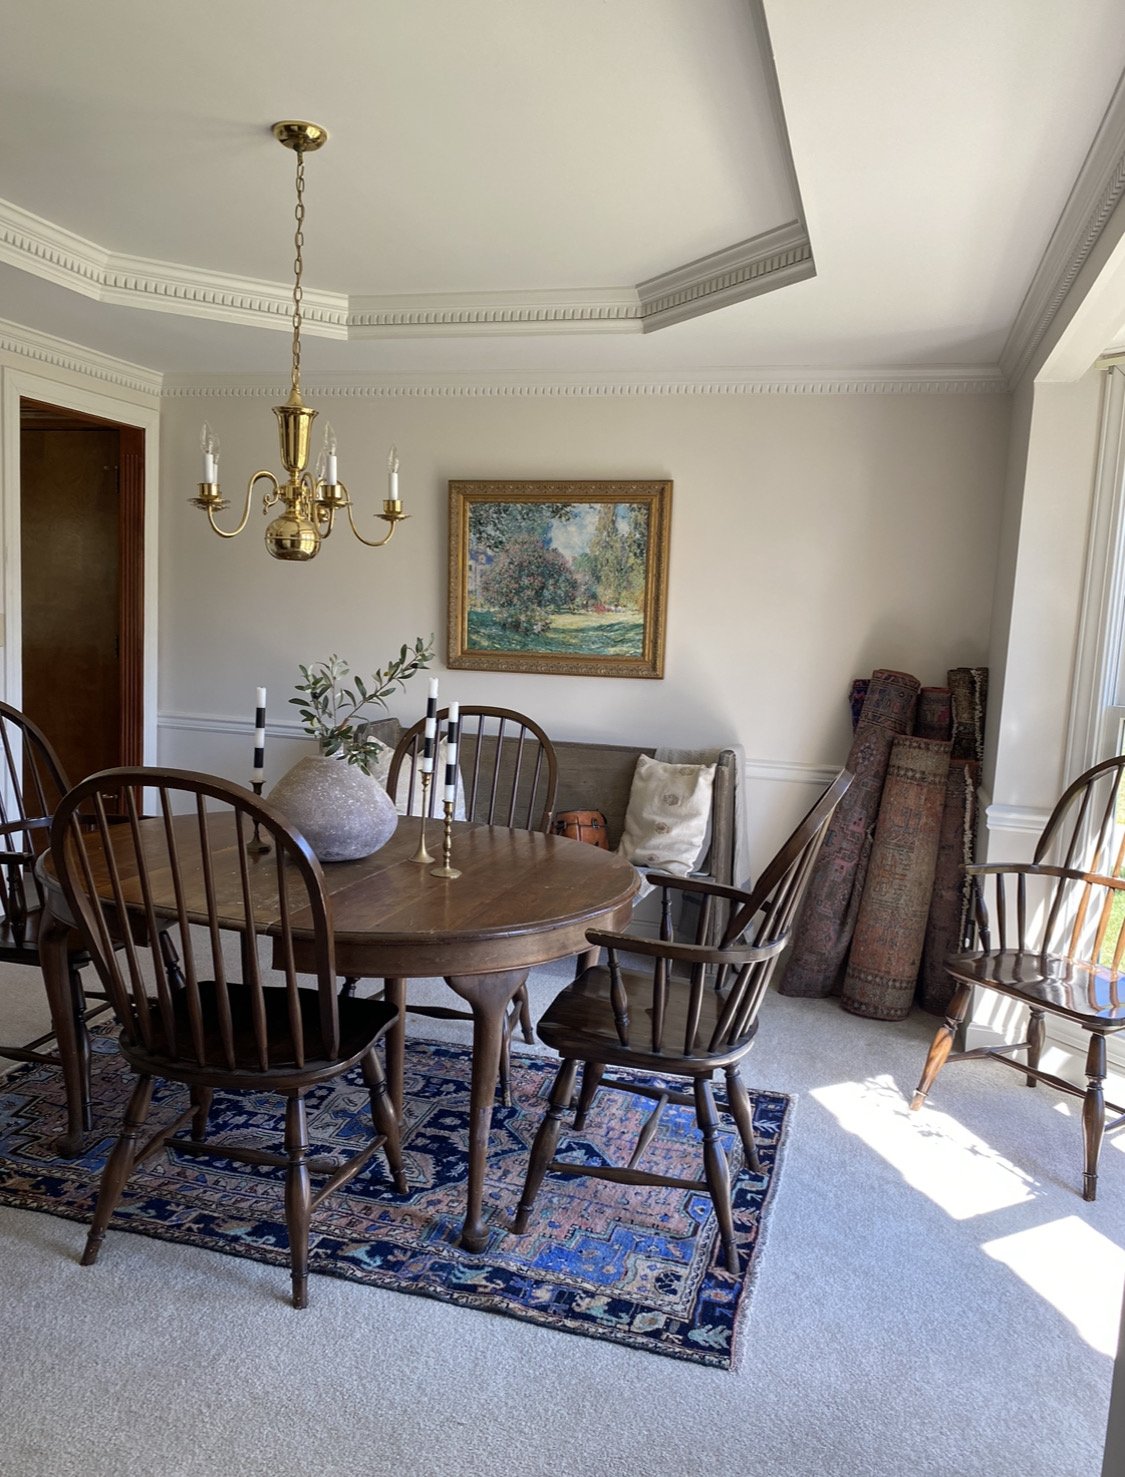
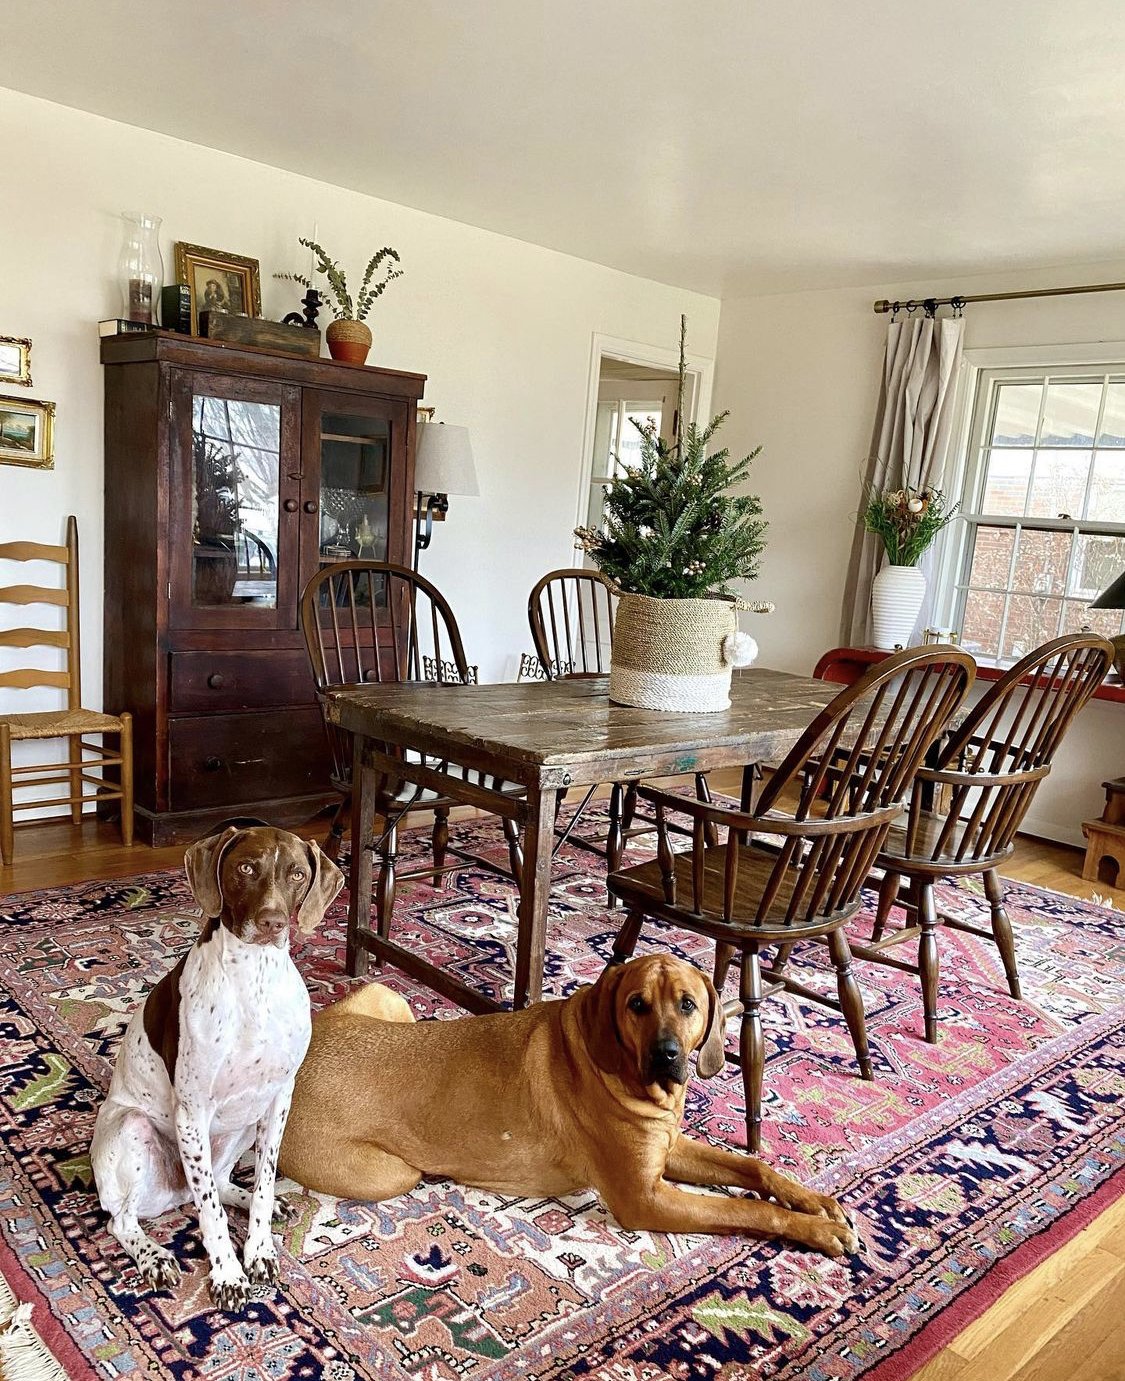
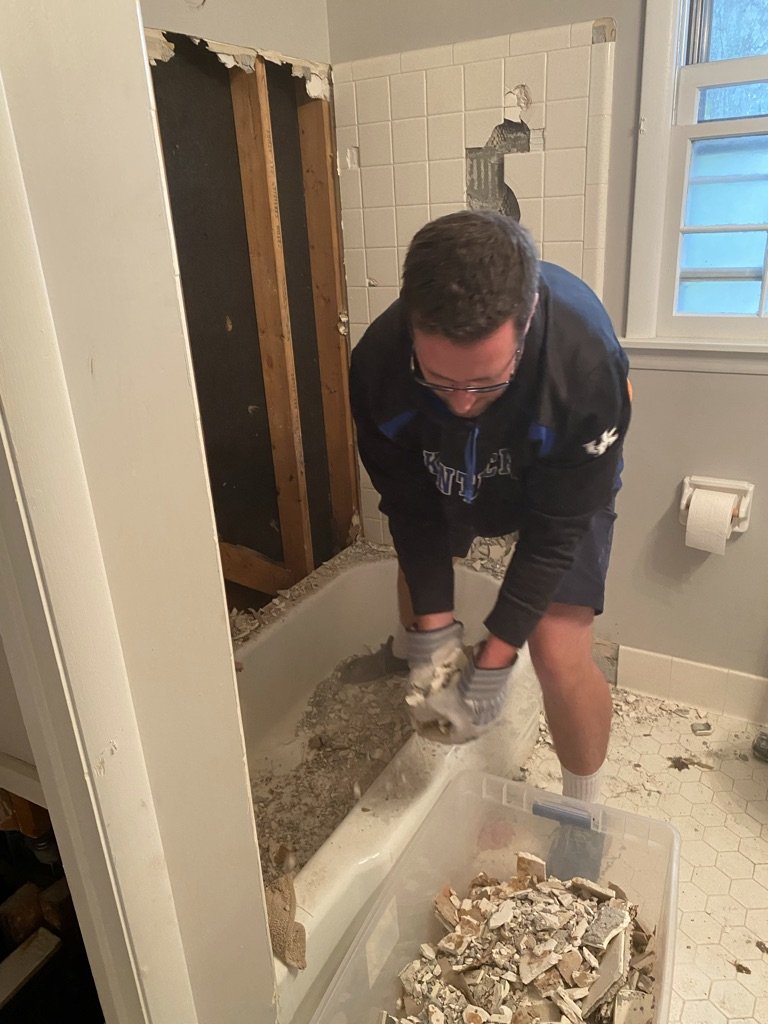
We rocked it like this for a while- until April of this year when we put hardwoods in.

In 14 months time, we have never once used the dining room as a dining room. It has been a catch all, car seat + diaper bag storage, diaper changing room, dog feeding zone… you get the idea. It had no identity. Granted, it was nice to have an official changing room on the first floor, but now that she’s rolling all around it is safest to change her on the ground. So. Why not an office? I realize that I am not the first person to convert a dining room into an office, but I am glad I did it!

I started pulling together inspiration- how did I want the space to feel? What would inspire me? How would I be using the space?

Function: I knew we may need it occasionally for overflow dining/seating, so I chose a desk that was more “dining table” size (thanks, fb marketplace). I also got a set of 6 chairs - the extras are just down in the basement for now. I knew that I would be taking a fair amount of video/virtual calls, so the lighting should be taken into consideration, as well as colors and layout in relationship to the window.

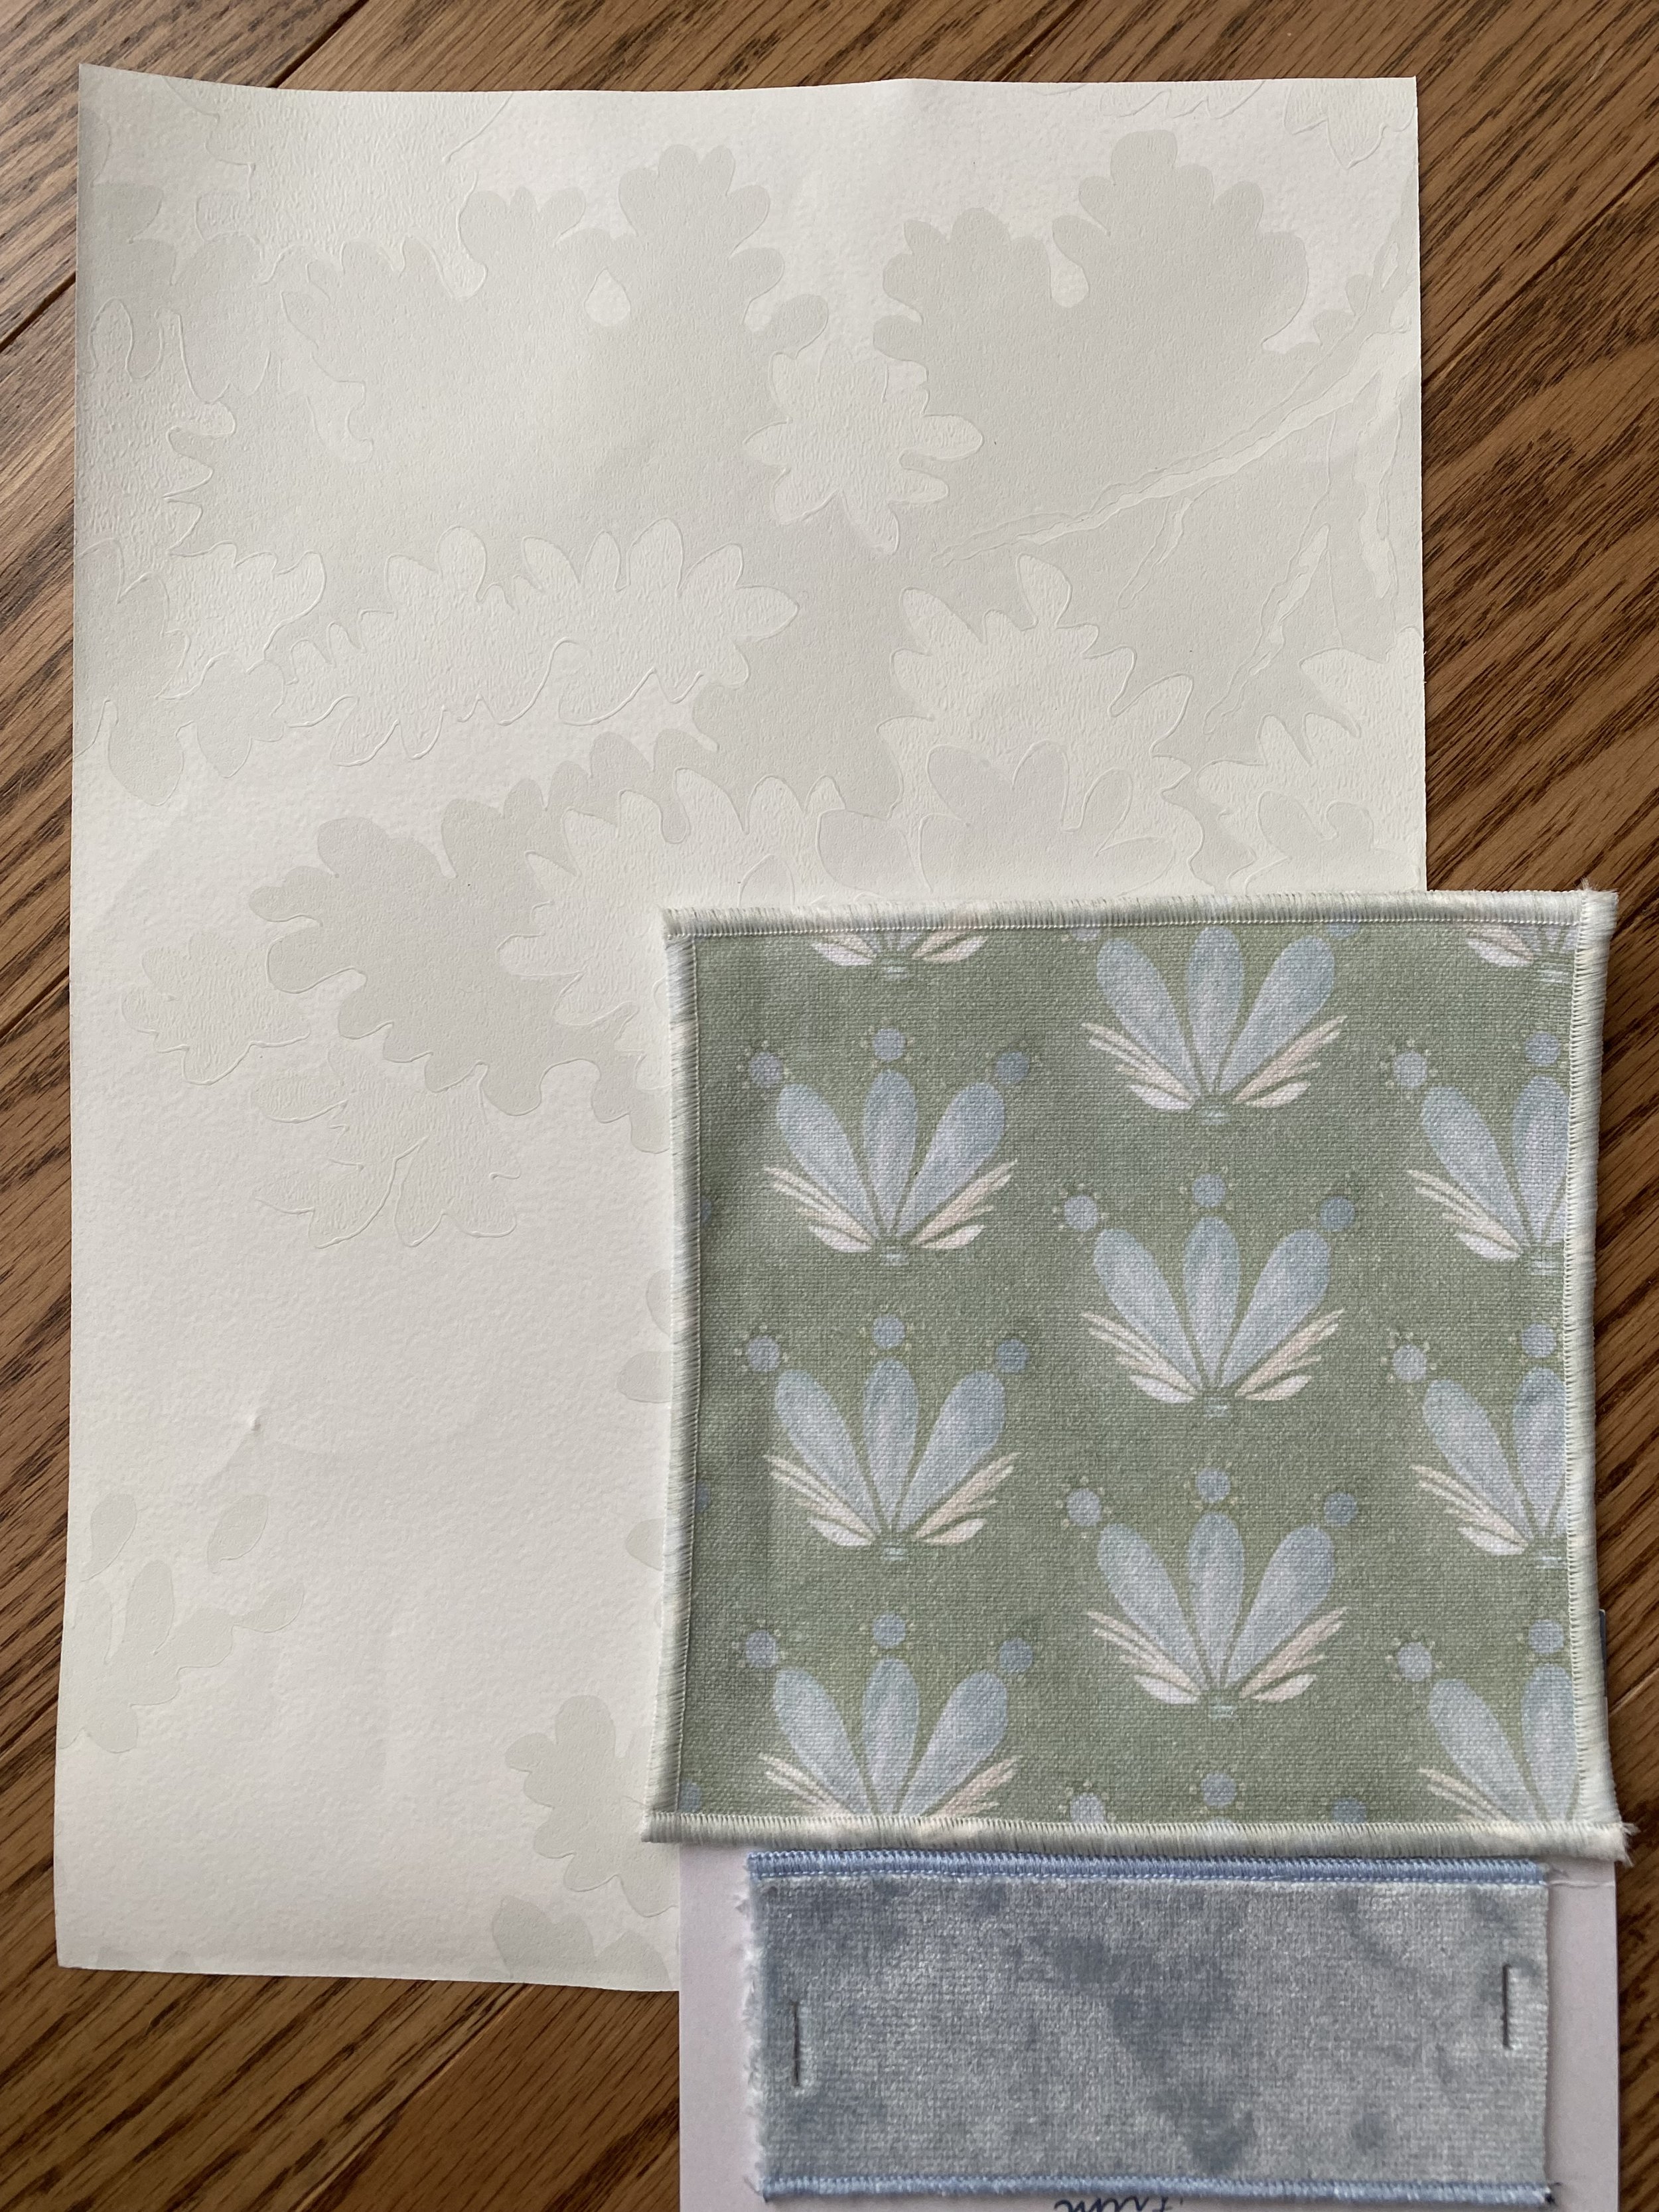
A closeup of the Sandberg wallpaper and fabric + trim from Pepper Home
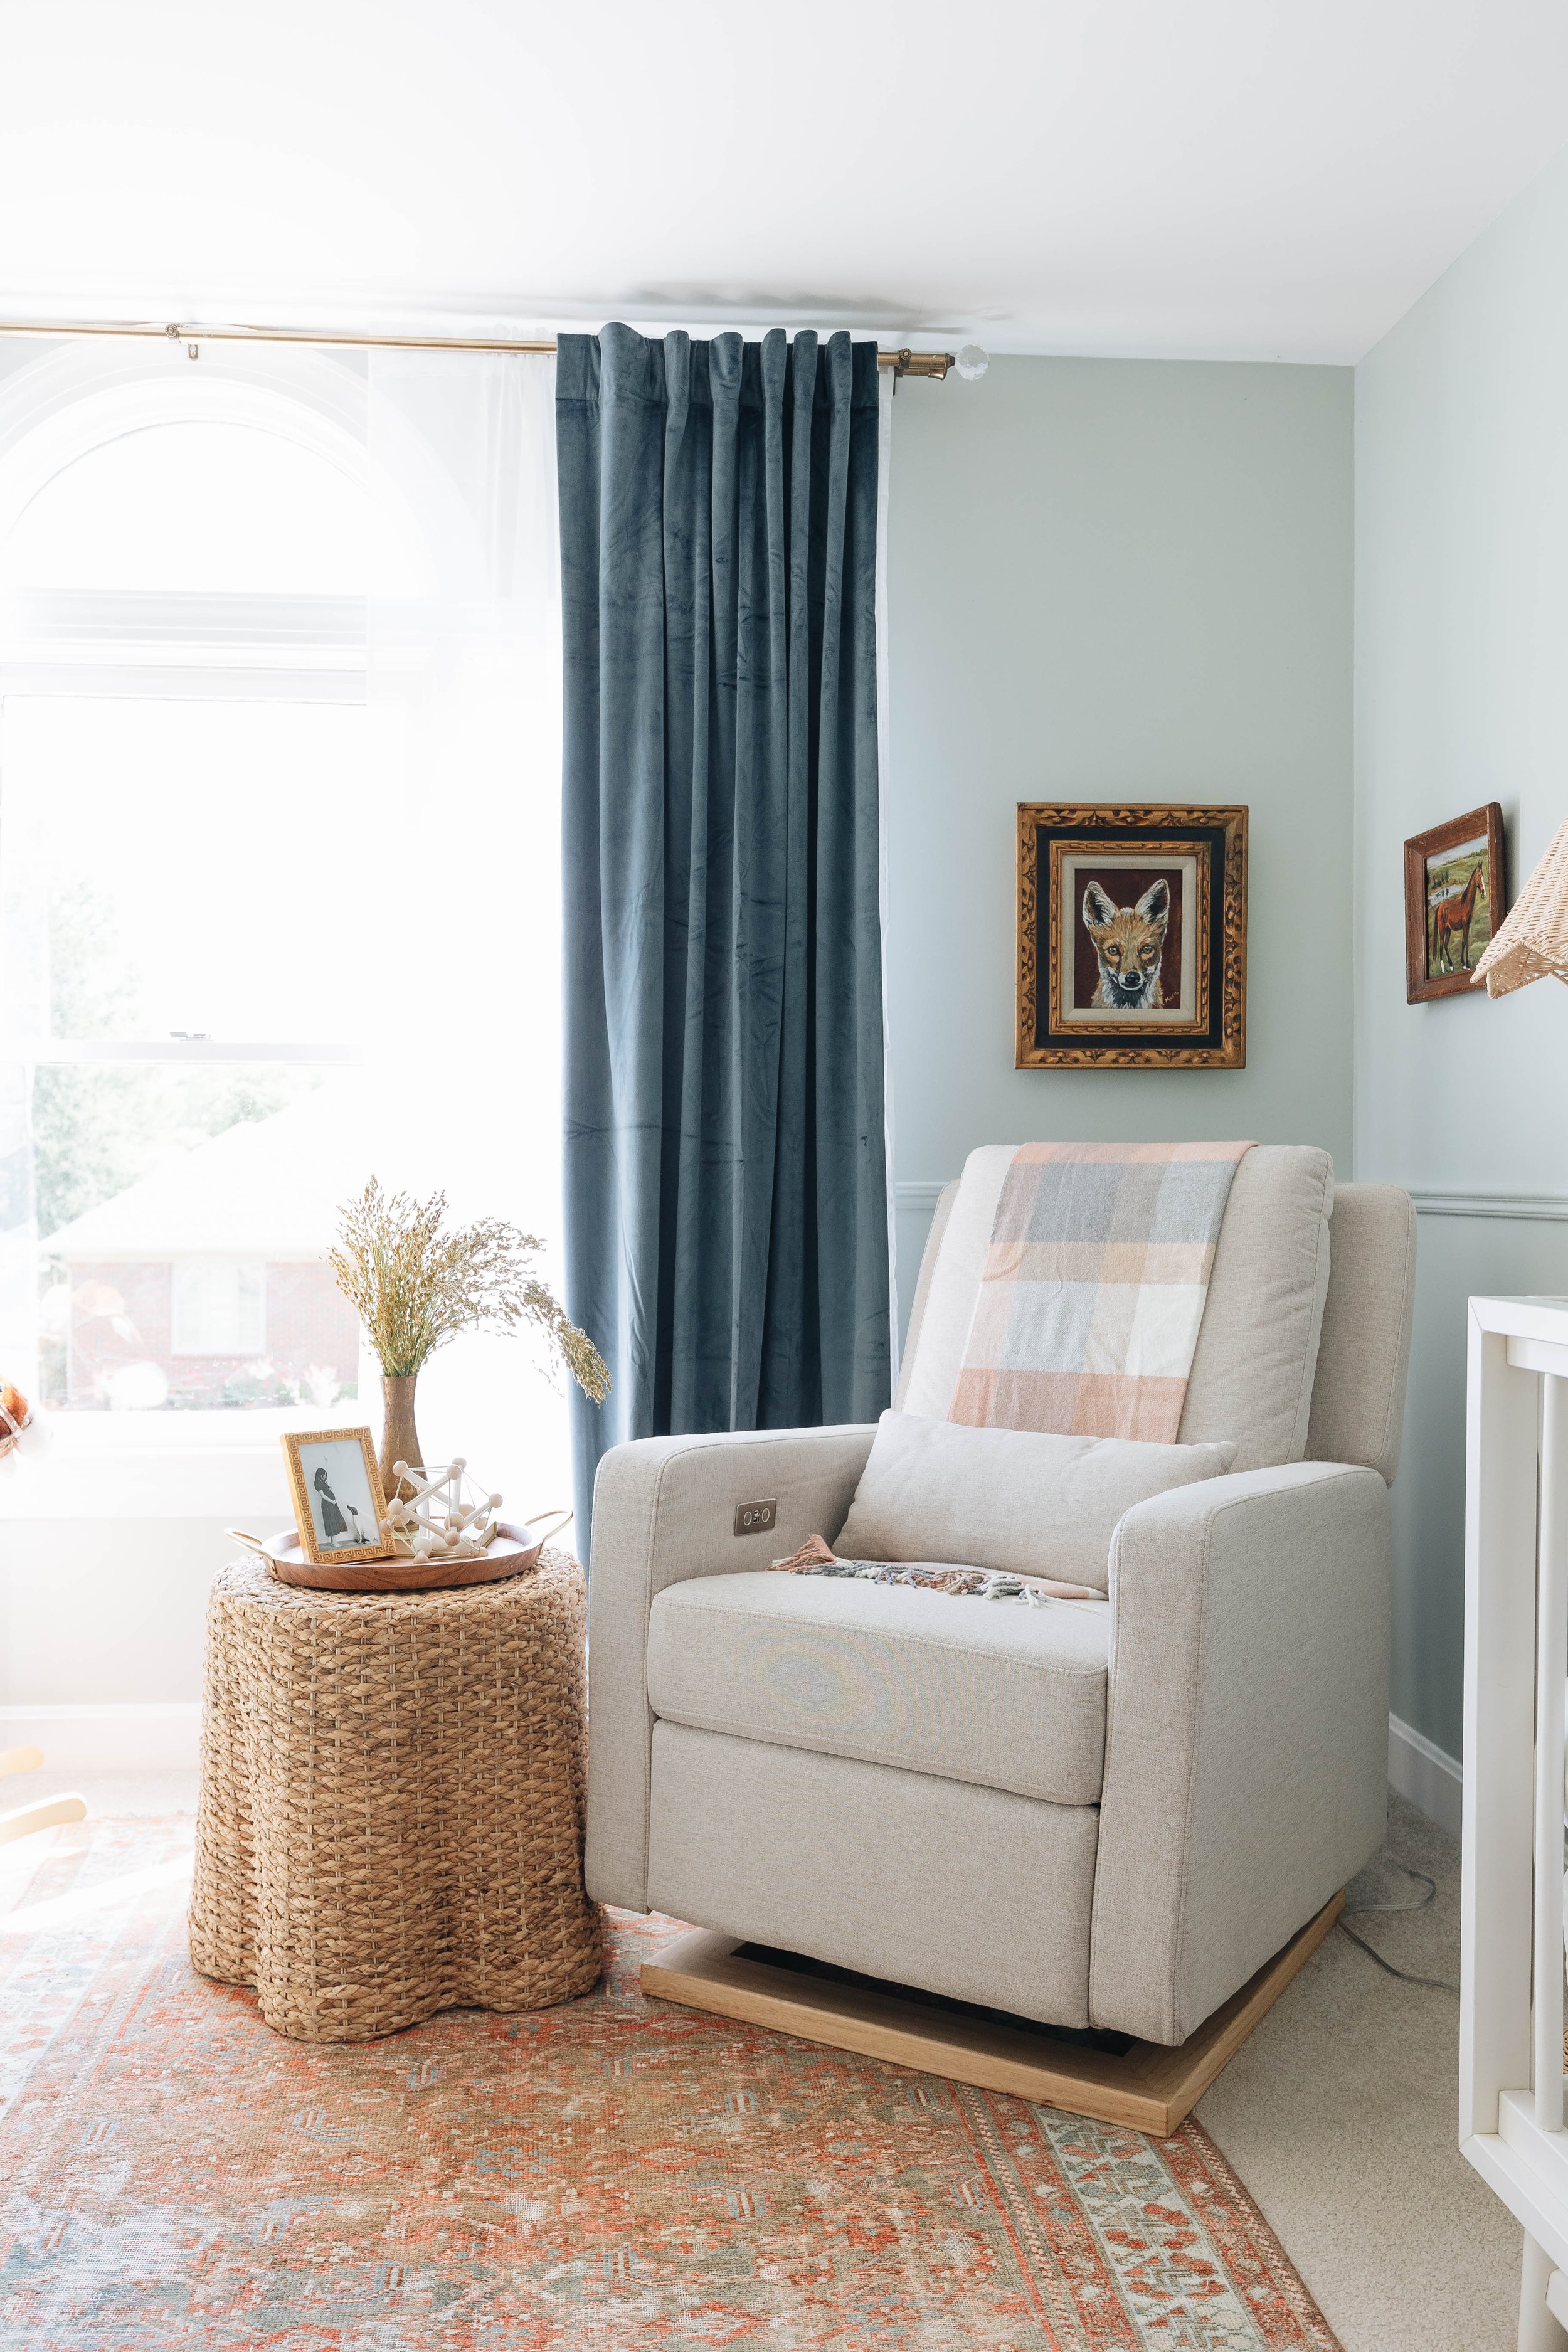
Yes to pleats.

Design: I wanted to stay true to myself and the rest of the house style-wise. It can be easy to get overwhelmed when starting out with a blank space- my tip is to find a few details that really inspire the rest of the design. In this case, those special details were the wallpaper and the drapery.

This heavy old hutch holds the perfect amount of samples.

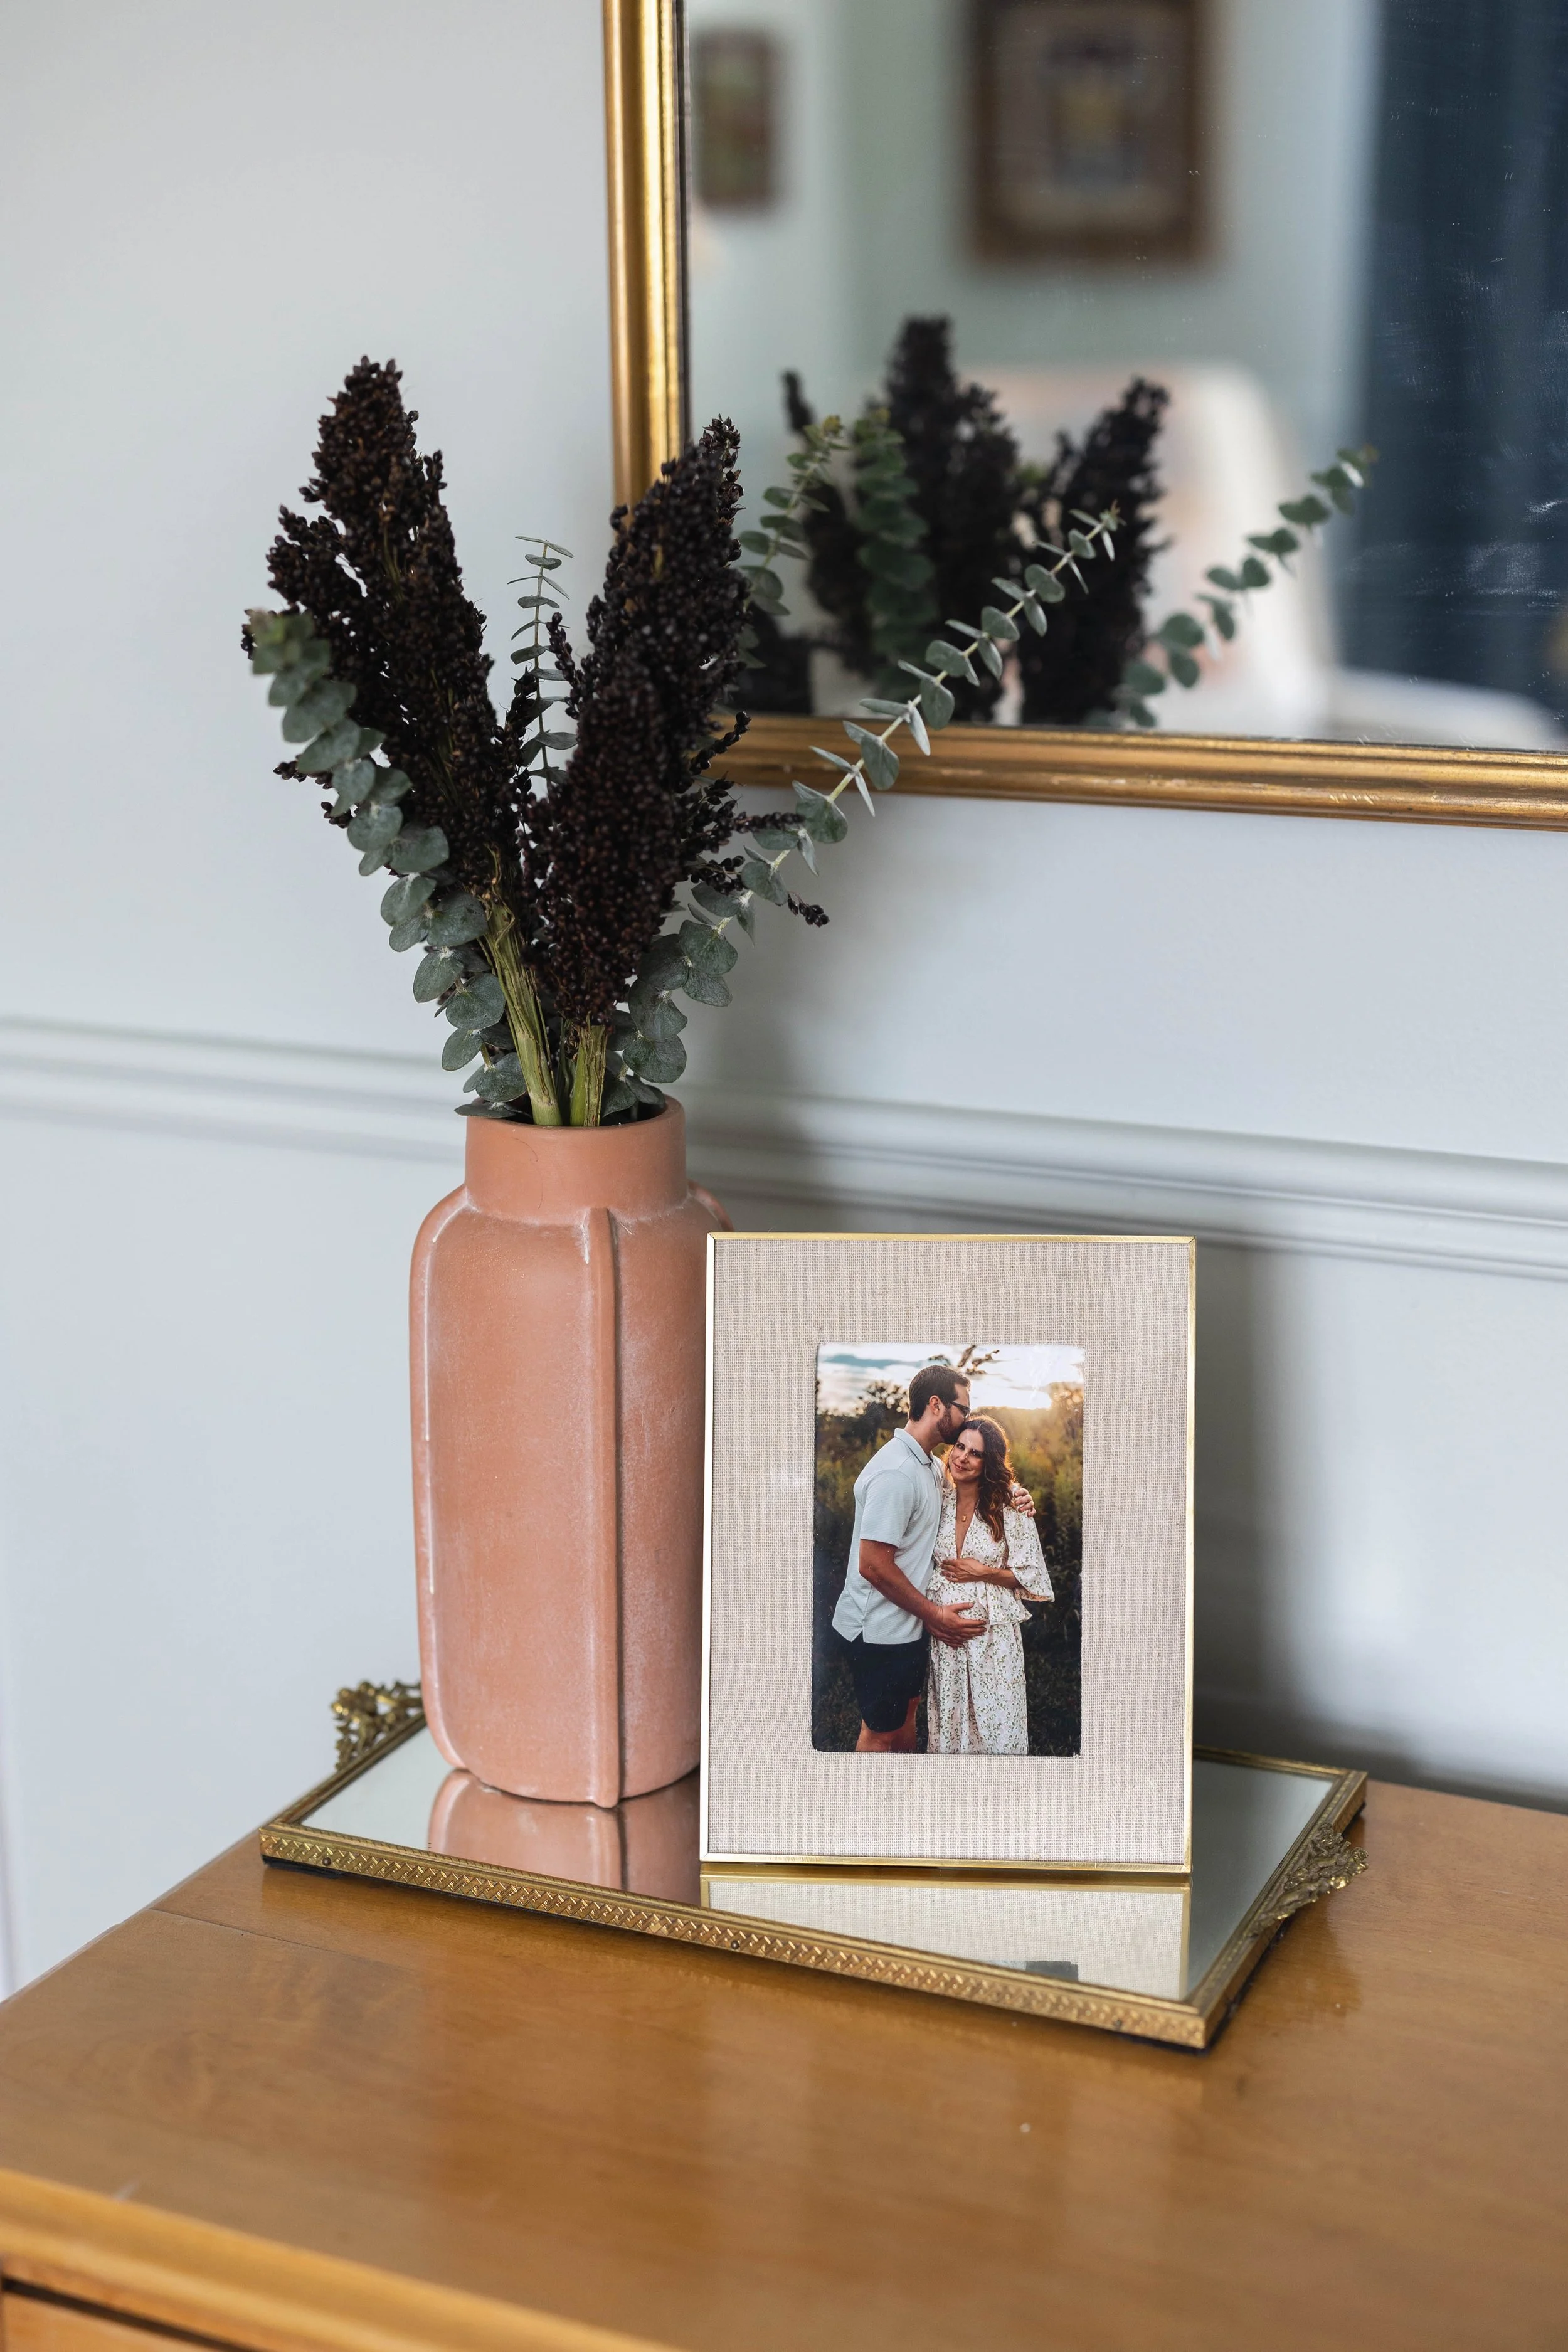
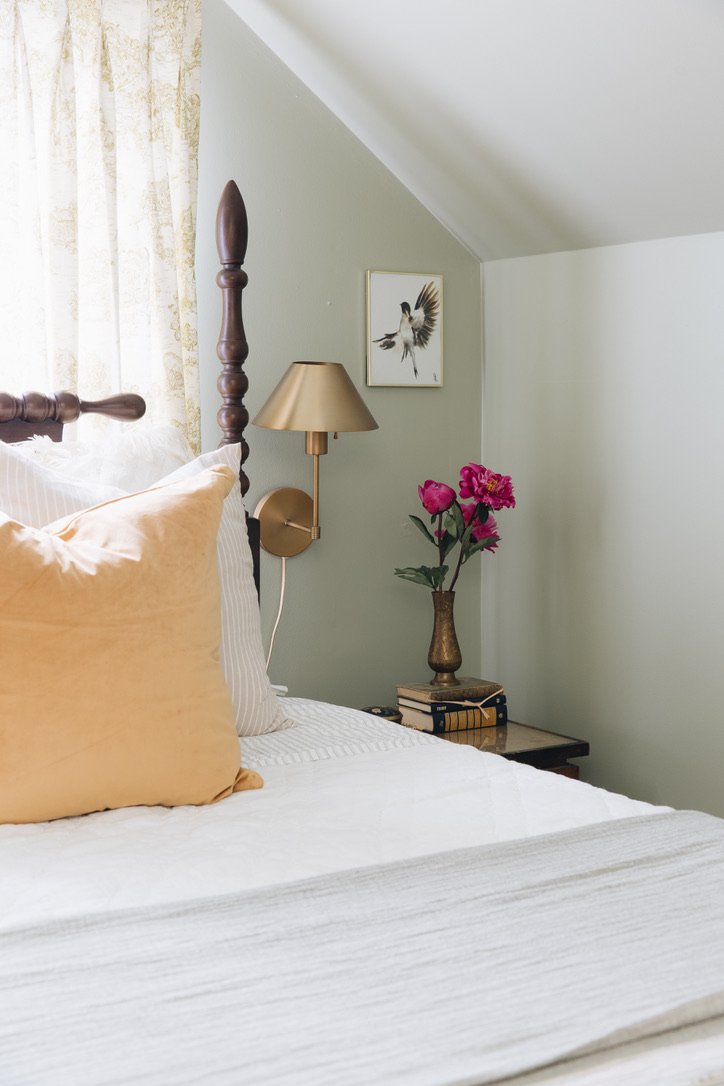
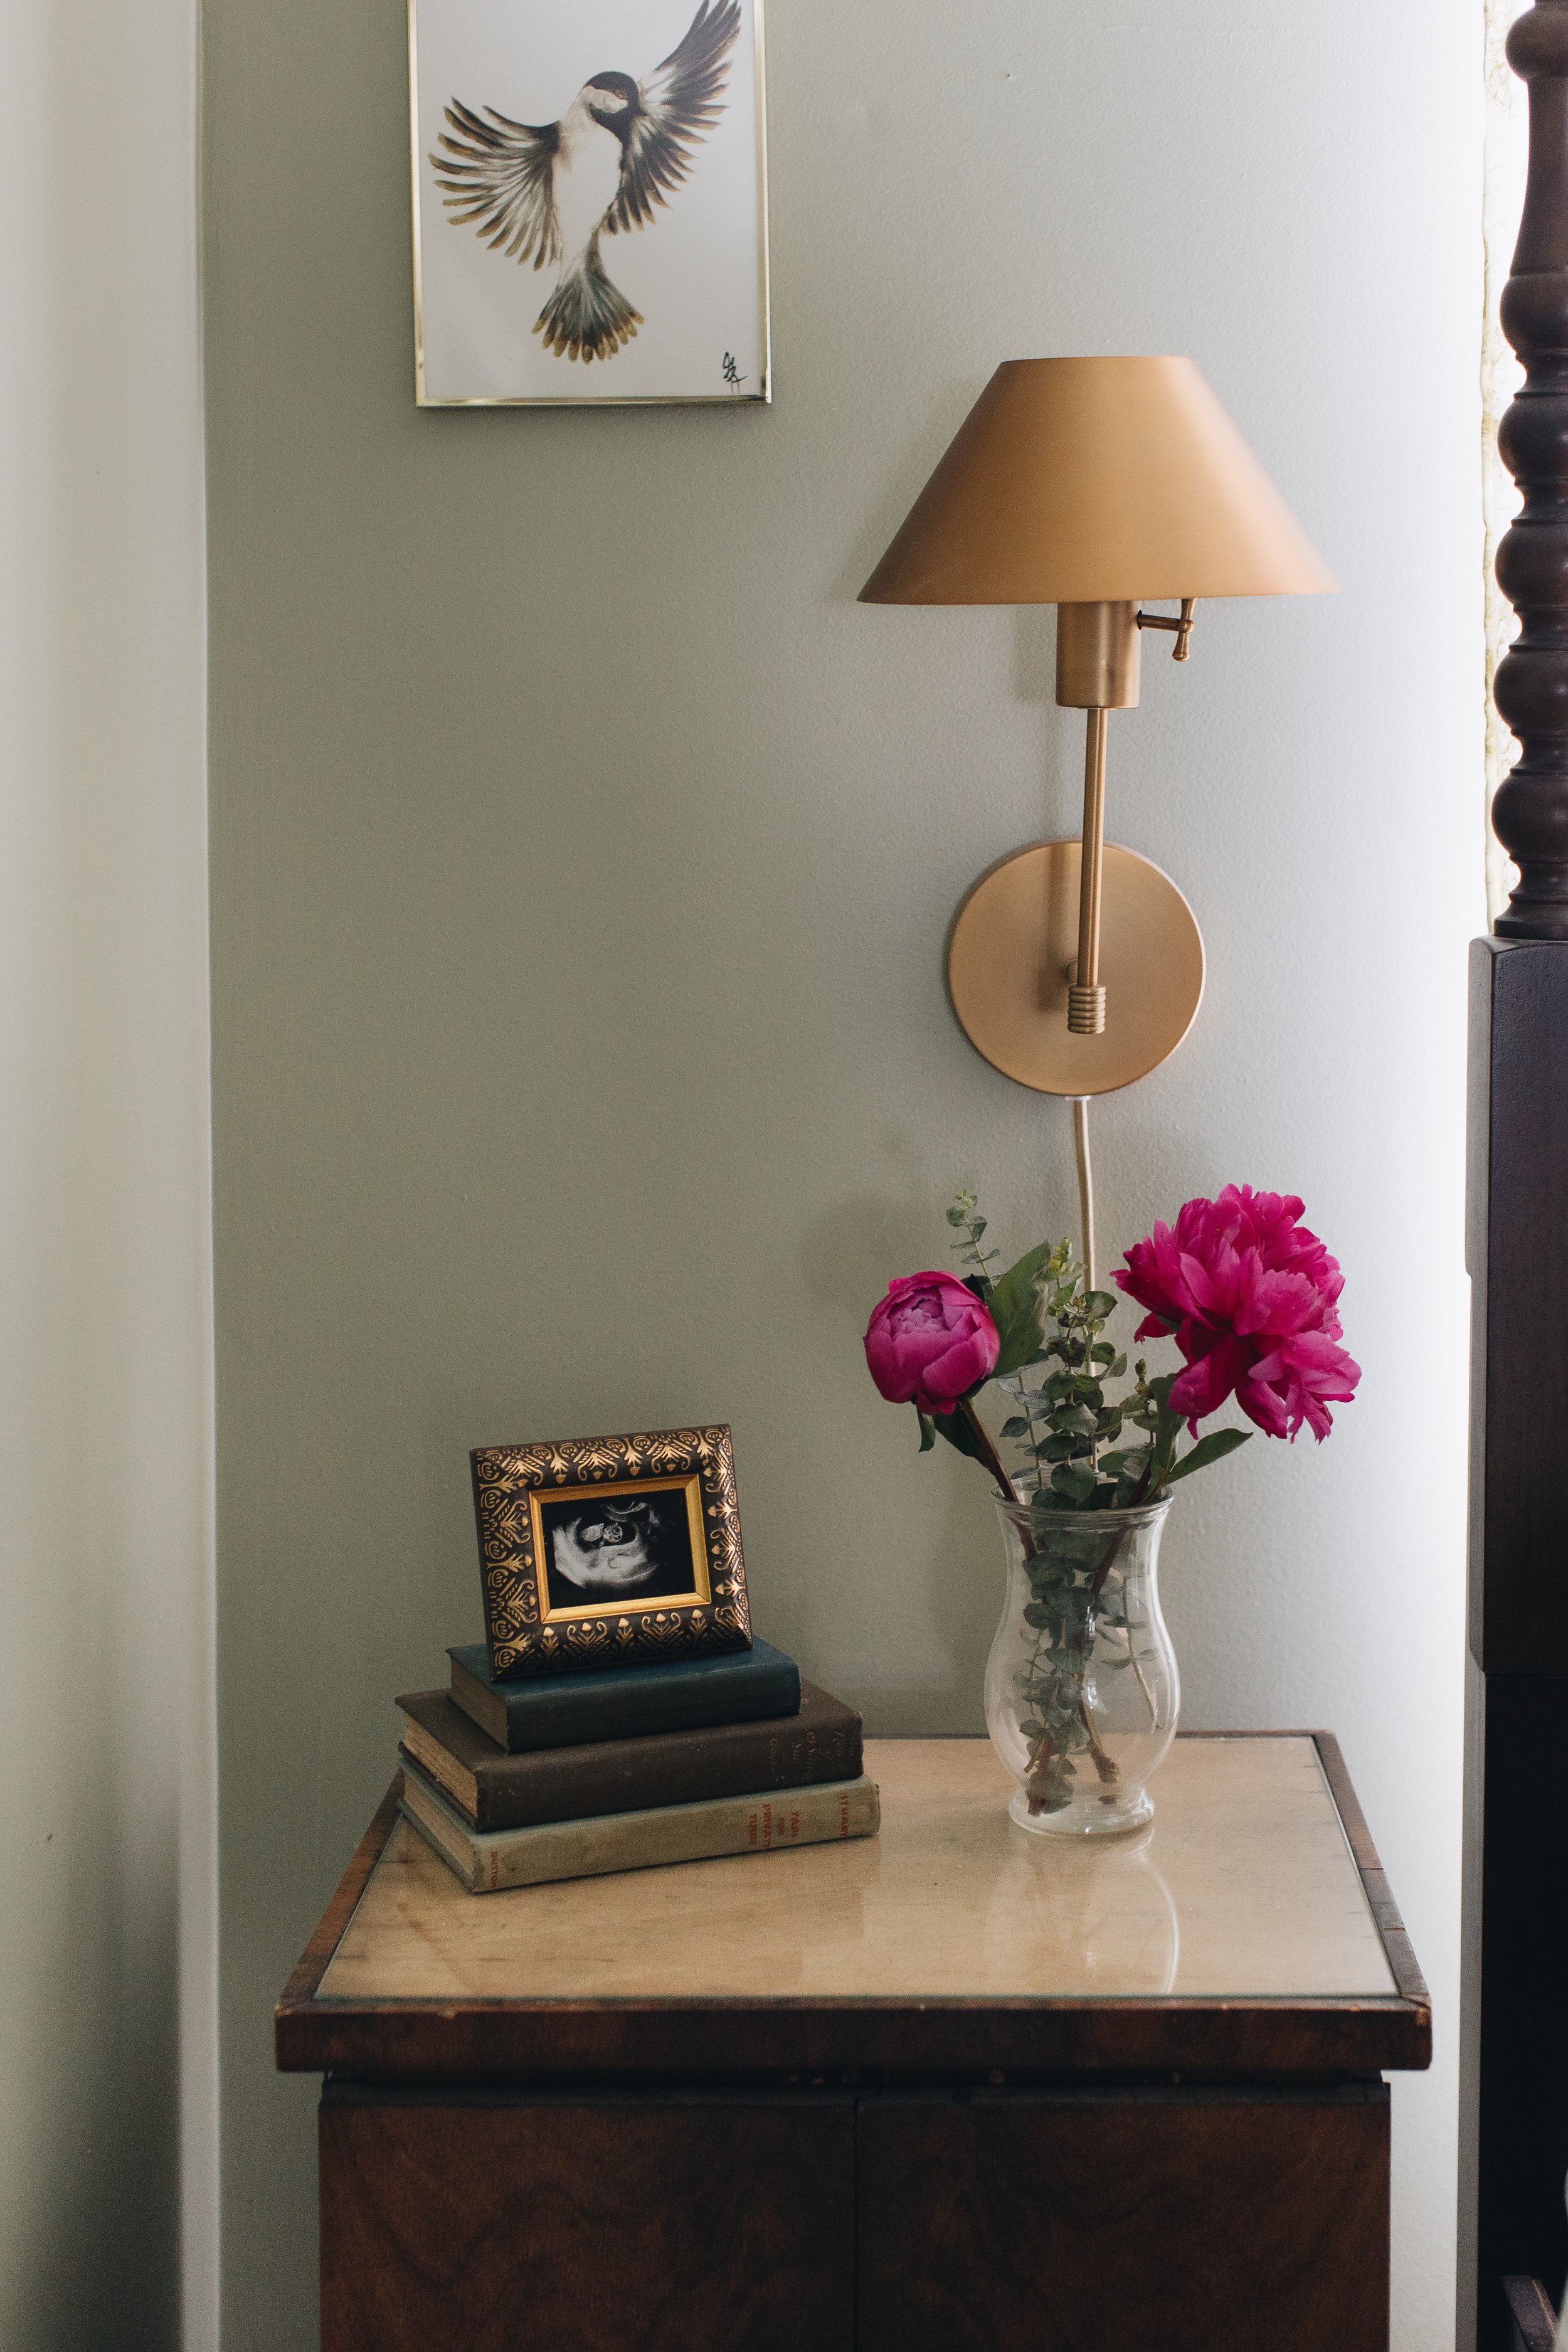
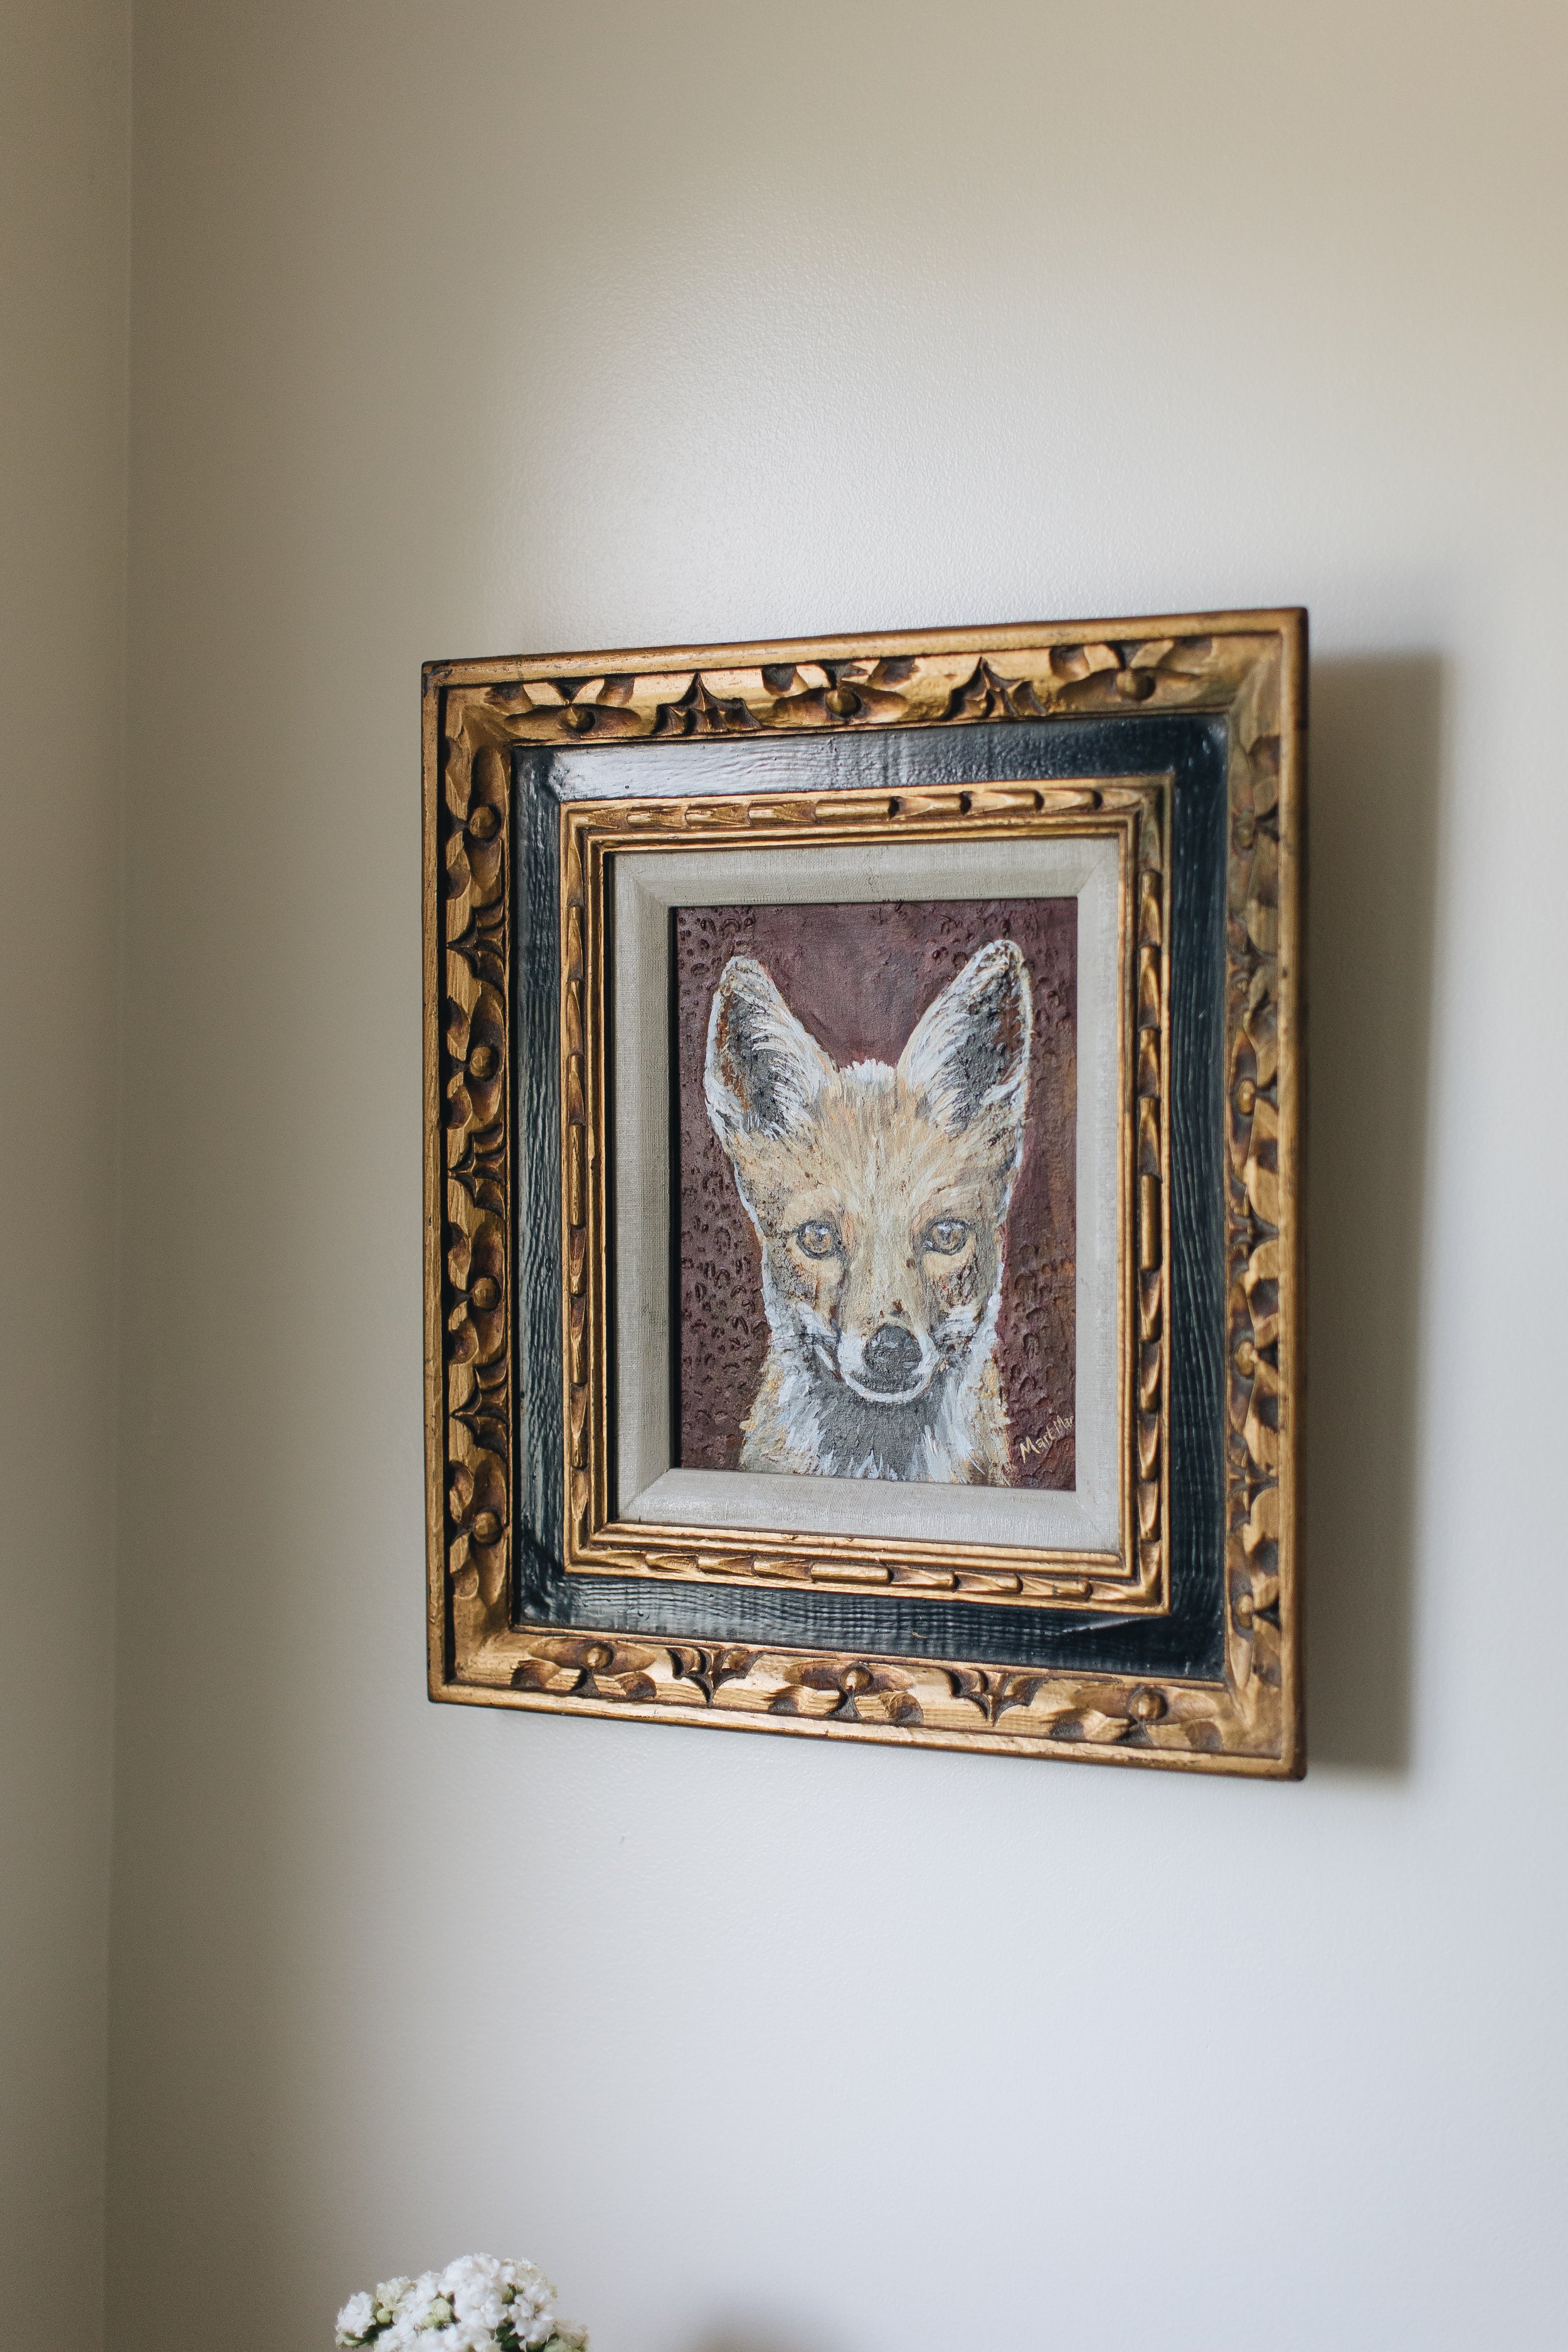
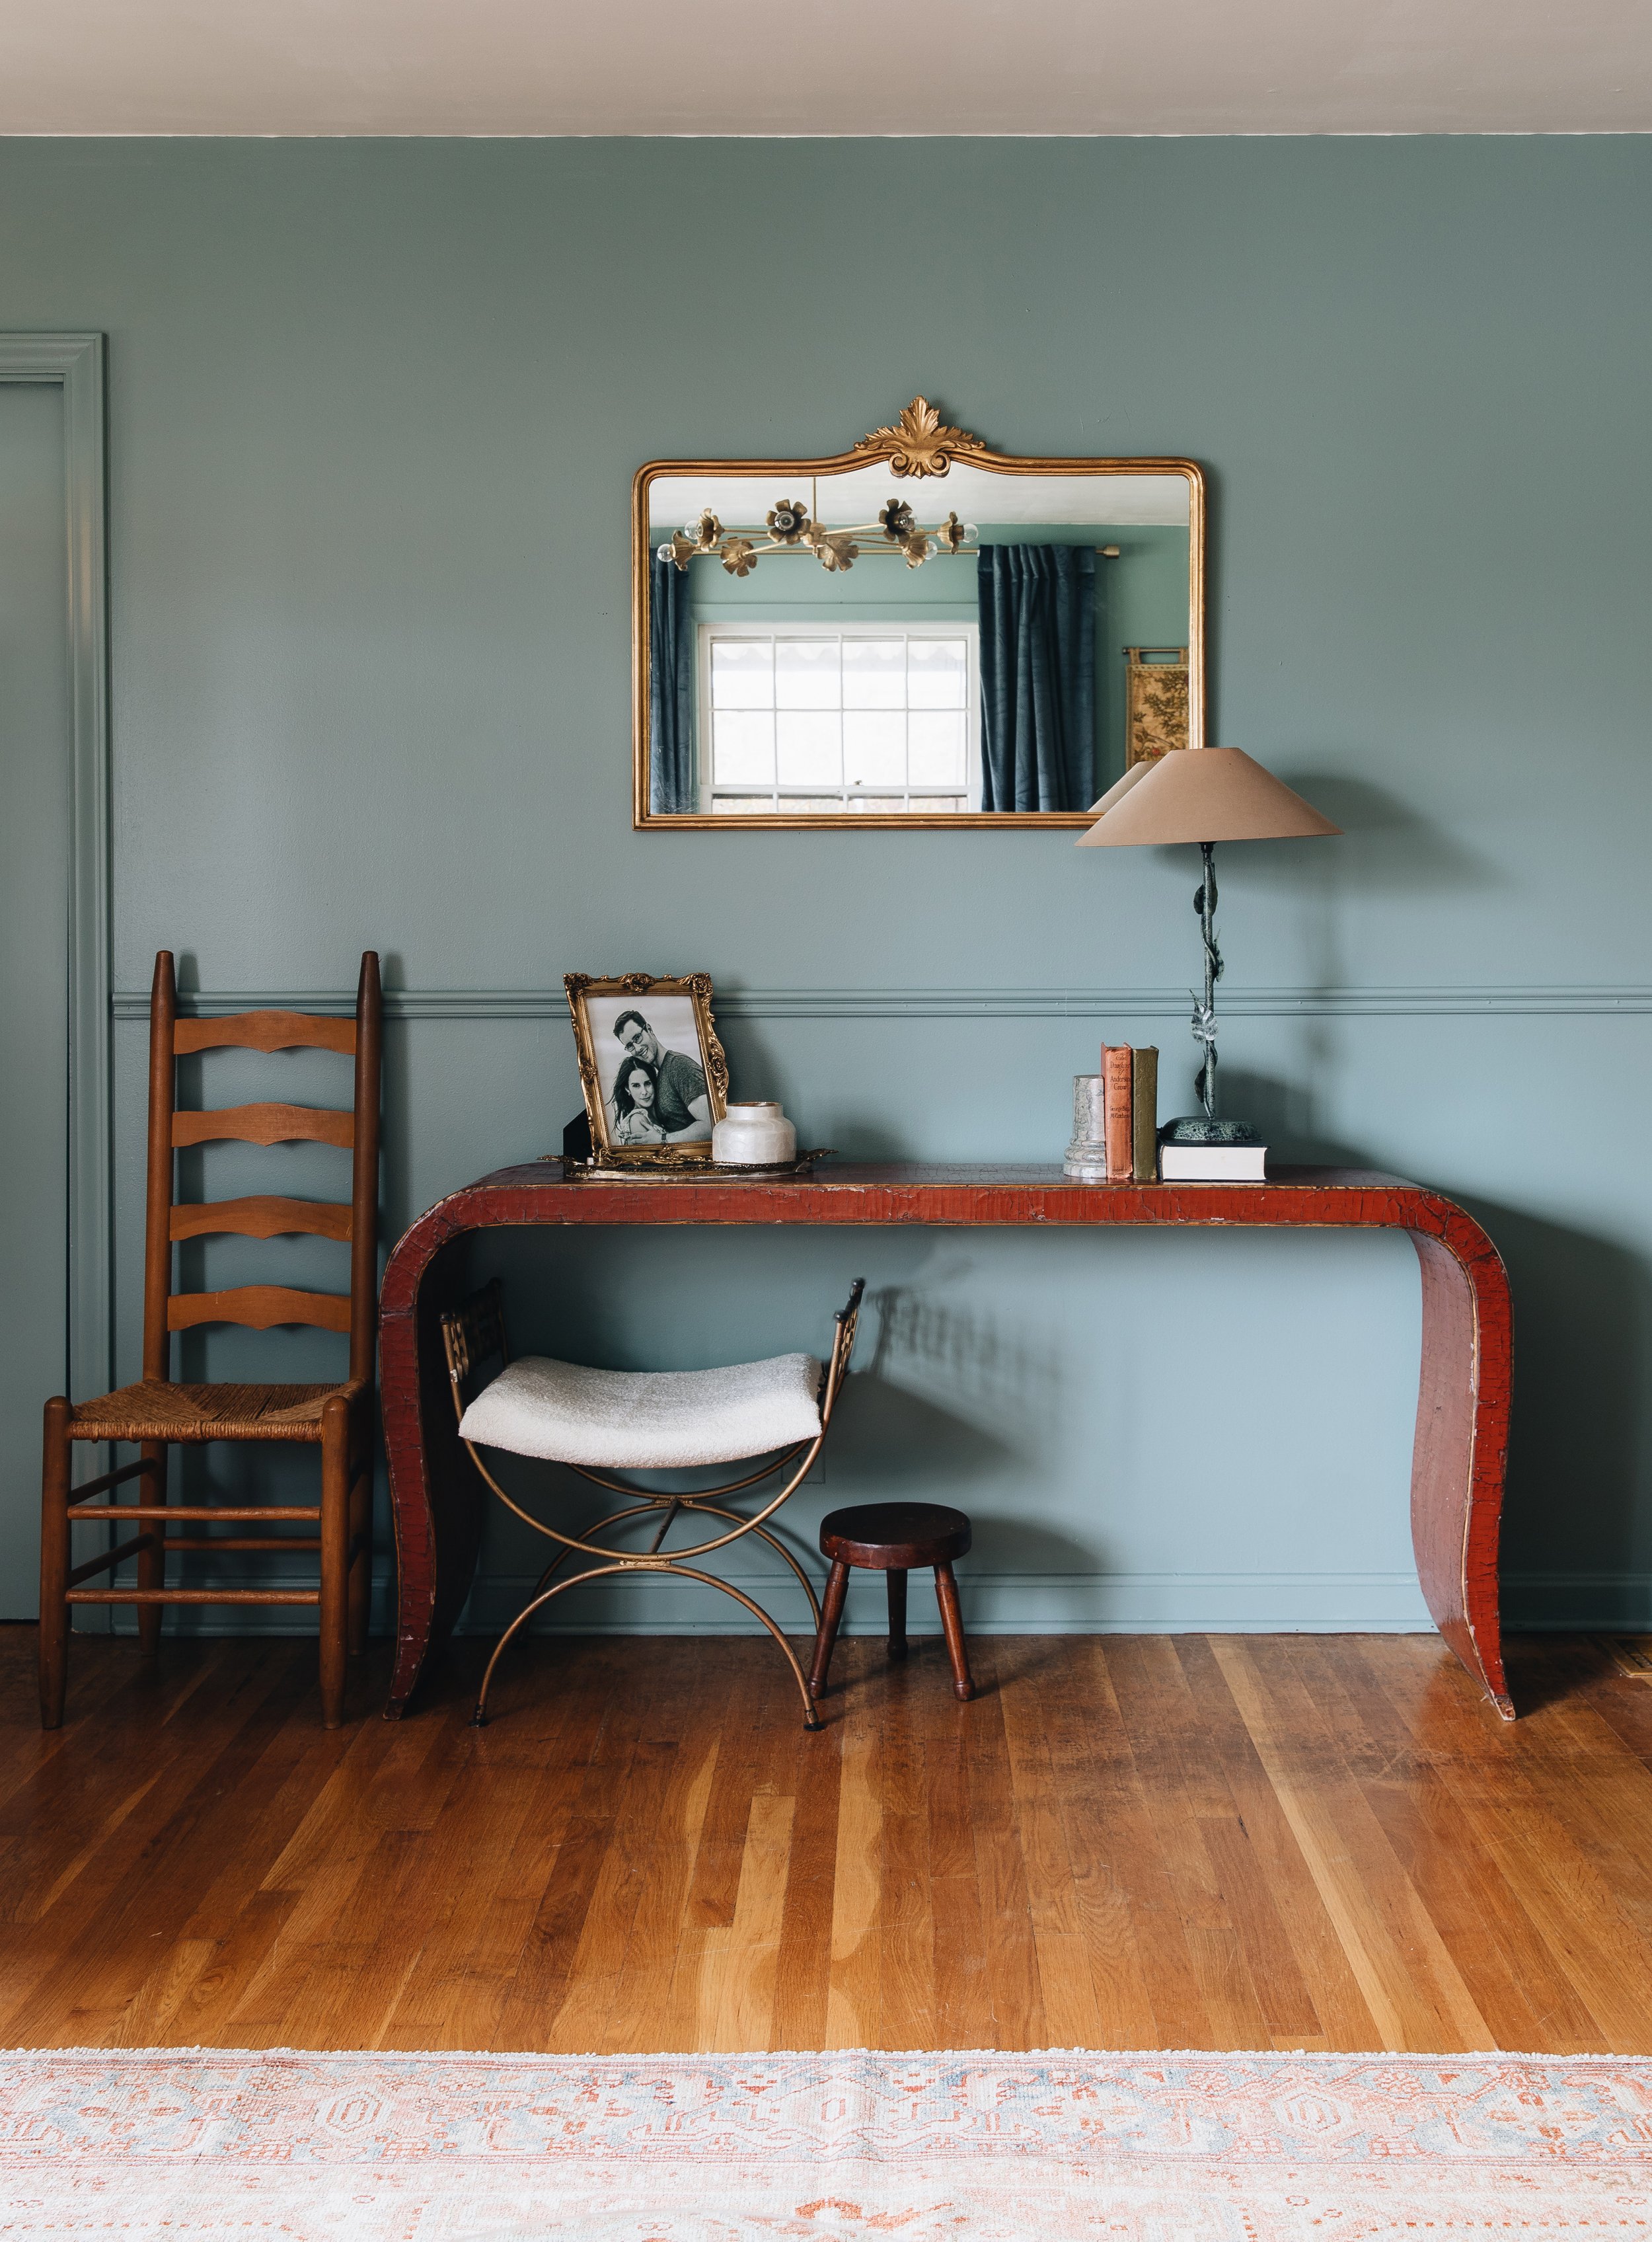
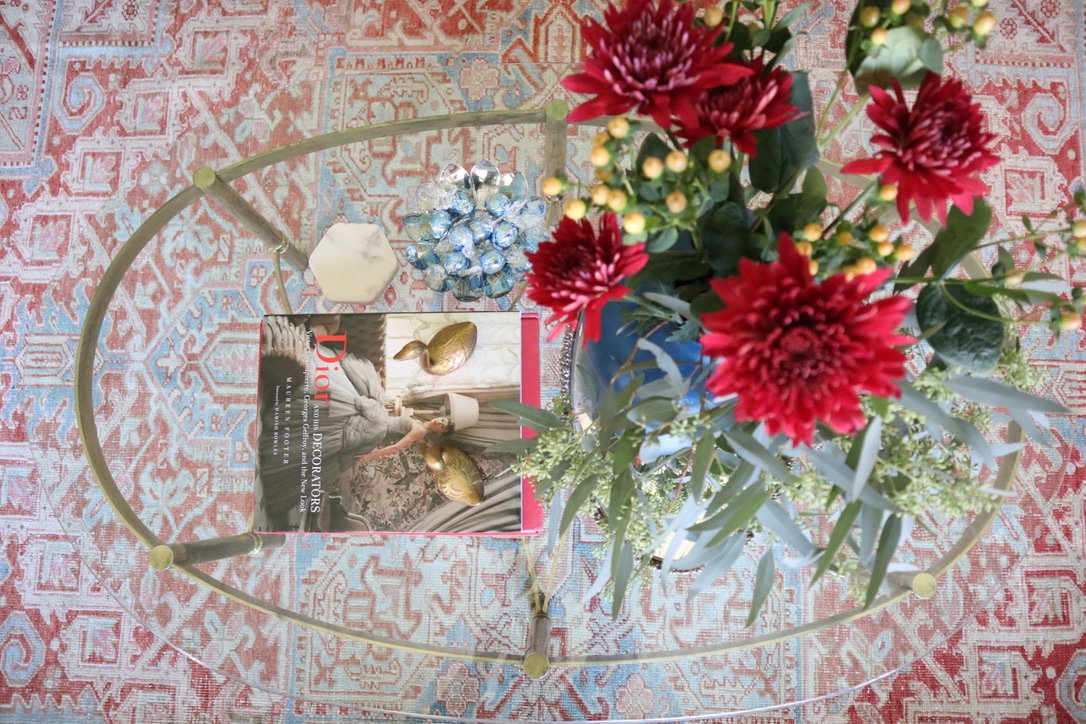
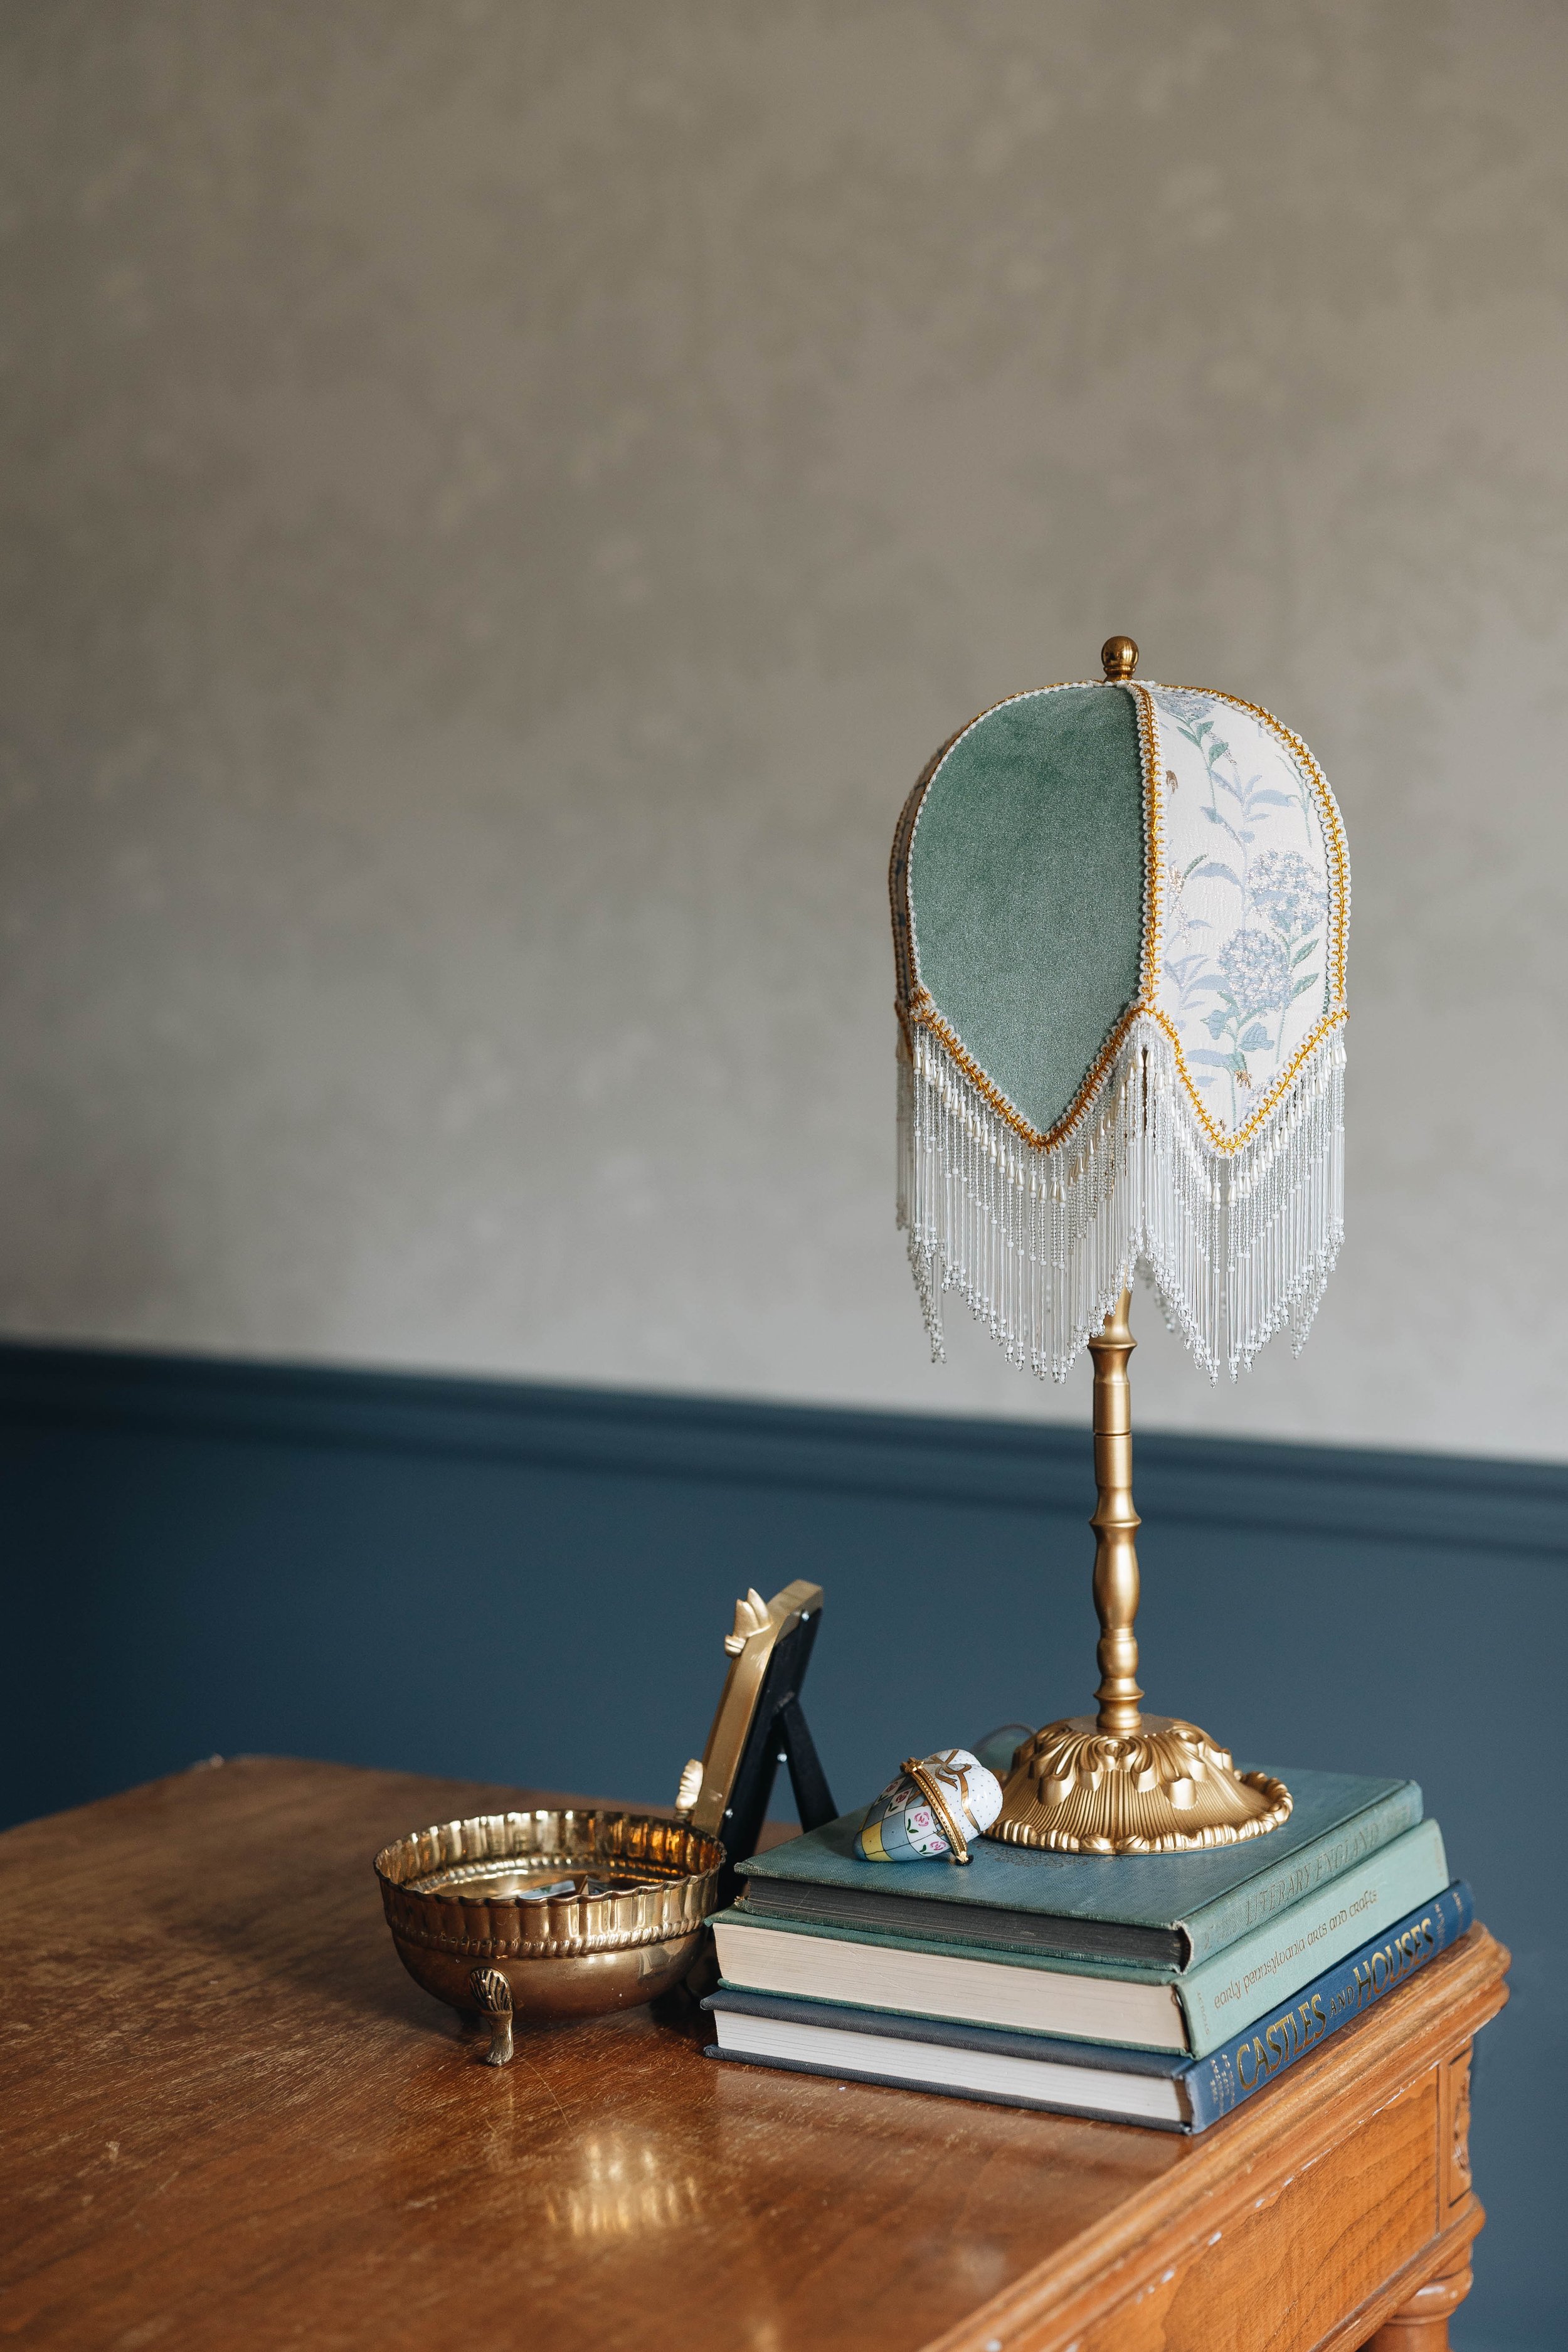
Always add flowers and vintage books.

Mood: This can be tricky to explain. I wanted something classic (meaning it would be difficult to know when it was designed) with a European twist. I wanted layers. Color. Texture. I wanted a balance of light and dark so that it wouldn’t be too moody or too happy- no storm clouds but no unicorns trotting across rainbows either, if that makes sense. HA!

Like I mentioned above, two special details really set the project in motion. I knew that I wanted wallpaper and drapery, so I started by searching for wallpaper on Sandberg’s website (here). Then I hopped over to Pepper Home (shop here) to narrow down fabric choices for the drapery. Once I found a few favorites from each company, I ordered samples (okay, I ordered more than “a few” samples).

Once the samples from Sandberg and Pepper Home arrived, the decision was made pretty quickly. While everything was beautiful, I had a strong favorite combo based on pattern + color. The tones worked well together and the design started taking shape.

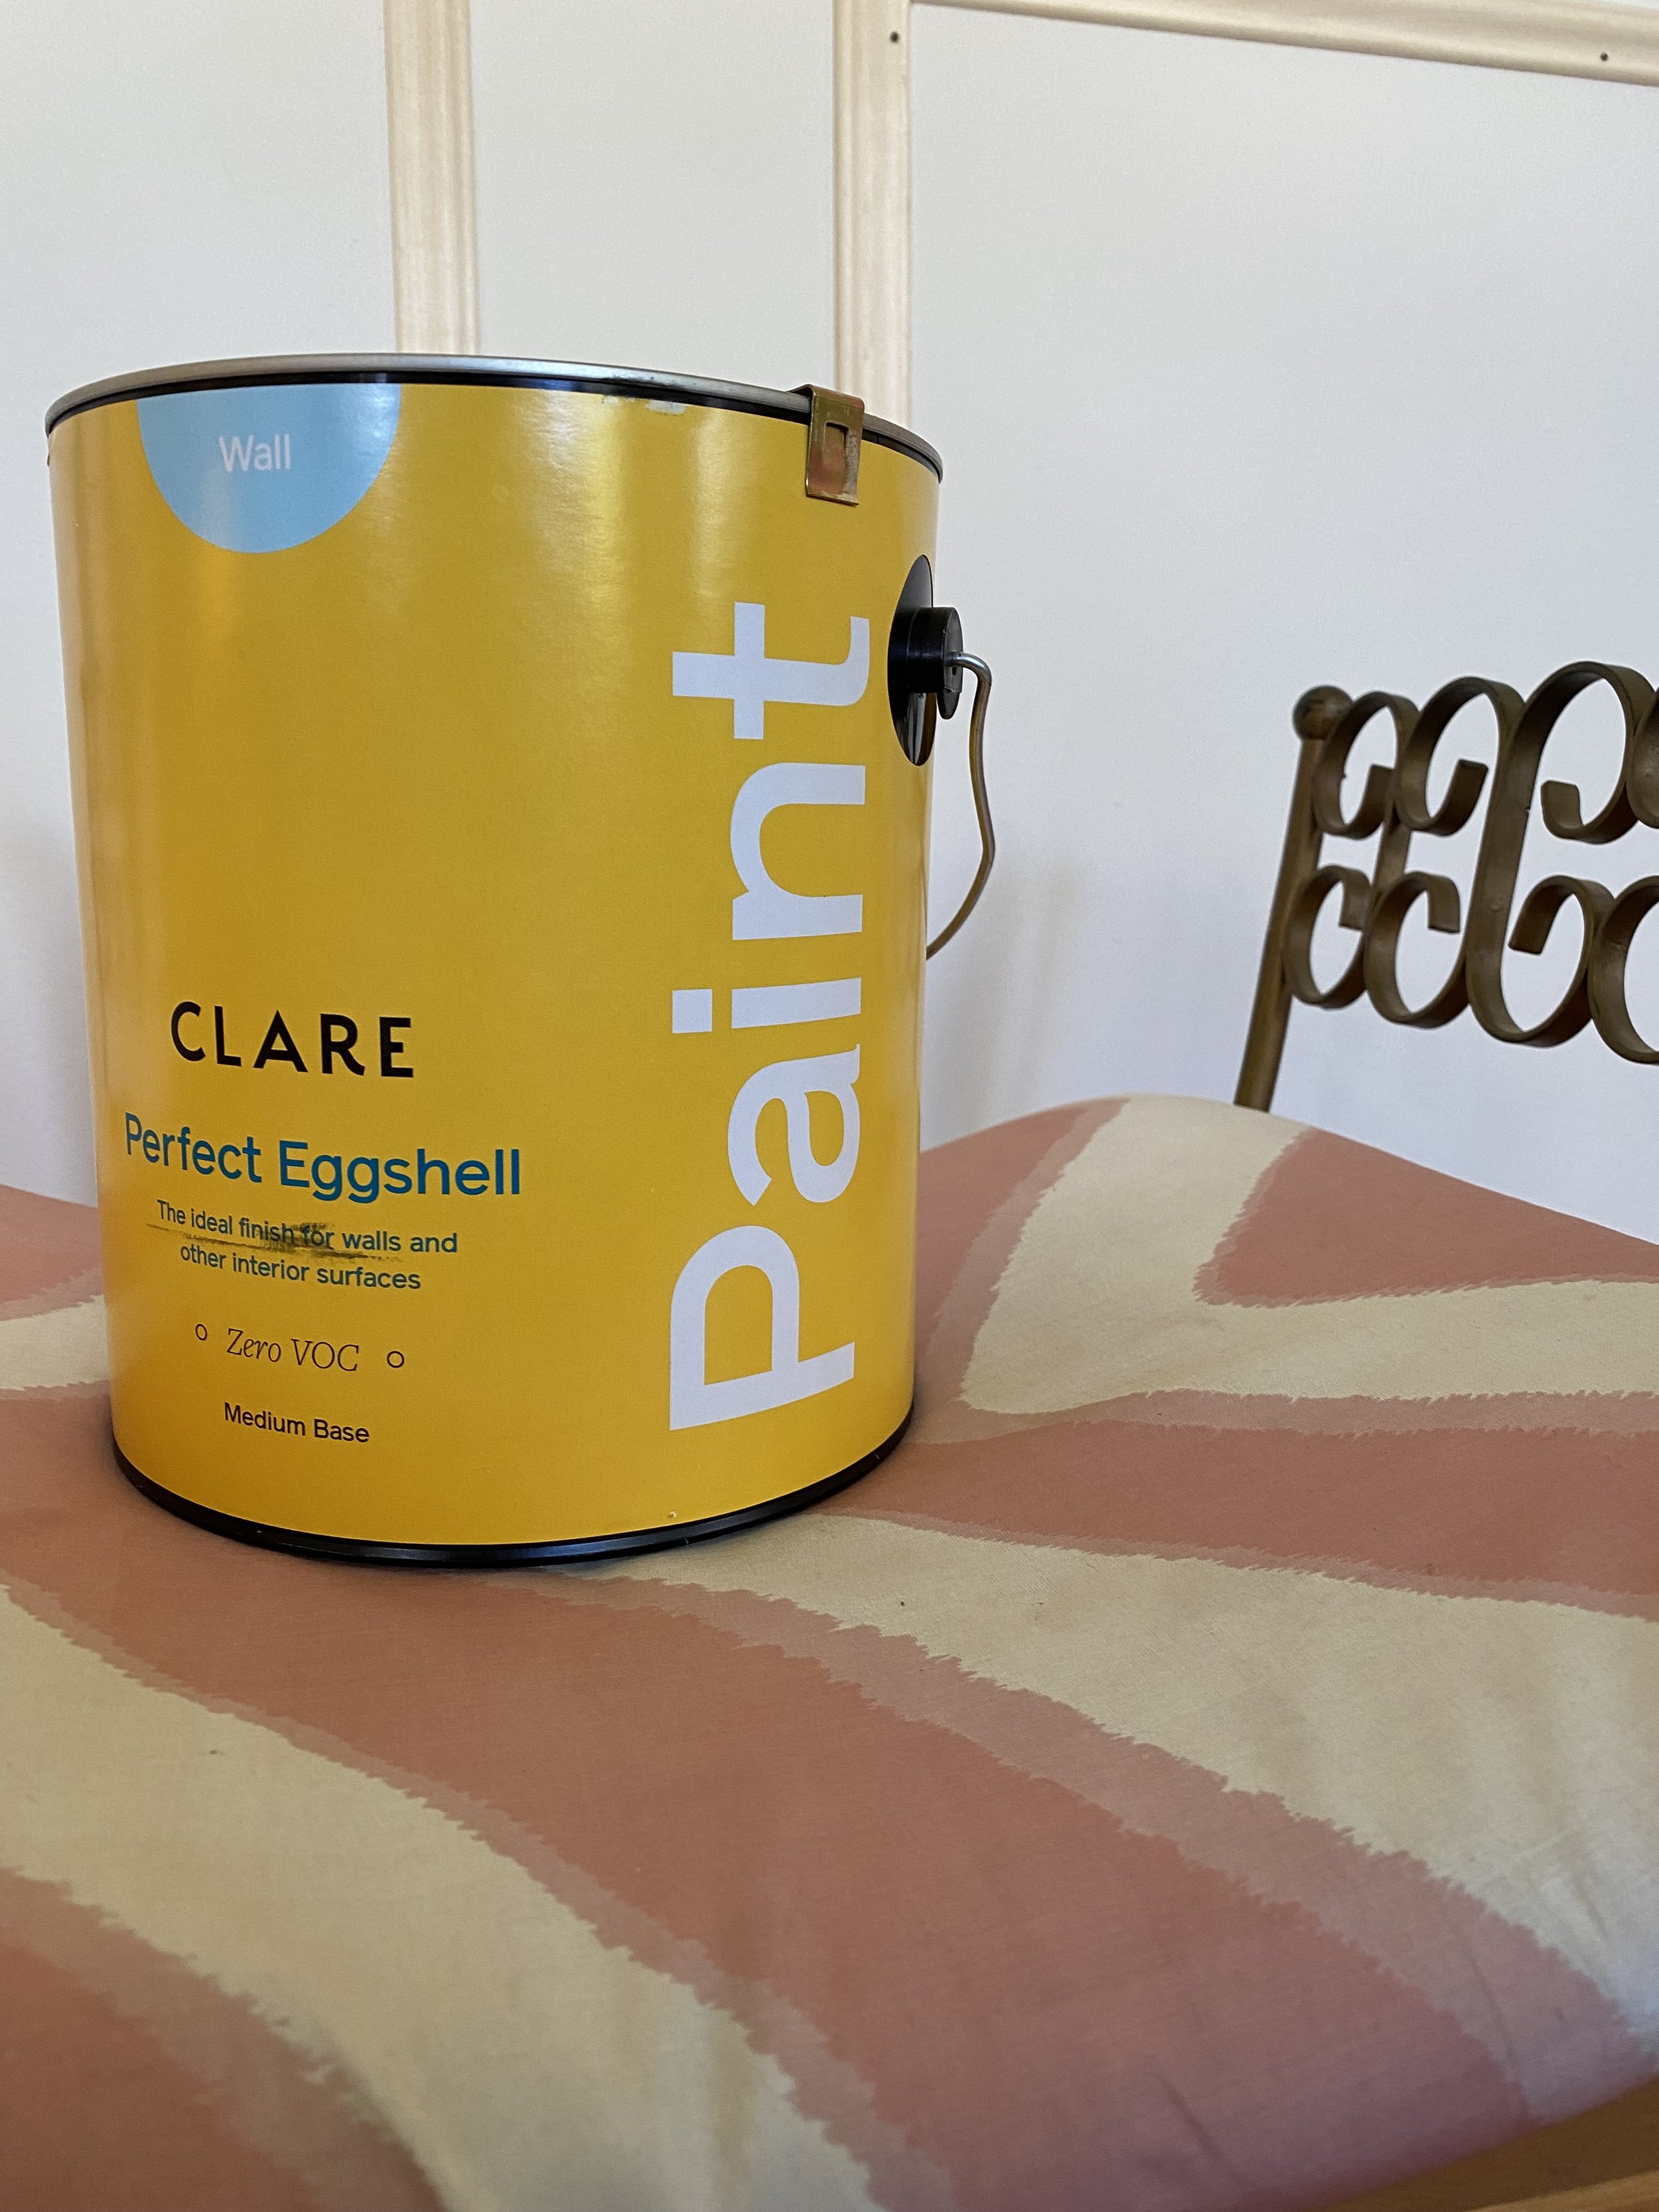
After an epic paint fail, I trudged back into Benjamin Moore for a few more moody blue paint samples (I went moody with the paint because the wallpaper was a much lighter color). I tested the color on all 4 walls and MADE SURE it was the one before painting the whole room (again). A week later, the Sandberg wallpaper was installed and the Pepper Home custom drapery arrived.

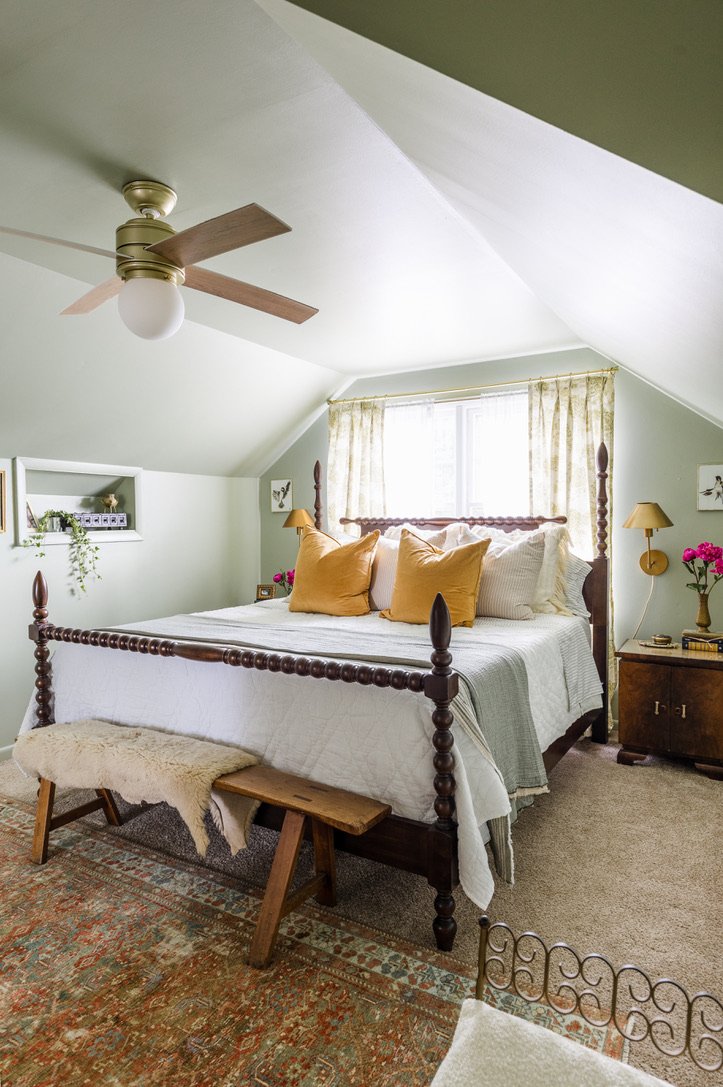
It sure feels like we have come a long way from 90’s beige.

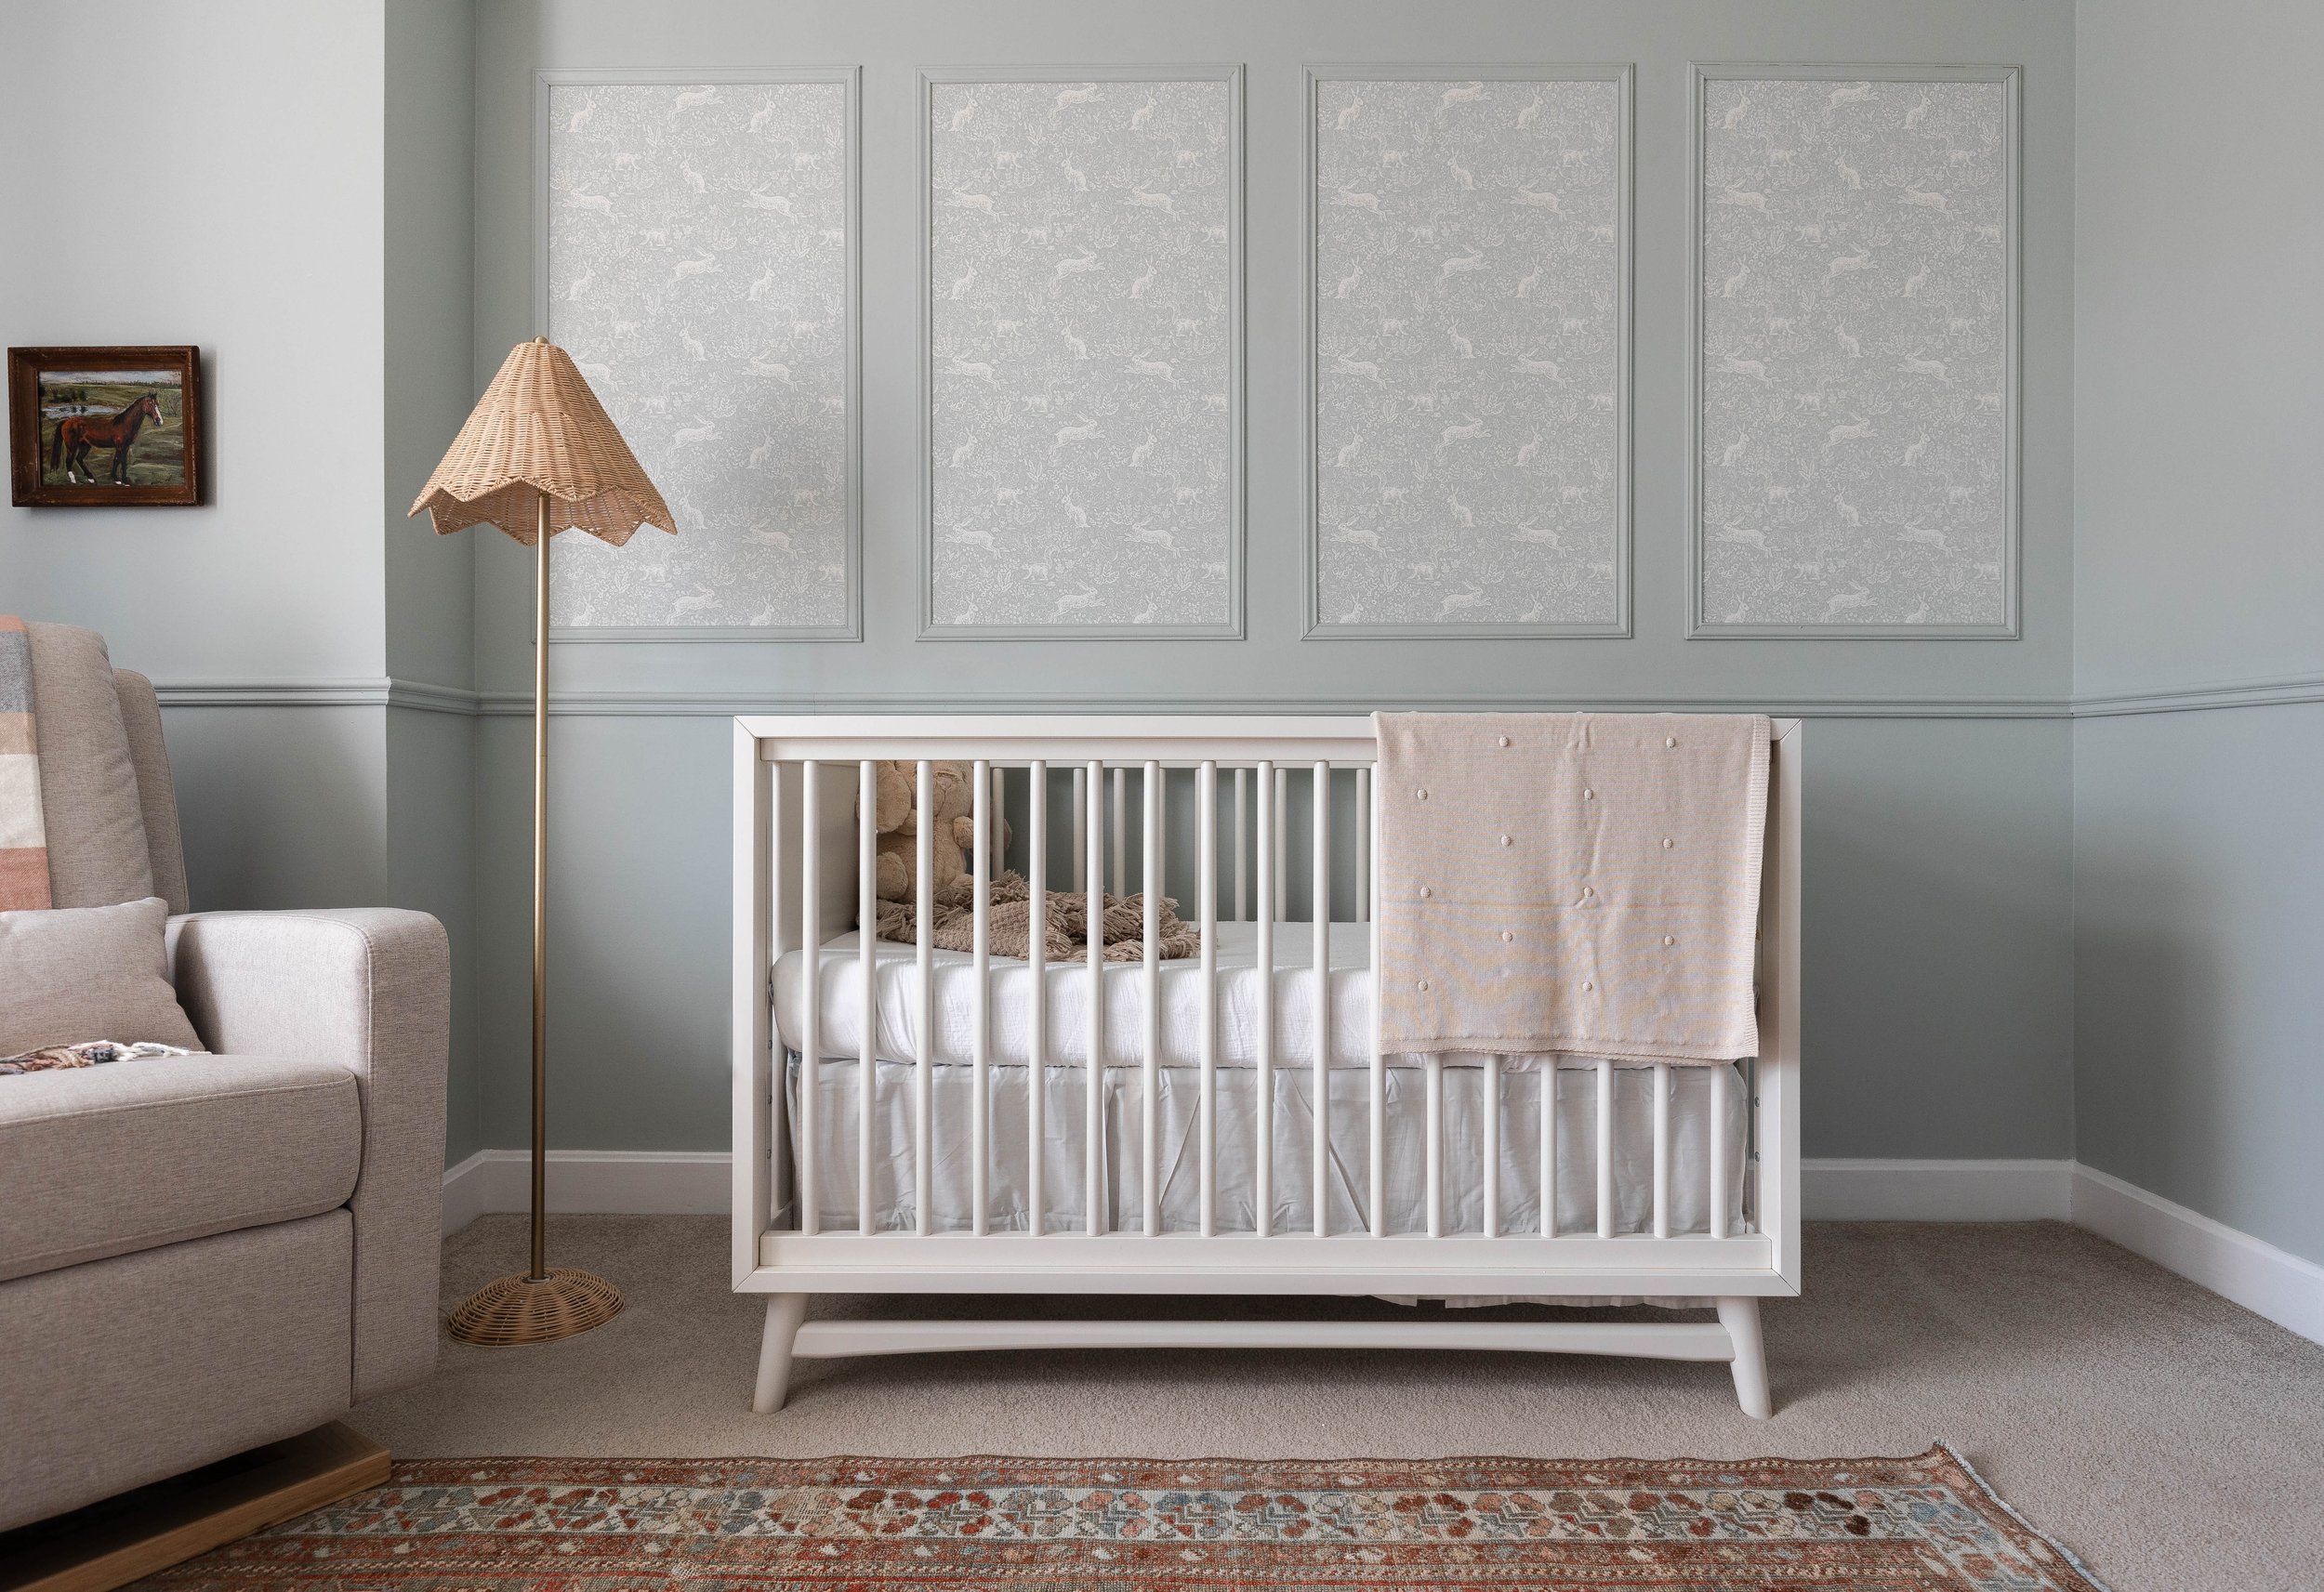
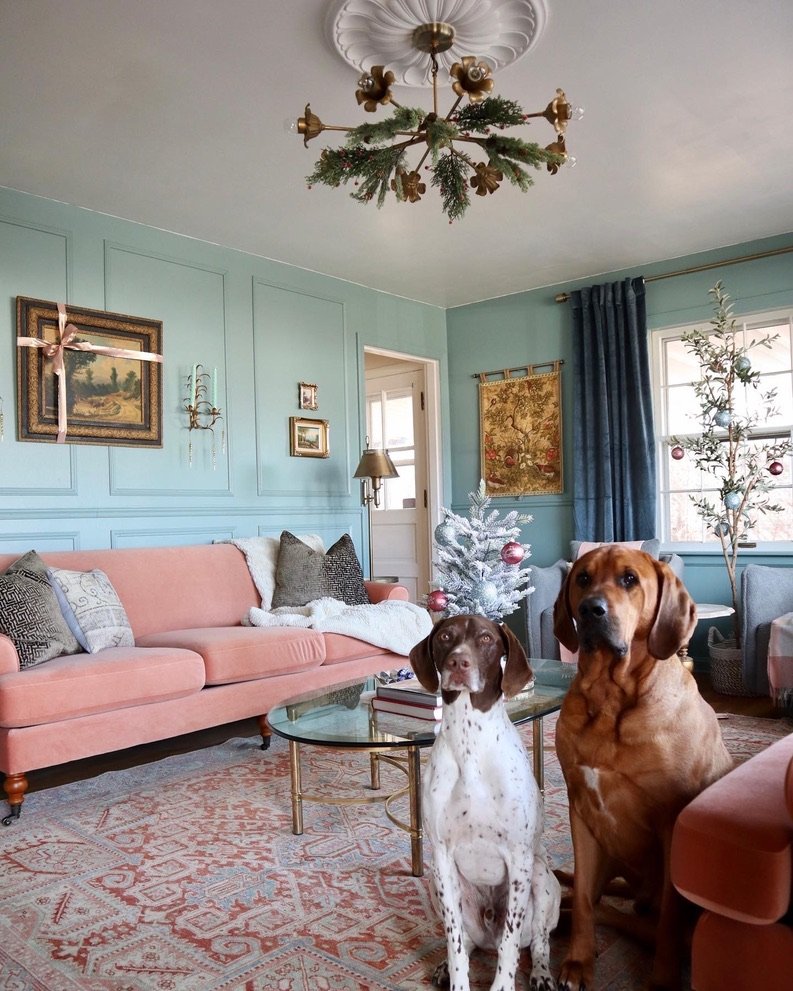
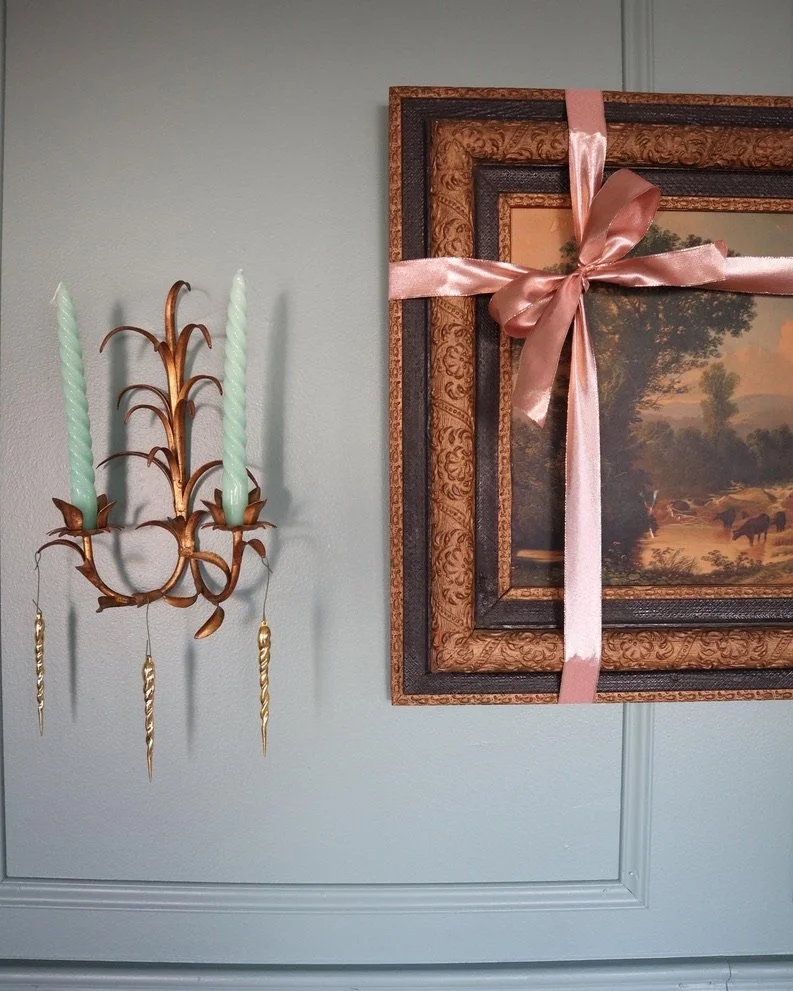
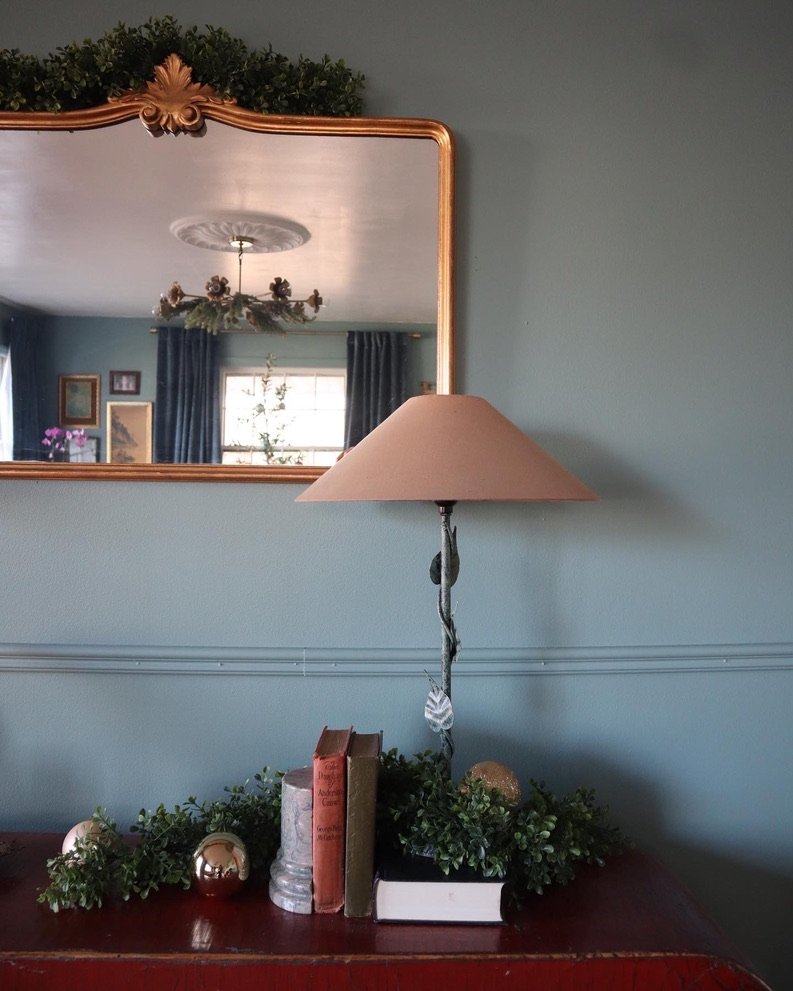
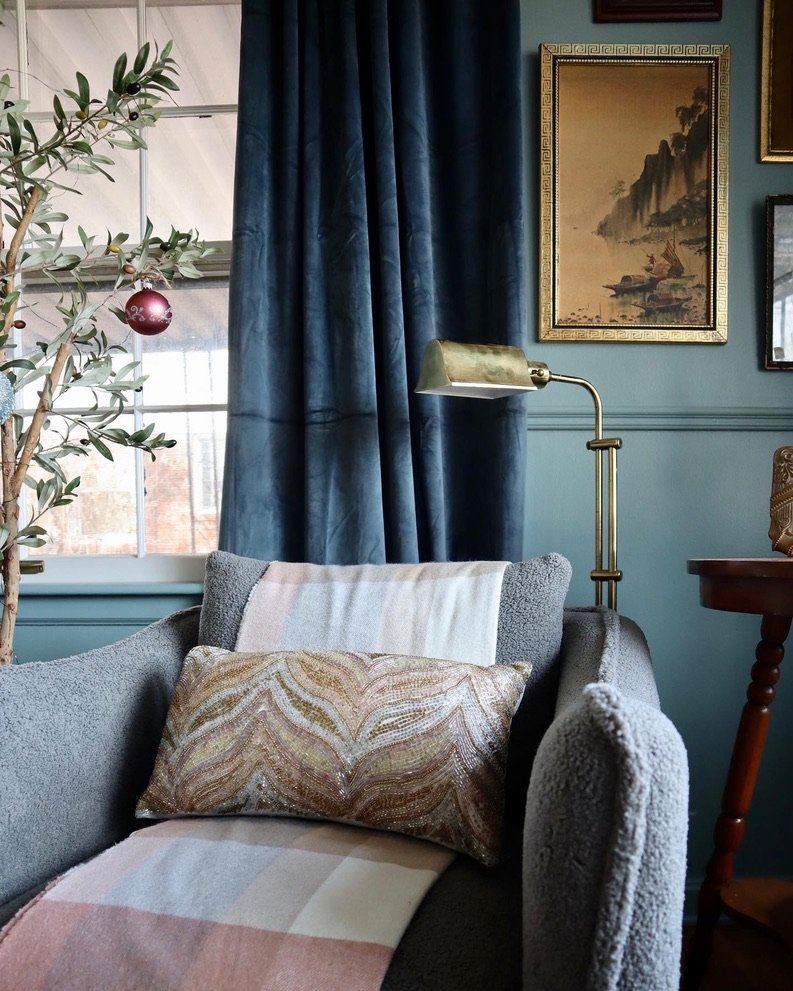
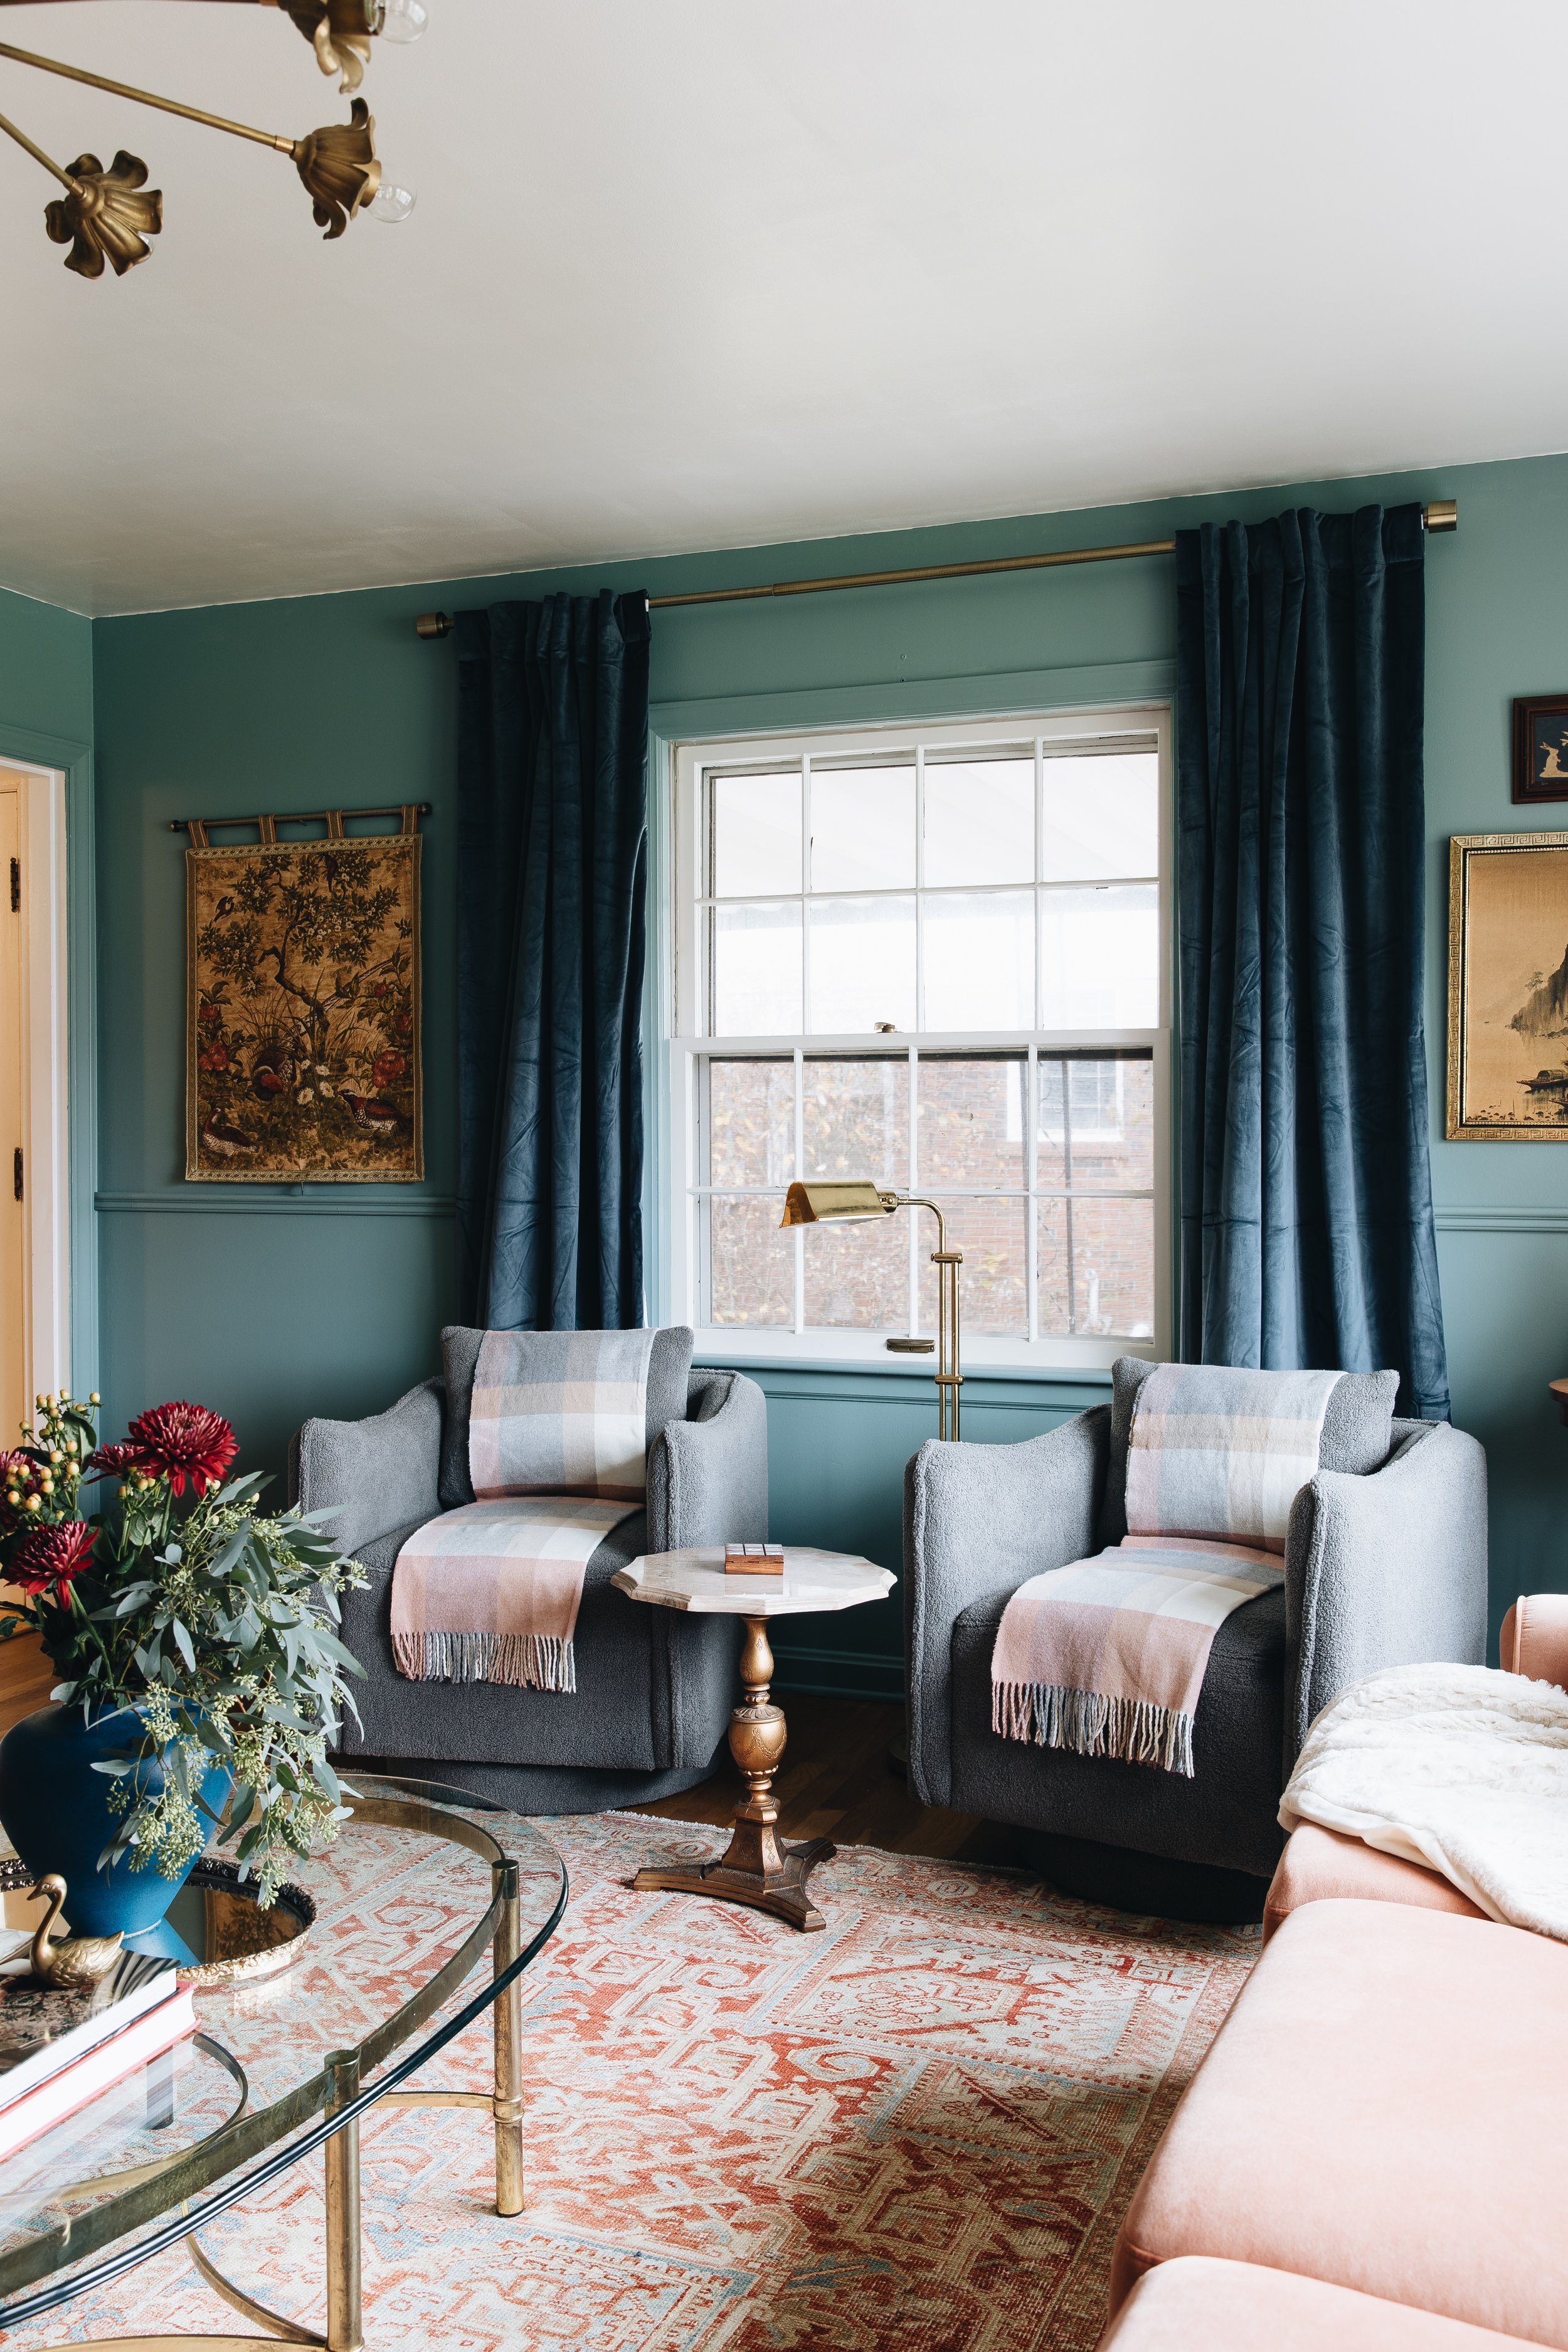
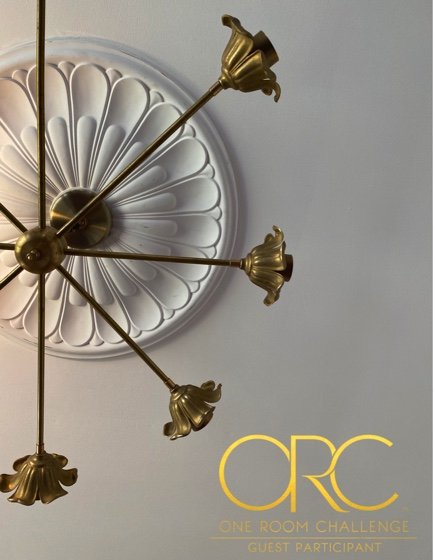
I played around with the layout, trying the desk in a few locations before settling on the final spot. I shopped my home (you’ll recognize the antique French pier mirror) for accessories. I fell in love with the most fantastic upholstered chair and swapped out the light fixture (you’ll recognize her, the Octavia from my blue sitting room project). I stole the rug from Gwen’s nursery, hung a beautiful vintage French tapestry and snuck a few fresh florals in for the photos.

I love how this room turned out- its bright in the morning and early afternoon. It feels like home, and that’s the best feeling. I am enjoying working here on a regular basis and I firmly believe that a well designed space can help inspire your creativity. I hope you enjoy it too.

Source list:

Wallpaper: Sandberg Wallpaper

Custom drapery: Pepper Home

Paint: Benjamin Moore “Normandy”

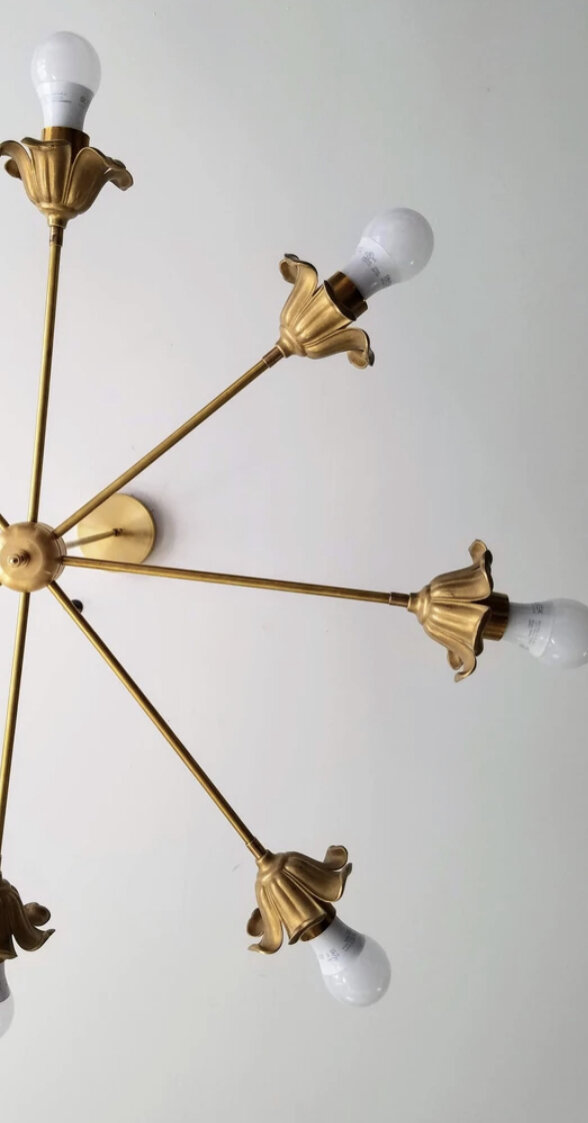
Chandelier: Sazerac Stitches

Fringe lamp: Alcott and Bentley

Medallion: Brechers lighting

Vintage: rug, mirror, desk, hutch, tapestry


XO,

Gretchen

Project Curb Appeal

Gretchen Rose

Let’s talk about Curb Appeal. What does it mean to you? Does your home have it? Is it “almost there” but missing a little something? To me, curb appeal simply means that the home catches your eye when you walk/drive by, standing out from the others around it (in a good way). The exterior of your home is the first thing your guests see, therefore it should reflect the personal style of your interior too.  There are many ways you can enhance your home’s curb appeal and show your own personality! 

Quick Ways to Increase Curb Appeal: 

  • Landscaping

  • Front door (new door altogether or just fresh paint)

  • New front porch lighting

  • Exterior paint

  • Shutters

We recently moved (in case you missed it) from a small, 1950s charming cape cod to a newer, larger brick traditional home (late 1980’s build with a little less of that old world charm). I fell in love with the bay windows, the 2 story brick exterior, the larger lot and the serious potential this home has to be a wonderful family home. 

But. 

It was missing something! 

Here is a before photo: 

As you can see, it is a classic brick 2 story. That said, it was a lot of brown. Brown brick. Brown roof. The lanterns were brown. Even the trim work was a shade of cream (brown). I love a tone-on-tone look, but I wanted a little more contrast to give our new home a bit of personality! 


We started with a new storm door because I love and need natural light. We also swapped out the front porch lanterns from 1989 dingy brown to more updated, yet still traditional, black lanterns (blog post about them linked here). Then I got a new doormat and larger/taller black urns and a few new porch plants! Landscaping is on our list for the spring, but at 9 months pregnant it just isn’t happening right now.

Although the new lighting, storm door, and doormat definitely updated the front porch, the house was still missing something. Fast forward a couple of weeks after move-in and I FINALLY realized what was missing…  SHUTTERS! It really didn’t take too long to convince Jordan of this either. I did a “mock up” of sorts to show him and he quickly agreed that adding shutters would improve the look of the exterior. 

Here’s the mock up I showed him:

We plan to work on the landscaping in the spring :)

All About the Shutters: 

Shutters, to me, are like jewelry for your house. They add personality (and curb appeal). Let’s talk about the process!

Step One: Shutter Shopping

This part didn’t take long. Here are some things to consider when shopping for shutters: 

  • Shutter style

  • Shutter color

  • Shutter material

  • Shutter size

Lincoln makes for a good desk!

I knew I wanted black vinyl shutters (less maintenance for vinyl, and black to tie into the black front door & lanterns). Additionally, I wanted an arch top style shutter to compliment the brick arches over the windows. I love Board and Batten shutters because they remind me of the English countryside- and if we ever lime wash the exterior, this style will look equally beautiful with that too! 

I went straight to lowes.com website and started my search. You can quickly filter shutters by color, style, and material, so it didn’t take long to find the Vantage Shutters Black Board and Batten Vinyl (with Arch Top) shutters (linked here). The best part was how affordable they were- some styles were well under $100 per pair!  They came in SO MANY sizes too- our windows are relatively tall so I was a little worried it would cause an issue with finding shutters but it worked out perfectly (they do offer custom sizes if you need that service). Lincoln even helped me shop! 

Okay, so you found the shutters you want. What’s the next step? Measuring! 

Step Two: Measuring

I didn’t really know where to start for this step. I am a classic “over thinker” - while I knew approximately how I wanted the shutters to look on the house, I didn’t want to order them in the wrong size! Thankfully, Vantage offers a guide for this exact reason. This is the guide that I used:

Since I opted for the arch top style shutter, I needed to measure all the way to the top of the arch.

Don’t forget to measure width too!

Step Three: Ordering

Once you have your shutter style chosen, and your measurements, it’s as easy as “add to cart”. Unless you have a custom window size - then I recommend going into Lowe’s and talking with a Lowe’s customer service professional in the window/doors department. 

Add to cart

We have 7 windows to order shutters for! 2 on garage, and 5 across the second story.

Step Four: Delivery & Installation

Shipping for our shutters (we had 7 total windows, so 14 shutters) took about a week, which seemed really quick to me! If you had a custom order, keep in mind it would likely take more time. The shutters arrived safe and undamaged, on a large pallet that we stored in garage until the install date. 

Since these are vinyl, they don’t weigh much at all - YAY!

Pure excitement to see these beautiful shutters!

Installation of the shutters was relatively quick and easy too! Our main concern was logistics- accessing the shutters over the bay windows. We knew regular scaffolding or ladder wouldn’t work (bay window would be in the way), so we decided to use two ladders, two ladder jacks, and a platform setup. Once we figured out our method of approach, it was time to get started! 

Very few tools are required for this!

Tools you will need: 

  • Drill (and appropriate bits for your siding material- i.e. brick, wood siding, vinyl, stone etc.)

  • Level

  • Tape measure

  • Pencil

  • Mallet

  • Work surface (we used two collapsible sawhorses from our local Lowe’s (sawhorses linked here) and a piece of plywood).

I double checked (okay triple) to make sure everything was level before we started drilling into the brick!

Time to drill

Install: 

  • Hold shutter up against house to mark where you want it (based on measurements and correct shutter placement diagram above). Mark on the shutters with a pencil where you will pre-drill holes. For shutter heights over 47”, installation guide recommends using 6 fasteners per shutter as opposed to 4. All of our shutters ended up being 55” or taller so we used 6 fasteners for each shutter.

  • Pre-drill holes in shutters

  • Hold shutter up against house again and take a pencil to mark where the holes need to go in the masonry.

  • Drill hole(s) in masonry.

  • Install shutter using provided fasteners and a mallet- start off slow until you make sure the fastener is in the hole!

  • TIPS:

    1. It really helps to have a partner for install - especially when you are using ladders!

    2. Make sure to wear eye protection when drilling (the masonry created a bit of dust).

    3. Wipe off the shutter after pre-drilling holes (before installing it) as this also creates a bit of dust.

Having a partner is necessary to help hold shutter still!

Tap the provided plastic fasteners in!

That is literally all there is to it- it was SO EASY. My friend John helped me install the shutters that required a ladder for access since I can’t be climbing on 20’ ladders right now haha! I even took the dogs for a short walk at one point and by the time I came back he had another whole set done (so like 10-15 minutes?!?). The most time consuming part of everything was moving the ladders around! 

Who’s faster: Pregnant Gretchen taking her dogs on a walk or John installing shutters?

Answer: John was faster!

But seriously… check out those beauties! They are exactly what this house needed!

The face of a girl who cannot contain her obsession with how the shutters look!


So, what do you think? We absolutely love how the shutters turned out, and I get excited again every time I pull in the driveway. Our neighbors love them too- they have stopped us to tell us that anytime we are out walking the dogs or in front of the house. Now I am even more excited and proud to invite guests over, and decorate for the holidays. Can’t you just picture wreaths in the windows now?!? 

We are looking forward

to family holiday photos on this porch now!

Oh, and we are VERY MUCH looking forward to holiday family photos on the front porch with our newborn (who will be joining us at any time- squeal). 

Thank you again to Vantage Shutters and Lowe’s Home Improvement for partnering with us on our Project Curb Appeal! 

PHOTO CREDIT: Nathan of Fusion Photography in Louisville Kentucky

Sincerely,

Gretchen, Jordan, Maker, Lincoln and Baby Rose (coming soon)

Our Nursery Reveal

Gretchen Rose

I honestly cannot believe how blessed we are to be here and for me to be writing a blog post about a nursery- OUR NURSERY. At 35 weeks pregnant today, we are getting closer and closer to meeting our baby Rose (boy or girl, we will find out soon enough). For the last several years, I have dreamed about how I would design a nursery and the time is finally here to share this special space with you all. Many pieces that I incorporated have stories and meaning, which makes it all the more special.

Where to start with nursery design… I suppose a crib and glider are a good starting point! I did quite a bit of research looking for the perfect crib and chair style/color/size/safety etc. For example, Jordan is 6’4 and we needed a chair with a high enough back for him to sit comfortably for long periods of time. We wanted some cushion under our arms when feeding & holding the baby. I also didn’t want stark white upholstery, primarily for stain disguising reasons! For the crib, I wanted something simple that wouldn’t compete with other design elements. I ran across the brand Babyletto (on Instagram from another blogger) and took a deep dive into their products- it was the perfect fit for us!

What we chose: The Sigi Recliner in Beach (shop here) had a tall back and some cushion on the arms, and the Peggy crib in warm white (shop here) was the perfect simple and classic style. Once our order was placed, the pieces were delivered within 2 weeks (UNHEARD OF RIGHT NOW) and were packaged very well- so they weren’t damaged at all! The chair was easy to assemble (slide the back into place) and the crib took us about an hour to put together (no fights were had during the making of the bed haha).

Moving on to some of the design elements:

I knew I wanted wallpaper. I have loved the “Fable” wallpaper from Rifle for a long time, and I found it well stocked on York Wallcoverings site (shop here). I selected the mineral color, which has a blue green tone.

Since I wanted a classic, sophisticated, gender neutral nursery, picture molding was a no-brainer. I already knew how to measure, cut, and install picture molding thanks to my first One Room Challenge so it didn’t take too long to complete in the nursery. I installed chair railing around the entire room and picture molding above the chair rail on the crib wall.

Lighting: If you have followed me for a little while, you will know I love supporting local business. As a small business owner myself, I know what every sale means and when possible, I choose to keep my business small and local! That said, Alcott & Bentley was my first and only stop for nursery lighting. I also snagged a ceiling medallion while there. The light fixture we selected wasn’t too masculine or feminine, plus it is semi-flush so that means Jordan won’t have to duck walking under it (safety first, folks). Shop the Alana Flush Mount here. The linen shade with scallop detailing is just dreamy. I selected the Eryn Ceiling Medallion (here) to pair with the light fixture. The Eryn was a good gender neutral style- not too floral yet not too modern either! The perfect finishing touch for the look I was going for.

Art and Decor Pieces:

You may recognize the paintings- all three of them (the horse, the fox, and the landscape scene) were done by my local friend & artist Marty. The horse is actually a painting of my horse Missi and the landscape is of Maker and Lincoln on my parents farm! The fox was just because I had to have a fox. Ha! Marty did such a wonderful job and these three meaningful pieces are absolutely perfect for our nursery.

The green trunk: this was my grandfather’s military trunk. His name is stamped on the top of it- I never met my grandfather as he past away years before I was born. It feels really special to have an heirloom such as this in our home.

The crochet blanket under the stuffed toys: Jordan’s Granny made this blanket years ago and has since passed on. I have held onto it for a few years, unsure of the best way to display it. This just feels right.

The rocking horse is from my great Aunt- it was technically my older cousin’s kids’ rocking horse so we have it on “loan”- it sings, swishes it’s tail, and scares Maker to death haha!

The wooden horse hook: Although I probably won’t be “planning baby’s outfits” the night before, this little wooden and iron horse hook does make for a cute way to display the cuter outfits! This was a gift from one of my aunts when I graduated from the University of Kentucky with my first bachelor’s in Equine Science.

Framed prints: We framed one of our nursery invitations, as well as two different maternity photoshoot pictures. Jordan and I will cherish the photos of us together at the Parklands and we can’t praise Jessie enough (site here). The one of Maker + Me melts me every time! Photo by Leslie Rodriguez (website here).

I think that about covers it- our gender neutral, classic, sophisticated with a touch of vintage nursery is complete. We cannot thank Babyletto enough for partnering with us for this project! Now for the fun part- enjoying the nursery while anxiously waiting Baby Rose’s arrival.

An extra special thank you to Kate Lang of Lang Thomas Interiors (site here) for capturing these photos.


XO,

Gretchen, Jordan, Maker, Lincoln & Baby Rose

Powder Bath Refresh

Gretchen Rose

We moved in to the new (to us) house about 9 weeks ago! I knew it was going to be a “project house” - what else would you expect? Sure, you can purchase a home that has been totally updated, but you will certainly pay a pretty penny for that. Additionally, I know myself. No matter what, I knew I would want to change a few things to make it feel more like ME!

There is admittedly an extensive project list. Some of them are purely aesthetic, some are due to years of deferred maintenance by the previous owners. The very FIRST project I wanted to tackle was the main floor powder bath. Why? Because it was just blah. It is also a small space, so I knew it was something that I could realistically accomplish before baby Rose arrives, plus it is a space that literally every single guest sees when they visit!

The before (from real estate listing). Nothing offensive about it, just nothing exciting either.

Where we started: Original. Original everything from 1989. Beige walls, massive mirror with no character, original faucet (the exact same faucet that is in EVERY bathroom) and light fixture (also the same in every bathroom, straight outta 1989). So, you could say it was a true blank slate!

My plan: Budget friendly update. Of course a new vanity would be awesome, toilet etc. However, the vanity is functional. It is actually decent quality and was built in when the home was constructed so there is a good amount of storage for such a small powder bath. The countertop is a cream stone so it “works” well enough. I knew I wanted to update the fixtures, mirror, lighting, paint color, and add a bit of personality with some fun wallpaper.

What I did: I first swapped out the original faucet for a more updated, matte black widespread faucet from Pfister- the Penn 2 Handle 8” Widespread faucet. This was the first piece I selected for the space and set the tone for how it would eventually pull together. We also opted to install the matching Penn paper holder and towel ring to complete the look (paper holder here and towel ring here).

Next I started shopping online for wallpaper! I knew I wanted to use something with some green in it, and I started with my favorite wallpaper company York Wallcoverings (here). They carry a variety of wallpaper brands, colors, and patterns- plus they have peel and stick options if you want to go that route! I opted for a pattern that wasn’t offered in the peel and stick style, so I ended up hiring someone to install this (pregnant Gretchen has no business on a ladder). Although there were several wallpapers I seriously considered, I finally landed on the Orchard Wallpaper in Beige (shop here). I honestly am obsessed with this paper and it really brings the powder bath to life!

On to the paint color- anything but boring creamy white please. I shopped Clare paint colors online and ordered a few paint swatches to see which complimented the wallpaper the most! Thankfully I checked, because the one I thought I would select wasn’t what I ended up with! I narrowed it down to Extra Virgin and Views, and Views ultimately won out in the end!

Signature Hardware brass pulls. Vintage rug from yours truly.

On to the details- light fixture, mirror, and cabinet hardware. I found lots of vanity lights that were unique and gorgeous- but I ended up choosing a classic option that wouldn’t compete with the wallpaper. I found this one on Overstock for under $100! Shop the Rossington Aged Brass 2 light vanity light here. I especially love the shades- they’re a milky white glass, and just read very timeless to me. For the mirror I just went with one that I had already! I found it on facebook marketplace and it added something more organic in shape/less linear in the space. For the cabinet hardware I wanted to stay within the 3” measurement as that was what the existing holes were spaced for. I found 2 pretty pulls (here) from Signature Hardware that worked perfectly!

Finally, lets talk about the gorgeous Victorian Lady with the Butterfly Face artwork! I was recently shopping Alcott and Bentley for lighting for other projects and this painting stopped me in my tracks. She had ALL of the colors of the wallpaper, and the modern black frame to tie in with the matte black Penn Fixtures from Pfister! She was absolutely perfect and I couldn’t leave without her. Over the toilet she went! HA!

THE RESULT:

I love how the powder bath refresh turned out. She is a little eclectic, a little classic, a touch of modern- and most of all, she feels lively and full of personality! What do you think?

As always, thanks for stopping by. Stay tuned for several more budget friendly updates to come, as well as the full Baby Rose nursery reveal!

xo,

Gretchen

Updating our Front Porch with Wayfair!

Gretchen Rose

For the front porch update I have been lucky enough to partner with Wayfair! Read on to see what I selected for the porch.

One of the first things on my project list for this house was updating the front porch lighting. I am ALL ABOUT vintage- but unfortunately not the 1989 exterior lantern variety. The existing lights were bronze, blended into the rose toned brick, and were overall lackluster. I wanted something with some presence to match the scale of our front door!

Before: see how the lights disappear against the brick?

When starting my search for exterior lighting (first timer here) I wasn’t even sure what size to get. The existing lights seemed too small, but when I taped out much larger options they looked way too big! I’m going to share a photo of the original lights- you can see how much of the fixture is actual “light/glass” versus how much is scrollwork details etc (that just disappeared against the brick). Turns out, the overall dimensions of the existing fixtures worked perfectly for the front of the house- they just looked too small since the glass portion was about 70% of the overall height. I strongly recommend taping out a few different sizes so that you get it right the first time!

These were around 22” tall, 3” of detailing below the glass portion and 7” above the glass portion = appearance of being too small.

Time to Shop: I wanted to find a relatively traditional and classic option to replace these bad boys- and I knew I wanted black. Wayfair has always been a go-to for lighting and decor, so I went straight to Wayfair and typed in “exterior lantern sconce” in the search bar to get started. You can easily apply filters (color, dimensions, price range etc.) to narrow down your search!

I came up with a few favorites and added them all to my cart so that I wouldn’t “lose them”- that is when I started taping out dimensions on the brick. This step truly made the decision for me! Although Wayfair had several beautiful options that would work style wise, one was certainly the stand out winner thanks to the dimensions. I selected the “Sona Black Aluminum Wall Light” (here) which holds 3 bulbs and is 24” tall.

This is the Sona Aluminum Wall Light that I selected for our front porch! Linked here.

Some of my other favorites:

  1. Crawley Aluminum Wall Light here. Ideal if you are looking for a lantern around 21” tall.

  2. Alondra Wall Light here. This comes in 16” and 18” if you need a shorter option!

  3. Wym Wall Light here. This is another classic look, but doesn’t have the scroll work at the top in case you want a more minimalist look.

Once the lights arrived, my uncle came to help us install them (pregnant Gretchen has no business on a ladder). My uncle is a contractor in my hometown so I have entrusted him on MANY projects around the house! I feel lucky to have him!

We love the 3 lights- they provide so much lighting at night!

closeup

Once the lights were installed, I was motivated to make the front porch more inviting. My uncle installed a storm door (yay natural light) and a brass kickplate. Then we grabbed a couple of urns and plants from a local nursery, a new doormat, and ta-da! Welcome to the Rose Home!

New lights!!!

We liked our front porch before, but we absolutely love it now. It is more welcoming, offers more curb appeal and just feels like home. It is hard to believe we will be standing on this porch in just a month or so with our new baby! Christmas photos, anyone?!?!

I want to send a huge THANK YOU to Wayfair for making this update possible- a new home and baby on the way means lots of projects and we truly appreciate the opportunity to work with Wayfair on this front porch project! Stay tuned for the rest of the exterior update!

xo,

Gretchen

Primary Bedroom Update: Featuring Casa One

Gretchen Rose

We purchased this house in March of 2020- it needed A LOT of work. I won’t get into all of that right now… but basically our primary bedroom was the last on the list of priorities (which says something, because it was a hideous shade of pink when we moved in LOL). I tolerated the pink for about 8 months, and finally repainted the bedroom. I wanted something totally different than pink so I went with a dark green- but it missed the mark. With the minimal natural light the room gets, the dark green was just too dark for my taste and never felt quite right. I didn’t feel like painting it again just yet, as we had painted the entire home 3x at this point it felt like!

Fast forward to January of this year, when I decided to join the Spring 22 One Room Challenge. We were already mid bathroom reno thanks to mold/cracked tile/water damage etc. I figured WHY NOT just go ahead and finally make the primary bedroom into what I always wanted? I signed up for the ORC around 2am one morning and haven’t looked back.

where we started…

I decided to make the bedroom a cozy cottage-like space, since the pitched ceilings really play into the vibe. I searched high and low for a vintage king bed with the spindle detail, but had zero luck! I truly could not find a king size, and with 2 large humans + 60 pound Maker, we really need the king size!

Building the bed was fairly quick!!! This was taken a few days before we repainted the room (FOR THE LAST TIME).

One day I decided to look at new beds (shocker, I know). After a few hours of searching for the spindle/vintage/four poster style, I stumbled across CasaOne. To say I was excited would be an understatement!

The spindle detailing is SPOT ON.

If you are on the hunt for a vintage inspired bed, look no further. The Beckett Moroccan Bed by CasaOne is absolutely beautiful. Not only is it stylish with it’s vintage four poster/cottage style, it is also high quality. This bed is HEAVY, and it truly seems like it will last for years to come. Another major plus? It is UNDER $1000.00! Seriously… how many quality KING size, solid wood beds are that affordable?!?! Do yourself a favor and check out Casa One on your next hunt for a bed! Shop the Beckett Moroccan Bed here.

The dark wood stain of the Beckett Moroccan bed against the lighter earthy green couldn’t be more perfect.

We have now been sleeping (and napping) in this bed since mid February- and we STILL LOVE IT. I honestly could not recommend this bed more. Excellent style, amazing quality, and an affordable price point. You will not be disappointed!

If the vintage inspired style isn’t your vibe- don’t worry. CasaOne stocks thousands of options, so make sure you check them out the next time you’re shopping to update your space! Shop here.

Thank you again to CasaOne for partnering with me on this project- you made my cozy cottage core dreams come true!

Sincerely,

Gretchen, Jordan, Maker, Lincoln & Baby Rose


Updating Our Primary Bathroom with Pfister

Gretchen Rose

I wasn’t sure if I would ever be able to say it, but we have a totally finished, completely remodeled bathroom!!! What an amazing feeling. I have learned that home projects take time, especially when you’re doing most of the work yourself/family versus hiring it out. Although it certainly took longer than expected, doing the work ourselves/with Jordan’s dad saved us thousands of dollars!

To coordinate with the adjoining primary bedroom, I carried the same colorway into the bathroom. I kept the walls white, but used the same Clare Paint “Dirty Martini” on the trim for a bit of contrast to help break up all of the white. I was going for a timeless look, so we went with the gray marble-look tiles + white penny rounds and chrome accents.

The true star of the show in this bathroom are the faucets- the Tisbury 2 Handle 8” Spread bathroom faucet (found here) in chrome. It comes in several other finishes too- like brushed gold and polished nickel. These faucets have beautiful detailing around the base, and I especially love the “H” & “C” white caps for the handles. The details give them a more vintage classic feel, which is exactly what I was after!

This closeup shows the ridges around the base, the tapered handles, and the little white hot/cold caps.

I had originally purchased some basic faucets from Lowe’s, but wasn’t in love with them so I gave Pfister a try. I honestly could not believe the significant quality difference. The Pfister Tisbury faucets were nearly twice the weight of the others and felt like they would withstand years of use- even Jordan was surprised! This was our first bathroom renovation, so we hadn’t really ever done research on brands/quality before. Once we saw the obvious quality difference, I quickly returned the Lowe’s faucets- they almost felt like plastic in comparison!

They look just as lovely from far away, don’t they?

We will definitely be return customers for Pfister- the quality, customer service, and style speak for themselves. If you’re in the market for new plumbing fixtures, make sure to check them out!

Shop all Pfister bathroom faucets here.

Thank you again to Pfister for partnering with me on this bathroom project- we are more than satisfied and certainly plan to use your products in the future!

Gretchen, Jordan, Maker, Lincoln and Baby Rose

SPRING ORC: THE REVEAL

Gretchen Rose

We may be a week late to the party, but we are FINISHED!!! My cozy euro cottage core dreams have come true, and our primary bathroom feels like a spa in comparison to what we were working with before.

Why this project took a little longer than expected: If you saw my Instagram post, you will know. If you haven’t, SURPRISE! WE ARE EXPECTING! We couldn’t be any happier. We are currently 17.5 weeks pregnant, and the hyperemesis gravidarum still hasn’t really subsided. Not that I am complaining - however it does slow me down quite significantly! In addition to that, I caught the “C” again and that was another hiccup. Plus we had some serious tree/yard damage during spring storms and our AC went out- SHEW it has been hectic!

ANYWHO. Here we are. We have a completed primary suite and photos to prove it. Keep scrolling!

The star of the show: the Beckett Moroccan King Bed by Casa One. Shop here.

What do you think? Do you get the cottage core vibes? I couldn’t find a 4 poster vintage king bed so when I found the Beckett bed via Casa One I was SO EXCITED. It nails the vintage vibe, and we absolutely have to have a king bed with the dogs. Shop the Beckett bed here. This beauty is extremely heavy and well made! It truly didn’t take too long to build either.

A little closeup of the spindle detailing.

For the paint color, I chose “Dirty Martini” from Clare Paint (shop here). It is the perfect soft earthy shade of green without being too soft, if that makes sense. The coverage was excellent- two coats covered the previous color well and we didn’t even use a primer. I decided to take the paint color to the ceiling too, because why not?

In the attached primary bathroom, I kept the walls white, but used Dirty Martini on all of the trim. I do love a good contrast.

Bathroom Details:

We were on a budget for this remodel, so we selected mostly in-stock items at our local Lowes/Home Depot. My favorite detail of this bathroom is by far the faucets- they are the Tisbury faucet in polished chrome by Pfister. These beauties are truly the jewelry to the vanity- shop here. I wanted a touch of vintage style but an overall classic design, and these were PERFECT. I have seriously considered taking them with me if/when we move… HA!

I especially love the details on the Tisbury Faucet by Pfister.

The glass shower door is another important feature, as it is such a tight space we didn’t want to close it off with a shower curtain. I found this shower door online and in stock on Wayfair! Exact product here.

I went with a (mostly) frameless shower door to keep it simple!

The last two days before my photographer came, I was running around trying to finish styling the space. I had been collecting art from thrift stores etc. for a while, but the BEST art came from Marty, a local painter here in Louisville. When Marty reached out asking if I would be interested in some custom artwork, you know I screamed YES! I was certain that I wanted a fox, but she worked with me on the other two pieces to come up with something beautiful and meaningful. Scroll down to see!

How sweet is this little guy? She used a unique technique with rust- I am sure she could explain it better!

If you zoom in, you will see Maker & Lincoln - she used an actual photo I had as inspiration. I had taken the photo at home on my parent’s farm (Maker’s favorite place on earth). He loves running up and down the long gravel driveway!

This is Missi, my horse that I grew up riding and competing on. I will cherish these pieces forever!

Other details:

All of the bedding is a combination of Homegoods, Tjmaxx and Target. The curtains are from Wayfair (now I am obsessed with pinch pleat). The side tables, bench, and dresser are all vintage/locally found.

I found this dresser for $60 at habitat for humanity Restore. It had a terrible smell, but a LOT of vinegar fixed that!

Love how my gauze-y kimono pulls all of the perfect colors from the space! In other news- bifold closet doors will be the death of me.

I think that pretty much sums it up- thank you so much for following along! I am proud of our primary suite now, and it sure feels much more like ME!

Special thanks to One Room Challenge and Better Homes & Gardens for hosting such a fun event- happy 10th anniversary! Make sure to check all of the other reveals out! Everyone has worked so hard. Check them out here.

Extra special thanks to my partners for this ORC project:

Clare Paint

Casa One

Wayfair

Pfister

Finally, thank you, Kate, of Lang Thomas Interior Photography for bringing my space to life for my viewers!

Sincerely,

Gretchen, Jordan, Maker, Lincoln, & Baby Rose

Spring 2022 One Room Challenge: Week 3-5

Gretchen Rose

Tile came from Lowe’s and is the 4x12” size.

Okay, folks! It is time for a few updates on our One Room Challenge!

Full disclaimer: We started early on our bathroom remodel- and by early, I mean over the winter. Thank goodness, because we still aren’t quite done! Apparently, renovating a bathroom takes a lot of time?!?! Even though it is small, it certainly has been a challenge. This is our first bathroom remodel ever, so we had no prior experience and everything has been a learning process. Luckily, Jordan’s dad has helped tremendously and he does have a little more knowledge than we do! Even still, it has taken quite a bit of time (granted, we are not working on it “full time” by any means- more like on the weekends here and there).

Okay back to updates:

Bathroom status: The vanity and shower doors are installed! We also installed the plumbing fixtures and they are SO BEAUTIFUL. I plan to spend plenty of time next week talking about them- so stay tuned. Next we need to attach the trim/baseboards. The plan is to use mortar for this! We chose a large baseboard that would cover the entire space (plus about 0.5”) of where the baseboard used to be, since there was some drywall damage when ripping everything out. The larger baseboard will cover and lumps and bumps right up! We also need to attach the vanity backsplash (came with the vanity). There are a few places we need to do drywall repair/mud/sand, as well as caulk between floor and shower pan. We plan to attack that this weekend (yes, Kentucky Derby weekend) then it will be time to paint! YAY! FINALLY.

Apparently solid glass doors are heavy?

Bathroom Sources:

Vanity link (purchased from our local Lowe’s): here

Shower doors (from Wayfair): here


Bedroom status: We are SO CLOSE. The bed arrived and is assembled, we have painted the room (new color not shown yet in these photos), and I have a few custom pieces of art in the works for the space. I need to source a bench or ottoman for the foot of the bed, and perhaps a small table/vanity stand situation for another spot but we shall see what vintage treasures I can find in the next week or so!

Although there were a lot of pieces to assemble, it really was pretty easy!

Speaking of THE BED… IT IS AMAZING. I wanted the vintage style with a touch of Jenny Lind meets English countryside vibe. Guess what? It is hard to find vintage king size beds- as I am sure you know! I searched high and low for a beautiful and affordable new options, and was so THRILLED to find the Beckett King Bed in shade “Morocco Brown”. Shop the bed here.

I can already tell that I am obsessed.

Finding what I wanted in a true vintage bed wasn’t possible- so we went NEW!

Y’all- this bed is heavy. We are so impressed with the quality- like beyond satisfied. Thankfully, it was fairly easy to assemble! It came in a few boxes that made it easy to take up the steps (think steep narrow staircase leading to a loft turned bedroom style steps). Dare I say it was fun to assemble? I will be dedicating an entire blog post to this gorgeous bed, but here are a few photos of the assembly process for now!

THAT FEELING WHEN YOU ARE DONE!!!!

With building the bed… not the One Room Challenge HA!

So there you have it! A quick update for our One Room Challenge. Like I mentioned before, we are hoping to finish up the bathroom in the next week or so! For the bedroom, I need a few finishing pieces (and then need to put it all together of course). Then it is time for photos and the reveal!

Thank you for stopping by and checking in on our progress! Make sure to show your support for all of my fellow ORC participants over on their site (linked here).

Gretchen

Spring 2022 One Room Challenge: Week 1 & 2

Gretchen Rose

If you came here via Instagram, then you know I am participating in the One Room Challenge again! It started last week (yes I am already behind on blog posts) and I am very excited to share our project vision and progress!

The Project: We are renovating our primary bathroom (down to the studs gut job) and refreshing the bedroom! Full disclosure, we got started early on the bathroom (go to Bathroom Demo for details on that). Thank goodness we got that head start though… with all of the supply chain delays and not having the time to work on it “full time”, we will barely be done in time as it is!

The Budget: For the bathroom, we received quotes from professional contractors ranging from 15k to 30k. If you have seen any of my posts about the bathroom… you will know it is very, VERY small. I just couldn't fathom spending that much on such a small space, so we decided to do it ourselves - with the help of my father in law! This means we have paid for materials only, and the labor has been free, which has saved us thousands.

As far as the budget for the bedroom goes, it isn’t a serious reno, so the budget is small. We are changing paint colors, lighting, drapes, bed, bedding, rug, etc.

The Inspo/Design: I am going for a “modern European Cottage” vibe with a touch of granny chic because why not? This means some extra layers, a few patterns, lots of textures, and cozy colors. I want to feel like I’m in the English countryside (without having to fly there because I hate flying)! The bathroom will be an updated but classic style, complete with penny tiles, wood tones, and chrome fixtures.

Here are my mood boards for the two spaces!

For the sake of budget and time, I selected in stock items (vanity, shower doors, tiles, etc).

Getting cozy cottage vibes yet?

Here are a couple of before photos for your viewing pleasure. HA!

As you can see, there is only one way to go from here. Up! But in all seriousness, when we first moved in there weren’t even floors up here other than a few pieces of plywood. The previous owner evidently caught this loft space/bedroom on fire! Way to go!

Looks cute-ish vintage from far away, but man was the speckled tile ugly and dirty. Not to mention the extremely low vanity that was annoying for me at 5’8, but impossible for Jordan at 6’4. Oh- and there were cracks in tiles. Everywhere. Water was going straight through to the drywall ceiling in the bathroom below. Mold, anyone?


Alrighty, now you know the brief reasons why we are renovating, what our plans are, and you’ve officially seen the before photos. Please drop by next week for more progress updates!

Don’t forget to check out all of the other participants in this Spring’s One Room Challenge! Everyone is working hard on their spaces and we could ALL use the support and encouraging words! Follow this link to check in: www.oneroomchallenge.com/orc-blog

Thanks, y’all!

Gretchen

It's Christmas Time

Gretchen Rose

Maker and Lincoln are always ready to pose (for a treat).

I can’t believe it is already December! I finally got my Christmas decor completed, but there are still so many presents to purchase and wrap! I wanted to share a quick post about how I decorated our home for Christmas (including our new sitting room created during the One Room Challenge).

When my friends at Wayfair asked to chat, I was thrilled to share my tips, advice and inspiration for The Holiday Edit. I included some of my favorite Wayfair picks for our own home!

Wrapping the vintage art like a present and adding ornaments to our vintage sconces was such an easy way to add festive flair!


I hung a bit of garland on upper left side of mirror, so I added garland to the table as well on lower right to balance it out. I also placed a few ornaments here to catch the light and sparkle when the lamp is turned on!

The Wayfair Holiday Trend Q & A with Gretchen Rose of Kentucky Rose Designs

Wayfair: As holiday trends change throughout the years, what are some core pieces that you consider decor staples?

Gretchen: Greenery and brass. I will use real greenery from the yard just as quickly as I will use store-bought. I also love brass- I have a darling little brass reindeer from a thrift shop that is one of my favorite pieces to decorate with for the holidays.

W: What is your favorite holiday decorating tradition?

G: At this point, it is still putting up the tree! Once we have kids, I am sure that could change- but for now, definitely just putting up the tree and decorating it while listening to Christmas music.

W: Are there any holiday decor trends that are really standing out to you right now?

G: Trends aren’t necessarily my main focus- I think I am more of a “do whatever you love” kind of gal, because ultimately you’re the one who will be looking at it all day every day! That said, I feel like greenery is always a trend & classic. Colorful trees seem to be popping up more this year, with a retro flare (think pink or aqua artificial tree). They are super fun, so why not?!?

W: What’s your advice to those looking to incorporate trendier items with classic holiday decor pieces?

G: Try one or two trendier items and leave the rest classic so that it feels like YOU!

W: Does your decor follow a theme? What do you gravitate towards when shopping for new pieces to add to your collection while maintaining the theme?

G: In the past I did a lot of neutral decor for Christmas, but this year I found myself gravitating towards color (pinks, green, blue) because of my One Room Challenge. I really have followed my heart this time around, and I am having fun with it! Adding some pink + blue ornaments to my tree was an easy way to bring color to my tree without totally changing everything.

W: Do you decorate the exterior of your home in the same way each year, or do you like to mix it up?

G: We moved in last year so have only decorated the exterior once- a few lights on the roof line and wrapped around the porch posts!

You can’t go wrong with a sparkly pillow! You can see I also added ornaments to my faux olive tree- we didn’t have quite the room for a full Christmas tree in here so I opted to decorate this skinnier tree! Ha!

I added small, lightweight sprigs of greenery to the chandelier! I love how this turned out. You could easily use small branches from your yard too!

Gretchen’s Wayfair 2021 Holiday Product Picks

I perused Wayfair’s holiday section so that I could share a few of my favorites with y’all! I hope you take a moment to check it out.

As always, thank you so much for stopping by, and Happy Holidays!


Gretchen

One Room Challenge: The REVEAL!

Gretchen Rose

8 weeks ago

I don’t have many before photos, probably because I wasn't in love with the space. Here is when I started the picture molding!

Before

The room wasn’t bad before, but using the front room as a living area rather than a dining room is much more functional for us!

I am SO EXCITED to announce that I finished my first ever One Room Challenge- and on time! Ha!

This room has come a long way from where it was a few months ago! To think it used to be an all white dining room - which was beautiful in its own way, I was just ready for a change.

Once I decided to make this room the new living room, I knew I wanted to add picture molding and use a strong color. I also had a specific light fixture in mind- I am thrilled that we were able to use it! I ordered my furniture fairly early on, but stumbled across a few pieces on Facebook marketplace too. The rest came together over the last several weeks, and I am so thankful that I finally get to share it with you all! Keep reading for all of the details!

Sofa from Wayfair, pillow and throw from HomeGoods, the rest is secondhand.

As you probably know from reading my previous blog posts, I had the opportunity to work with Clare paint for this challenge! The specific color I used is “Make Waves”, and it is the perfect shade of green-blue! Originally I intended to paint the ceiling too, but I fell in love with it just like this! I opted to keep the ceiling white, but high gloss to catch light. Although the Make Waves paint is a rich color, it doesn’t feel too dark since we have ample natural light and an overhead fixture now too!

Speaking of the light fixture…

The medallion and chandelier duo is certainly one of my favorite design details in the room.

This beautiful brass chandelier is the Octavia chandelier from Sazerac Stitches. It is heavy, large, and can be hung as far/close to ceiling as you want! You just choose the downrod length that you need. This meant we could hang it high enough that Jordan wouldn’t hit his head on those gorgeous brass flowers! The scale of the chandelier is perfect for our large living room and we are OBSESSED with this beautiful showstopper!

I can’t go on without making a big deal about the ceiling medallion from Alcott & Bentley. They truly have so many options to choose from, you are sure to find something you love! They’re a local store, but have online shopping as well. When choosing a medallion for my space, I kept in mind the size of the room and chandelier, as well as style of chandelier. I didn’t want a medallion that was too intricate, as it would distract from the chandelier. The goal was to compliment, not distract!

I changed the furniture layout a couple of times over the last few weeks, but once the sofa arrived from Wayfair (by Joss & Main) I knew exactly what I wanted! Dueling sofas with two comfy occasional chairs. Thankfully the sofas are fairly low profile, so the one in front of the large window really doesn’t block any light!

Then came the chair debacle. I couldn’t find exactly what I wanted- I was THIS CLOSE to settling for an option from World Market, but I didn’t love the legs (a MCM look, which doesn’t really fit my style anymore). Waiting paid off, and I was lucky to find the gray boucle chairs at my local HomeGoods for a great price- plus they SWIVEL! Seriously, we sit in this room every night now.

I wanted a tone-on-tone look for the curtains, so I selected velvet drapes in a slightly deeper shade than the wall color.

Okay, so I had the large pieces figured out. Two sofas facing one another, and two chairs to go on the end. Next on the list was a coffee table and some side tables. I wanted a few different heights of table to add dimension to the room, and I was able to use a few that I already owned (piano stool and primitive diamond cutting table imported from India). I spotted the pink scalloped marble table at a local Goodwill, and found the larger corner table on FB Marketplace.

I tossed in a vintage rug pillow to add character to the new sofa.

The lamp and side table are pieces I already owned. Incorporating the worn, heavy wood table added a natural element to ground the design. I also decided to go with darker toned (thrifted) art to set the mood.

Finding the perfect rug was harder than I thought. This is actually the first rug I have purchased with the intent to keep for our own home! The others that I have are either from my mother or ones I just decided to keep over the years, but I have never truly ordered one just for us before! I knew I wanted the rug to have some terracotta tones to pull that color from the sofa without making them appear too pink. The rug would also need to have blues and neutrals, as well as a slightly more neutral base to keep the room from being too dark. This vintage beauty is absolutely perfect!

I especially love how you can still see the rug through the glass of the coffee table.

I found this Dior coffee table book at my local TJ Maxx! The colors were perfect.

This is our “entry wall” portion of the living room- a coat closet on the left, a table for keys, and a chair for putting on shoes! This mirror is another item I already had, but I love it even more in this newly transformed space!

Adding the chair rail to this wall was a last minute decision and I am so glad that I took the time to do it!

Jordan got me this orchid a few weeks ago and I love the vibrant pop of color against the darker wall color!

I tried to choose a dress that complimented the decor- how did I do?

We couldn’t help but get a few photos of the pups too! Maker is happy to have a window-front sofa, it is his new favorite perch!

I just about cried when I saw this one of Lincoln! He is the sweetest 120 pound teddy bear there is, and he sure is happy to have the room complete (he wasn’t a fan of the mess).

That pretty much wraps up the Fall 2021 One Room Challenge! I can’t believe I am saying that! I am tired, proud, and so happy with how it all turned out. Thank you so much for following along, I hope you have enjoyed the transformation as much as we have!

EXTRA SPECIAL THANKS:

xo,

Gretchen

Make sure to check in on all the other big reveals this week at One Room Challenge!

Bathroom Reno: DEMO!

Gretchen Rose

The “Before” in all her glory. Yes, that is a temporary fan in window to assist with circulation/vent.

We started demo yesterday on our primary bathroom! Everything is coming out- floor tile, tub, shower tile, vanity, toilet, medicine cabinet, etc., none of it stays! I am very pleased with the progress that we made.

Tools needed:

  • sledgehammer

  • prybar

  • contracter bags

  • hammer

  • drywall cutter

  • SOMEONE TO HELP WHO HAS EXPERIENCE (we wouldn’t have made 1/10th of the progress yesterday without his dad, who has done several total bathroom remodels on his own and is very knowledgable).

Boots for feet safety.

Jordan’s dad came down to help us, so there were three of us working- this helped tremendously as one person could be doing demo while the other two were clearing out/removing debris etc. We started with the old vanity. Before ripping the entire thing away from the wall, we made sure the water lines were disconnected so that nobody got an unexpected shower. The vanity came out in one piece for the most part, then we started on the shower tile. This was trickier than we expected! Due to the age of the house, some of the tile were set with mortar and also on plaster- there was extremely sharp metal mesh that made it hard to break into small enough pieces that were easy to carry out. After completely removing the walls, it was time to tackle the tub. The original, made in Louisville, 1950s cast iron tub. A few people have asked if we were going to keep the tub or not- we decided not to for a few reasons. One reason is because we have a tub in the guest bath/main floor bathroom. Additionally, water was leaking around the bottom of this tub drain and in behind the tile so we wanted to start completely fresh to make sure everything was clean, dry, and new.

Vanity gone too!

Back to the tub demo…

These cast iron tubs are extremely heavy- several hundred pounds. Jordan and Cheldon (his dad) tried to pry it up, but they could only get it to budge an inch or so. I’m not sure what they would have done with it if they were able to scoot it, it is a LONG way down stairs and a hallway to get to the front door haha. They decided busting it up into a few smaller pieces was the way to go! One of my friends, Caleb (who is also a serious remodeler, check out the talented St. Matthews Remodeling) recommended safety glasses and gloves for the demo of the tub and he was right! That thing busted into thousands of teeny shards of glass and they went everywhere. EVERYWHERE. Like confetti. In our hair, clothes, everything. The boys were, however, able to break it in half (longways) then into quarters for easier removal. To keep the shards from going all over the house on their way out, we wrapped the sections of tub in canvas drop cloth, and it worked pretty well for containing the mess. I vacuumed the path they took through our house a couple of times because I don’t want our bare feet or Maker & Lincoln’s paws to find any sharp pieces!

While I cleaned, the boys disconnected some more of the old plumbing to that bathroom and took a few more loads of debris out.

We improvised with large storage tupperware to take debris down the stairs.

What I wish we had done:

  • Dumpster! Get a dumpster. We waited too long and then weren’t able to get one in time. We have a tarp laid out in our driveway with everything dumped on it, and will hopefully get a dumpster dropped off this week. Transferring everything from tarp to dumpster should be fun, HA.

  • Plastic floor sheeting/tarps. Knowing now how tiny the shards of tub are once it is hit 50x with a sledgehammer, I would definitely make a covered path out of the house that protects the floors and makes cleanup easier.

  • Box fan: this would have been helpful to blow the dust out of the bathroom window, as the plaster/mortar/drywall/tile dust was THICK.

Plans for today:

  • Lowe’s shopping trip

  • Run new PEX plumbing lines to primary bath (from 2nd story all the way to the basement)

  • Start demo on the floor tile (maybe)

You can see how the old cast iron + enamel tub shattered into tiny daggers.

Total time spent yesterday was about 7 hours- with 3 people!

That’s it for now, I will update you again soon. I will also be sure to dedicate a post to the cost breakdown of everything once we are finished.

Thanks for stopping by!

Gretchen

Day One: After

As clean as it gets! Next up, floor tiles come out.

One Room Challenge: Week Seven

Gretchen Rose

When styling these vintage ornate sconces, I wanted to do a funky + fun, unexpected “twist” with the candles! I chose a green candle with a unique shape that complimented the wall color! Thanks again, Clare Paint for this gorgeous paint!

WE MADE IT, Y’ALL! The room is done. EVERYTHING IS DONE - well, pretty much everything! The last thing to do is to take photos!!! I am super excited for those, as I am working with a professional interiors photographer (for the first time ever wahoo)!

What happened this week?

I picked up the coffee table. Man, was that a story. I found it on FB Marketplace (what did you expect from me) and fell in love with it a month ago. Messaged her. She said “yes, available”. She is about 30 mins or so away, so I ask when can I pick up? Her answer was along the lines of “not sure, I am in Florida but I should be back sometime in early November”. Okay… stay calm, I mean the ORC Reveal isn’t until after November 18th, right? We are totally good! I responded with “ok, well I definitely want it so please let me know when you return”. I had been looking everywhere for a very specific style and could not be persuaded into anything else, so I knew this was the one.

Fast forward to the beginning of November, when I started reaching out to see if she was back yet. Always a “not yet, but hopefully soon” type of response. I tried to stay patient (I loved the table and it was indeed a great price), but I finally asked “What day will you be back and what is the best time for pickup” so that she would have to commit to something. She seemed nice enough, just very flaky- which is not something I wanted to deal with.

Finally, we set a date and time and I got to go pick up the table! It was in her car, which she was still unloading from Florida trip… did she take the table to Florida? Without the top? Because the base was in the trunk but the top was in her apartment. Her apartment was a goldmine of vintage and antique art deco, mcm, french glamour- I mean I could have stayed and shopped for a while. We managed to get the 80+ pound table top out of a back room, and to my jeep without dropping it (my back is totally paying for it), or breaking any other of her antiques and collectibles.

I picked up some fresh Trader Joe’s flowers today and finalized the styling, so I think she’s ready for her debut! I am beyond excited to share photos of every piece in the room- everything was chosen with purpose and love. Most every piece (other than couch and chairs) are vintage (art, side tables, rug, extras). The rug I picked for the space is actually the first rug I have purchased with the intent to keep for myself.

Here is what I saw in FB Marketplace listing- no glass top shown. No detail photos. I saw potential!

Now it is time to throw sheets back over everything so it can stay clean until the photos are done. Ha!

As always, thanks for stopping by, and please be sure to check back next week for THE FINAL REVEAL!

Closeup of the coffee table + florals situation. Y’all, I can’t wait to show you the room next week!!!

Xo,

Gretchen


Check out other participant’s progress at www.oneroomchallenge.com

One Room Challenge: Week Six

Gretchen Rose

It is already week six of the One Room Challenge! That means we have two weeks left. Thankfully, I don’t have a ton left to do. At this point, it is mainly styling!

This is what I received in the mail- paint swatches, painters tape, brush, tarp, roller, paint tray, paint, and a guide with tips and tricks.

This week I want to focus on Clare Paint- both the company itself as well as the process of choosing a paint color from start to finish!

Let’s start by introducing Clare paint:

  • Clare paint is a zero-VOC and Greenguard Gold certified company- meaning it emits less chemicals into the air of your home. I literally couldn’t smell the paint in our living room! Jordan couldn’t believe I had started painting, because he couldn’t smell it either!

  • Clare is a woman owned company. The founder, designer Nicole Gibbons, set out to create a paint company that was hassle-free. Boy did she deliver!

  • Paint swatches are easy and mess-free. You choose the samples you want to see in your home, and they come in a 12”x12” peel and stick type product- SO EASY to use and you don’t need a brush!

  • Clare paint ships to your door. The box is sturdy and the paint is well protected, so you don’t have to worry about it spilling or coming in damaged.

  • Clare offers a variety of paint colors, but not SO MANY that it makes deciding impossible. I knew I wanted a blue-green situation, so I selected the “Best of Blues” sample kit. Choosing a favorite color out of 7 options is much less overwhelming than choosing from 100 tiny paint swatches…

Not only do they offer lovely paint colors, they have such a fun, bright logo!

Now that you know a little more about Clare Paint, let’s chat about my paint color!

Like I mentioned, I wanted something blue-green. Or maybe green-blue. Not too dark, not too light, and certainly not too aqua. Out of the seven beautiful sample colors, I quickly narrowed it down to two or three favorites. In the end, I went with “Make Waves”. The name worried me a bit, I do NOT want “coastal vibes” (don’t get me wrong, there is certainly a time and place for that- just not in my house, in central Kentucky, in the fall). Thankfully it doesn’t read “beachy” at all in my house, with the natural light, and the other pieces of furniture I have selected!

P.S. Jordan did worry that painting all of the walls would make the room feel dark- he was wrong, I was right (he loves saying that), and I am thrilled to announce that he has spent more time in the living room this last week than he has combined in the past 18 months of living here! I win. Ha!

I don’t want to ruin the drama of the reveal, so here is a closeup (for now).

So whats next? The final piece of furniture arrives early next week. Other than that, I need to spend some time styling, hanging art, etc. We will be out of town this weekend (Cincinatti Bengals football game), so I have tomorrow and next week to finish up before we take pictures for the reveal! I seriously can’t wait to show you ALL OF THE PHOTOS!

Thanks for stopping by,

Gretchen

Don’t forget to check out the other participants’ hard work too! Visit oneroomchallenge.com for more details and inspiration!

One Room Challenge: Week Five

Gretchen Rose

It is week five of the Better Homes & Gardens One Room Challenge, and things are finally happening! Last week I shared all the details on my DIY Picture Frame Molding (read here), as well as some plans for the next few weeks.

THE ELECTRICIANS ARE HERE! You know what that means?!?! I will finally get my gorgeous chandelier from Sazerac Stitches installed! If you read my earlier posts, you will already know that we do not have existing overhead lighting, so the electricians had to do a little more work in order to get this beauty hung. Before they can hang the light fixture, they will install the ceiling medallion I scored from Alcott & Bentley, a local lighting store with a seriously good inventory of unique pieces. I needed a medallion approximately 30” in diameter, and found something perfect for my design!

Y’all… I have wanted a chandelier (or any overhead lighting) in here since we moved in!


Hopefully by the end of the day today, we will have power turned back on for the ORC room, a ceiling medallion, and a chandelier up!

I was waiting to paint the room until the electricians finished up, since we weren’t sure where in the drywall they would be cutting in order to get the wiring situated. Since all of that is happening today, I am optimistically planning to paint tomorrow (at least start).

We decided on a layout for the room (it changed a few times), curtains were selected and have arrived, and overall I am just really excited that it is starting to look like a well-designed room instead of a storage space!

You may also have seen on Instagram that we have had a few bathroom/plumbing issues, so that is an entirely different project that I am working on as well (read about that here). When it rains, it pours, am I right?

She is up and she is fabulous.


To recap:

Chandelier and medallion today. While electricians are here (we used Mr. Electric and have zero complaints), they will be installing an exhaust fan for one of the bathrooms too.

Tomorrow I hope to start painting- this needs to be done by end of the weekend!

Painting is somewhere between barely started and finished by the time this post goes live! Paint from Clare Paint, I will share every detail next week!

Next week, wallpaper?!?! Will be my first time…


That is all for now! Hope you enjoy this quick update and a few more sneak peeks! See you next week!


Gretchen Rose


Check in on the other participants here: https://www.oneroomchallenge.com/


Bathroom Issues: Part One

Gretchen Rose

View of ceiling/wall in main floor bathroom. This is directly below second floor/primary suite bathroom.

If you are reading this, you likely saw my Instagram stories where I posted a poll on the bathroom situation.

Wanna know what is happening with said bathroom(s)? Keep reading to find out!


Ok. We bought this house at the beginning of lockdown, March 2020. So we have lived here for about 18 months at this point. When we purchased the house, we knew the bathrooms would need a little attention, as any 1950’s original bathroom might. We have two bathrooms (stacked on top of each other); one on the main floor (guest bathroom), and one on second story. It is the “primary”. The entire second story is our bedroom + bathroom + closet. Kind of a loft style space with slanted ceilings, cute built in bookshelves, and windows on either end of the large room. The bathroom was added on at some point, created by building a dormer type situation. It is all very cozy and cute… at first. Ha!

This is the current state of main floor/guest bathroom. Notice there is no ceiling. You can also see that a human cannot fit in here right now thanks to the massive drying machines…

So now you know the layout. Back to the issue…

We always knew an update would be needed eventually. If you know anything about me, I am a vintage loving lady through and through. I actually enjoy the original 1950s tile that is in our main floor bathroom (guest bathroom). It is a cute mauve/pink tone and cream tile design (see photo below). This pink vintage tile situation is only on the floor of the bathroom. There is a pedestal sink and toilet, as well as a tub/shower combo (unfortunately no tile here, I am guessing it was replaced over the years). This is a small footprint bathroom- like a one person at a time situation haha. If you have a 1950s Cape Cod house, you know what I mean! Basically I am saying that the first floor bathroom is darling, and we weren’t planning on doing much to it other than changing the light fixture/mirror/paint.

Fun, funky design with pink (I love pink)! It has debris on it in this photo because the ceiling was ripped out. It is a mess. Don’t judge me!

Upstairs, in the primary, it is a different situation. The original tile isn’t very cute at all- more like plastic/acrylic cream colored with brown specks that just appears dirty. In addition to the style not being my “ideal”, it has functional issues. The door was poorly fitted to the frame so it doesn’t swing open fully (drags on the bathroom floor). The linen closet in the bathroom is behind this door, so when I am brushing my teeth with the door open and Jordan needs into the closet for toothpaste or whatever, he can’t really get to it due to layout problems. I should mention there isn’t sufficient AC in the bathroom unless the door is open. Like the first floor bath, this is also a “one at a time” size bathroom, which has worked alright for us since we thankfully aren’t both getting ready to go to work at the same time (he works from home, I work odd schedules as a RN).

Although the primary bath wasn’t perfect, we thought it was functional enough to live with for a while. Fast forward to this past weekend…

The hot/cold handles (of tub/shower) were acting up, like they were stripped - you had to spin them 100 times to turn the water off (exaggeration sure but something was obviously loose). I am not sure if that was the actual issue or not, but Jordan attempted to fix it by taking the handle off (wrong move hahah). We are not plumbers. This created a much worse problem- a miniature fire hydrant in our bathroom. The water pressure was actually so strong it blew Jordan’s glasses off! I am very mad I missed seeing that happen, I was downstairs doing gosh knows what and missing (truthfully ignoring those calls as we had been in the middle of a disagreement- the same disagreement that prompted him to attempt to fix the water faucet…) all of Jordan’s desperate phone calls asking me to turn the water main off…LOL. After a few minutes I realized he was yelling GRETCHEN so I walked up to see what was happening, only to quickly run down to basement to switch the water main off.

Of course this happened on a weekend, so we waited for Monday to contact a plumber. When the plumber came out, he replaced something in the handle so that we could turn water back on without it blowing all over the place. We quickly realized there was a water leak somewhere, because the ceiling of the MAIN FLOOR bathroom (right below upstairs bath) was wet. Uh-Oh!

After a few conversations with insurance, a restoration professional came out to take a look. Then they had the plumber come back out to fix the leak. Then the restoration crew came out to rip out ALL OF THE WET, DAMAGED, MOLDY drywall. They put de-humidifiers and massive industrial grade fans in both bathrooms - and WOW are those things loud. This all took place over the last 5 days.

One of these massive things is a fan, one is a de-humidifer. Yes, I have to step over it to shower or use bathroom in the middle of the night. Yes, I am terrified I will get electrocuted. Oh- I tried using a blowdryer in our bedroom and turns out that is one too many things plugged in. Had to flip allllll of the breakers to get the power back on… how fun.

Oh, and yea that is a window exhaust fan. Electrician scheduled to install a real one this week…

Currently, we have a main floor bathroom with no ceiling and fans in there. The door is staying closed and it is basically out of order until the ceiling is dry and they come out to replace all of the drywall. Our primary/second floor bathroom has the same fan + de-humidifier combo, but we found out that water was going through the wall tiles in the shower (in addition to the leak around the drain). They fixed the leak, but we have to fix the tile. Cue the bathroom renovation…

Plan:

This week the restoration guys will come out, remove fans, and drywall main floor bathroom ceiling. We will then be able to use this bathroom while working on the second floor/primary bathroom.

Is that a shower curtain nailed to the drywall inside a shower? Yes. Yes it sure is.

Why? The cracks in the tile. The restoration guys did such a great job drying the main floor bathroom below this out, that I refuse to get it wet again. Until the ceiling below is replaced and we can use that shower, this will have to work.

The plumber suggested a full remodel since the water is getting in behind the old cracked tiles/nonexistent grout. YAY, NEW BATHROOM!?!?! I started down the path of searching for bathroom remodeling companies here in Louisville. We had a few out to the house for quotes, which ranged from 10k-30k. Taking our neighborhood property values into account, we are not willing to spend that kind of money on such a small bathroom. Who knew a 4 x 8ft bathroom remodel could be so expensive? Materials alone won’t cost a fraction of that…so I suppose these quotes are 90% labor costs.

Some of the companies we talked to: Re-Bath (basically they drop a plastic composite style material over existing tub/shower- not a fix at all. A $10k bandaid). Triple Crown Remodeling (first quote was 20k, and when we balked at that the price quickly came down to 10k in about 10 minutes, so not very trustworthy in my book). We also talked to a couple of smaller businesses, but they were even more expensive.

Exasperated at the cost of such a small space, we looked for other options. Why not call Jordan’s dad? He has flipped a few homes in their hometown, so he knows a few things about remodels and also has all of the equipment needed. He knows how to cut tile, lay tile, install vanities, etc. Perfect! We lucked out. The plan (for now) is that Jordan’s dad comes down to KY next month for a week or so and helps us get this project going. We (Jordan and I) will be doing the demo and removal beforehand. I have the basic design plan down. We are about to find out how fun a DIY bathroom is!

Recap:

-Water, mold, old pipes, wet drywall, etc. All of that is in the process of being fixed by professionals.

-We will use first floor bathroom while second floor bathroom is being remodeled/is out of commission.

-Jordan and I will do demo/removal ourselves.

-Jordan’s dad will help us with the remodel (we will use licensed professionals for plumbing/electric).

-I want a timeless black and white bathroom that fits the 1950s cape cod style of the home.

-Hopeful to do most of this the week before Thanksgiving.

Of course, I will share ALL PRICING DETAILS. I want to be totally transparent with this process. We are hoping to keep it around the 5k mark. That is an appropriate amount to spend on a bathroom for the neighborhood we are in.

So there you have it. The current issues, the plan, the goal design.

Follow along to see how we are doing, if we are still married, and if we have two functional bathrooms by the end of 2021…


Thanks for stopping by!

Gretchen, Jordan, Maker & Lincoln.


One Room Challenge: Week Four

Gretchen Rose

Maker + Me enjoying our new wall.

It is week four of the One Room Challenge, y’all. This is the halfway point!!! I still have quite a bit to accomplish, but I am surely not alone in that regard!

Over the weekend we had a plumbing issue, unrelated to the ORC room (living room). Unfortunately, that has taken a good amount of my time and energy, so I haven’t made a lot of progress this week. Life happens, right?

It is hard to see here, but there are pencil sketches on this wall to test out size/template!

One of the main details of my ORC design plan was picture molding. I love how such a small detail can add so much character to a space! Our home was built in the 1950s, so it has a “little bit” of character already- but I have been swooning over picture molding long enough. Time to try my hand in DIY-ing it!

Materials (found at Home Depot and Lowe’s):

  • Chair railing/trim pieces: Choose whatever size/thickness you want based on your design goal and scale of room.

    • I opted to go with 1-1/4” x 8’ for the picture molding here.

    • I went with a slightly thicker piece for the chair railing that separates top and bottom picture molding (chair rail is optional, and you could use the same size as picture molding if you want).

  • Measuring tape

  • Level (here)

  • Trim/finishing nails

  • Saw (I used a miter box handheld saw because I went with thin enough trim pieces that it would cut through fairly easily- also I was afraid of the power tools haha). Miter box saw here.

  • Caulk (to fill holes/cracks between wall and trim since wall isn’t perfectly flat). Make sure to choose a paintable caulk! (option here)

Lincoln wasn’t afraid of this saw, it wasn’t loud!

Steps:

  • Decide on your layout and take measurements! Be thorough- check where outlets and light switches are. I made sure to create a layout that didn’t require cutting light switch or outlet face plates!

    • Considerations: Do you want shorter on bottom, taller on top? How many do you want? Do you want a chair rail? How close to the ceiling will you go? Look at pinterest or instagram for inspo- decide how you want it to look before you start cutting!

  • Draw it on the wall so you can visualize how it will look! Maybe you will change your mind on dimensions- this is a great time to change your mind- versus after everything is cut!

  • Use a level to ensure your lines are straight. I realized my floors weren’t totally level, so basing measurements off of the floor wasn’t going to work!

  • Once you have made a layout/template, you know your measurements, and size of trim pieces you want, you can head to the hardware store and purchase the goods!

    • I purchased two extra 8ft pieces of trim and one extra chair rail piece in case of mistakes so that I wouldn’t have to make another trip back to Lowe’s.

  • Make the cuts. I am sure you can have this done at your hardware store, but I took mine home and cut them myself with the miter box saw linked above in the Materials section.

    • Cut at a 45 angle

    • Make sure the details on trim line up- mine has a non-symmetrical profile so I had to be sure to turn the piece the right way before cutting.

  • Attach to wall:

    • I attached chair rail first. Originally I planned to use wood glue of some sort… that did not work. Trim nails did the trick! This would have been a convenient time to have a nail gun, but I went old school with a hammer. I only got my finger a few times!

    • After chair rail went up, I started with the lower (closer to floor) picture frame molding boxes. I figured if I made any mistakes, they would be less noticeable than the details at eye level!

    • Continue with top/above chair rail molding.

  • Caulk the cracks/nail holes.

    • Make sure this is paintable!

That is pretty much it. This entire process took me about 3 days. A few hours day one deciding on layout/template, day two was purchasing the materials and day three was install. I could have probably managed this in two days, but this was my first time installing any sort of trim so I went slow!

Second to measuring… holding the trim piece & level (while hammering a nail in) was difficult! I need three hands.

Next Steps:

The paint just arrived, and I am beyond excited to get started on that! Wallpaper is here, so I plan to install that after painting the room.

Chandelier install is scheduled for next Tuesday, so I am praying the third time is truly the charm!

I still need to source a few pieces (side tables, artwork etc), but THE RUG is on the way! I cannot wait to see this beauty in person.

I think that is about it for now! How is your project going?!? What do you think of my “trim-work”? Let me know below!


Thank you!

Gretchen

TA-DA! It is up! Lincoln is so proud! Also… I DID THIS!


Don’t forget to check out all of the progress happening over at One Room Challenge, and make sure to support other designers along the way! Thank you!


One Room Challenge: Week Thre

Gretchen Rose

I can’t believe it is already week three of the One Room Challenge! Anyone else think time is flying by?!?!

If you read my post last week, we were unfortunately unable to have the chandelier installed yet (sigh)… which actually turned out to be a blessing in disguise (yay)! I needed a canopy and a downrod, so I ordered both of those and they came in yesterday! This morning I dropped everything (chandelier, downrod, canopy and hardware) off at a local lighting store Alcott & Bentley . I wanted to be sure that I had all the necessary parts so that we are ready to go when the electrician comes back next week! While there, I found the most beautiful ceiling medallion. They had so many options to choose from, but I think I picked the perfect one to compliment my chandelier! Sneak peek below!

Finding the perfect ceiling medallion isn’t hard when you have so many beautiful options - you literally cannot go wrong! Thank you, Alcott & Bentley!

Finding the perfect ceiling medallion isn’t hard when you have so many beautiful options - you literally cannot go wrong! Thank you, Alcott & Bentley!

Now that the medallion is checked off my ORC list, what else have I accomplished this week?

I chose a paint color!!! Yep. Only took a week. I feel like that is typical, right? I had to wait on the couch to arrive (it came in last Friday!) so that I could be sure which color worked best. The paint is ordered, and once it arrives I will share ALL ABOUT my selection process, as well as the company that I am so honored to partner with.

Here are just a few of the details! Art from my friend and incredibly talented artist Mel Remmers (shop here: https://www.melremmers.com), paint color (find here: Clare Paint), vintage sconce, sofa fabric, and a snippet of some seriously lovely Rifl…

Here are just a few of the details! Art from my friend and incredibly talented artist Mel Remmers (shop here: https://www.melremmers.com), paint color (find here: Clare Paint), vintage sconce, sofa fabric, and a snippet of some seriously lovely Rifle Paper Co wallpaper (shop all of Rifle’s options here: https://riflepaperco.com)

Wallpaper is also selected and on order! If all works out as planned, I will have a bit of leftover paper from the roll that I am excited to use for a special project. Can you guess what paper company I chose for this room? (Hint, they are the best, and mentioned in the caption above).

When designing a unique space, the details can make or break the mood of the room! I am steering far away from “coastal vibes” for my home, so I am incorporating some colors on the “moody” scale. Nothing “light, bright, and airy” to see here! Ha! Vintage finds from a local store, Shop Paire (check out on insta @shoppaire).

When designing a unique space, the details can make or break the mood of the room! I am steering far away from “coastal vibes” for my home, so I am incorporating some colors on the “moody” scale. Nothing “light, bright, and airy” to see here! Ha! Vintage finds from a local store, Shop Paire (check out on insta @shoppaire).

Plans for next week:

-Install chandelier and medallion

-Patch holes and drywall from above installation

-Replace outlet covers (they have already been painted over 10 times hahah)

-Custom framing for beautiful artwork from a dear friend of mine


That’s all! I’m sure there are probably more things going on that I am simply forgetting, but that’s basically the gist of where I am in this 8 week process. How about you?!? Are you participating? If so, please leave a comment with a link to your blog so that I can check it out! If you aren’t joining, maybe you have a favorite “one to follow”, so drop that below too! Have a lovely rest of your week, y’all!

xo,

Gretchen


Follow along on everyone’s journey below!

https://www.oneroomchallenge.com/


ORC 2021.jpg


One Room Challenge: Week Two

Gretchen Rose

ORC B.P.2.004.jpeg

This week is all about the LIGHT! This morning we had a local electrician come out and install an overhead light fixture in our ORC room. When we bought this house last year, the main living spaces didn’t have overhead lighting - so we rocked the lamps for a while. I still love lamps, but it sure will be nice to have an overhead light (for both style and functionality). Typically I would install a light myself- however, since there is no existing overhead lighting, we hired a professional to cut into the walls and connect the wiring. Let’s hope I don't have to do too much drywall patching!!!

So… what light did I choose?

I have been hoarding a gorgeous chandelier from Sazerac Stitches for a few years now. I never had the perfect spot for it, but I couldn’t let her go! So thankful that I held on to her!

BC6D1307-5FB3-4995-8860-B8ED8E4CAABF.jpeg

What else has been happening?

The sofa I ordered is scheduled for delivery this week as well, and I cannot wait to see it in person. I also found a couple of chairs for seating to go opposite the sofa, and paint swatches came in!

What happens next?

I am lucky enough to work with an incredible paint company on this project, and I cannot wait to share more on the paint color selection process in the coming weeks!

I want to personally thank each and every one of you for following along on this journey- I know there are tons of ORC projects happening and I cannot wait to check out all of the others! If you have a favorite participant, drop their name below so I can cheer them on too! See you next week!

xo,

Gretchen Rose


UPDATE: Well… the chandelier won’t be installed today unfortunately. There was a shipping delay in the canopy needed to hang the light, so we have to wait on that!

Use this link to check out every participant in this season’s One Room Challenge! https://www.oneroomchallenge.com